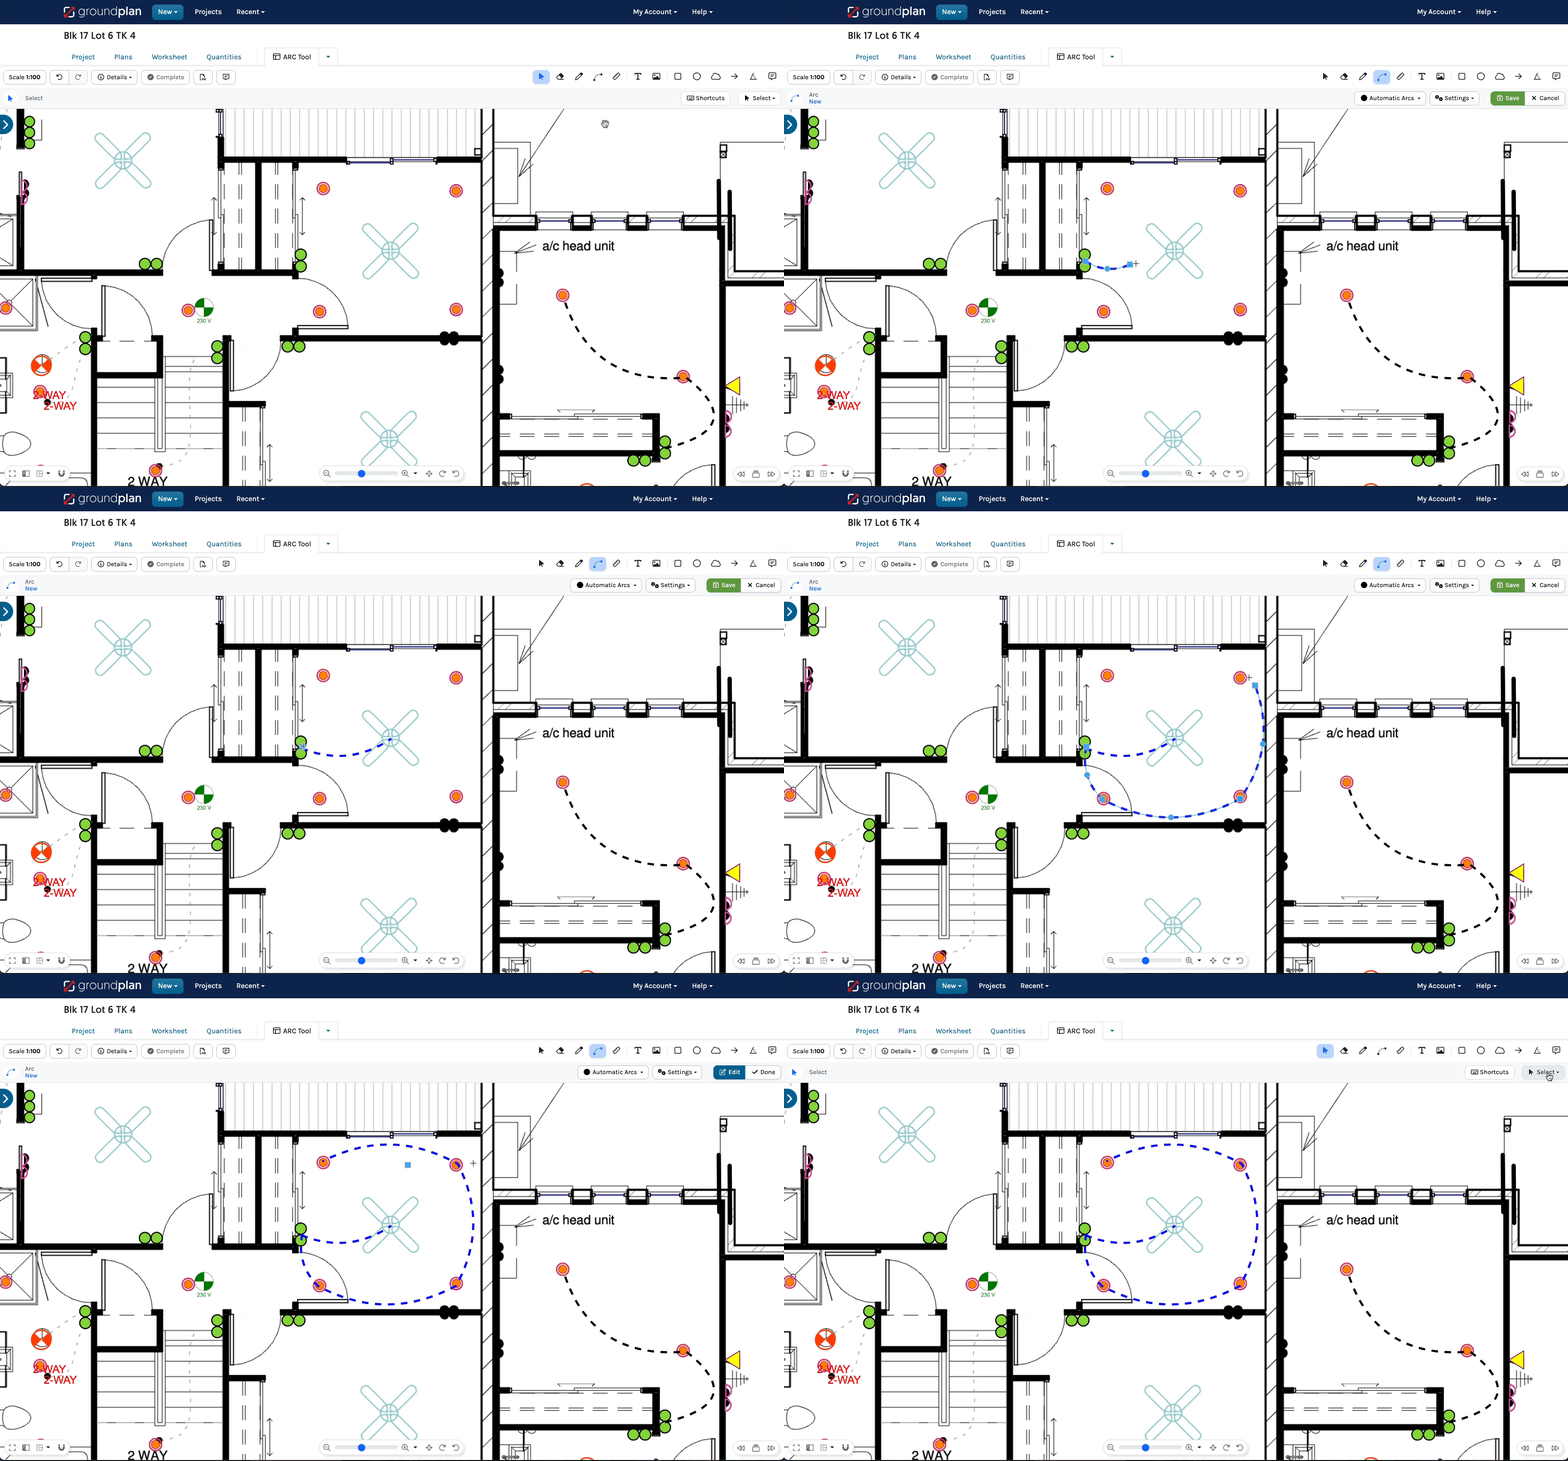
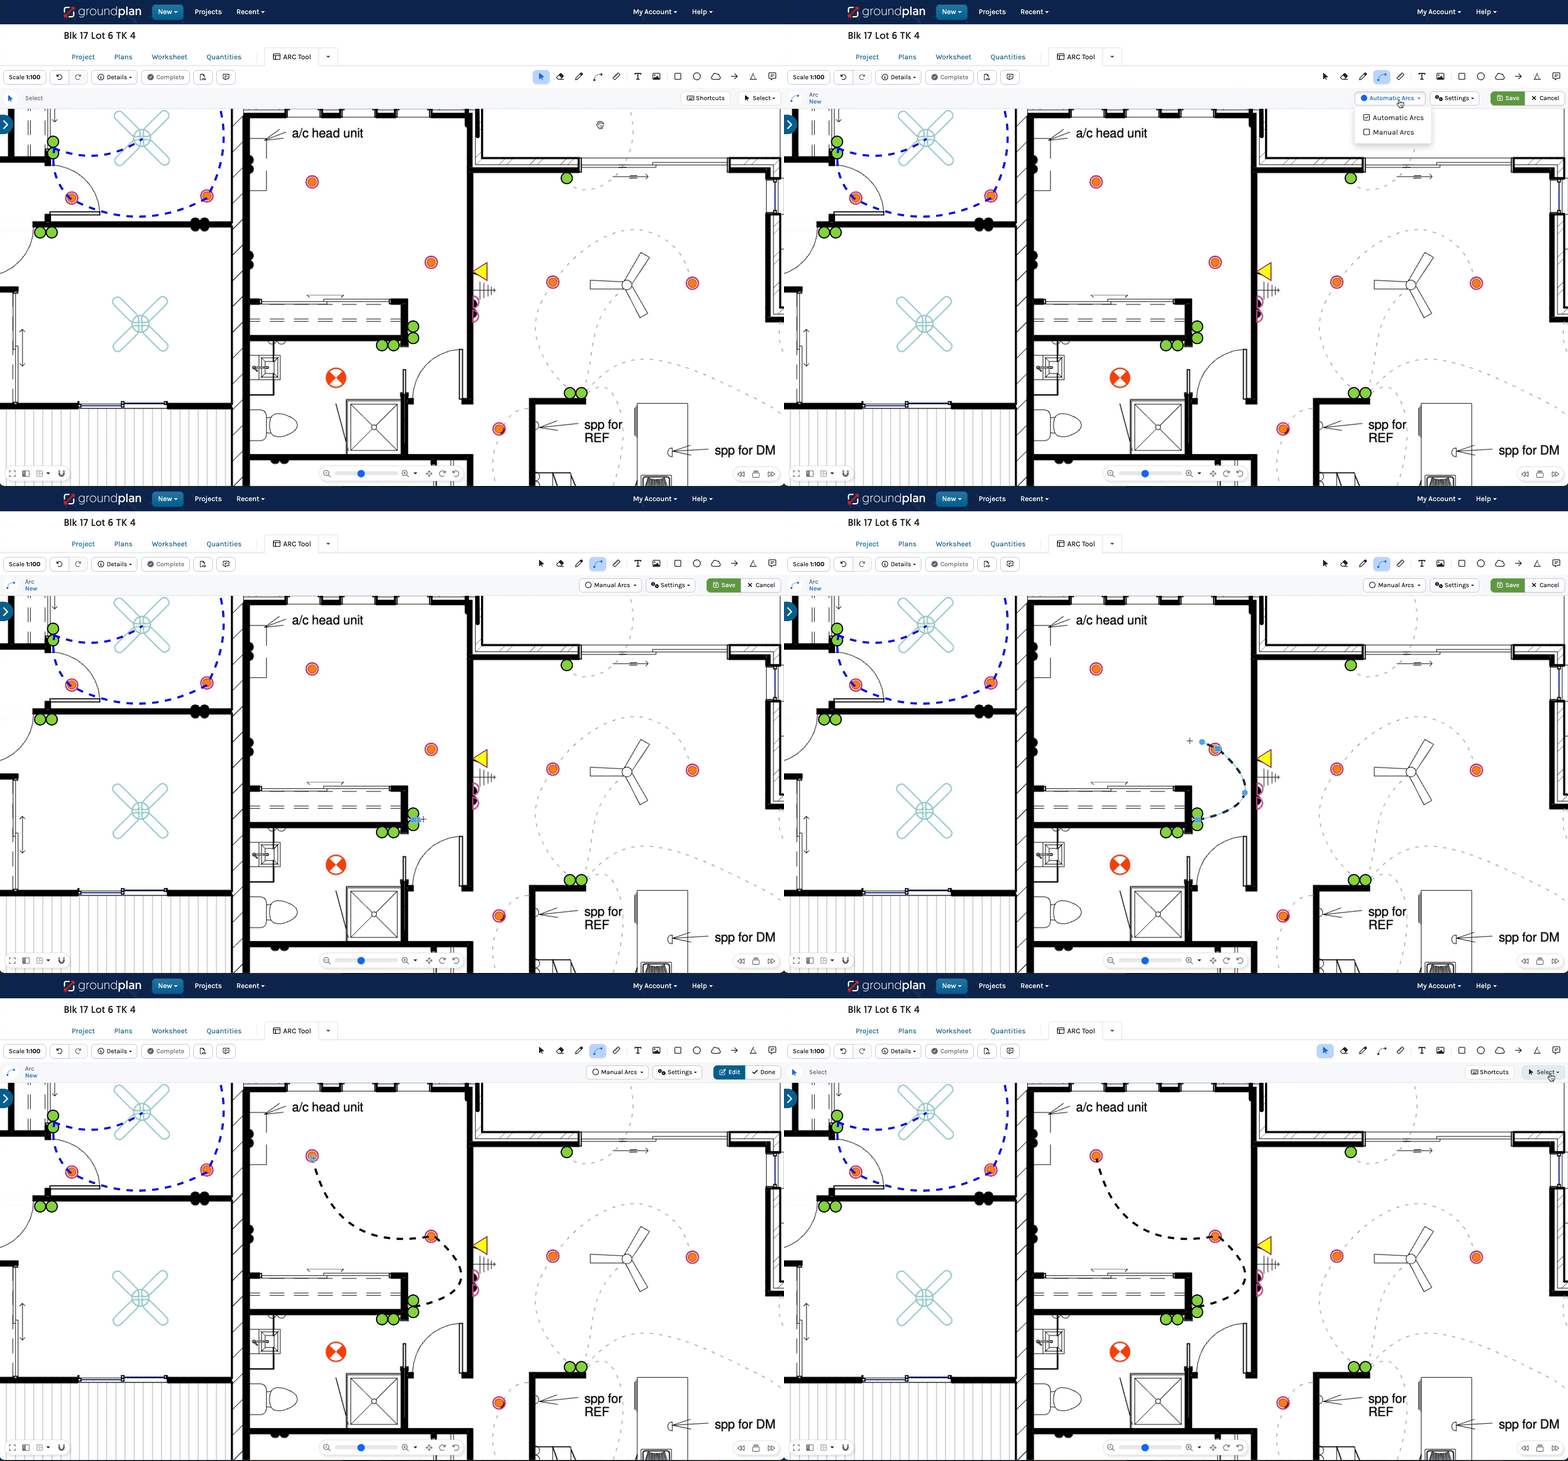
The Arc Tool is frequently used to draw circuitry. Arcs drawn will not add quantities to Lengths. To quantify and display the linear metres on a Plan, please use the Length Tool in Curve Mode. Relocate the annotation bar by click, holding and dragging.
Drawing Arcs
Automatic Arcs
- Click Arc Tool
- Click start point
Groundplan automatically adds the Arc peak - Click on the next point
- Repeat for additional points
- Double-click to finish
- Click Done
Enable the Snap to Objects Tool while drawing an Arc to Snap to a PDF element on the Plan easily
Eg. Walls or cupboards

Manual Arcs
- Click Arc Tool
- If required click Automatic Arcs, then click Manual Arcs
- Click start point
- Click to create the Arc peak
Creating the Arc peak between the points - Click the next point
- Repeat the click to create Arc peaks between points as required
- Double-click to finish
- Click Done

Editing Arcs
The Settings modal remains open during editing and requires a click to close once editing is complete.
- Press ESC
- Zoom in and select the Arc on the Plan
- To move: Click, hold and drag
To move several items at once, use the Select Tool - To change the Arc shape: Click, hold and drag the blue circle / squares
- To move: Click, hold and drag
- Click Settings to:
- Edit the Line Colour, Line Style and Line Width
- Click Actions to:
- Click Save
To Cancel the changes click Cancel
- Hold CTRL/Command ⌘ and press Z or
- Click Undo before leaving the Plan

Using an iPad or Tablet?
Click for alternate terminology.
Things to note when following the above steps:
- Tap instead of click
- Unless there is a keyboard attached to the device, there are no shortcut keys on an iPad or Tablet
- Tap Done instead of pressing ESC
Navigation hints:
- Pinch zoom
- Tap hold and drag to pan around a Plan
Images within this article are taken from a desktop computer. Interface appearance on an iPad / Tablet devices may vary based on screen size, potentially hiding or shortening buttons to icons. For accuracy, consider using a stylus, Apple pencil or mouse.