- 10 Jul 2020
- 2 Minutes to read
- Print
- DarkLight
- PDF
iPad/Tablet: Uploading Plans
- Updated on 10 Jul 2020
- 2 Minutes to read
- Print
- DarkLight
- PDF
The actual interface may vary in your device, depending on its screen size, as some of the parts or buttons may be hidden.
Please refer to our System Requirements article for a complete and specific guidance on what devices you may use with Groundplan.
Before you start your takeoff, you'll need to upload your plans to the Groundplan cloud.
Supported file types/formats for the moment are jpg, png, tiff or pdf (single or multi-page) and we also support zipped files.
Uploading your files
Open a project;
Tap onto the Plans tab;
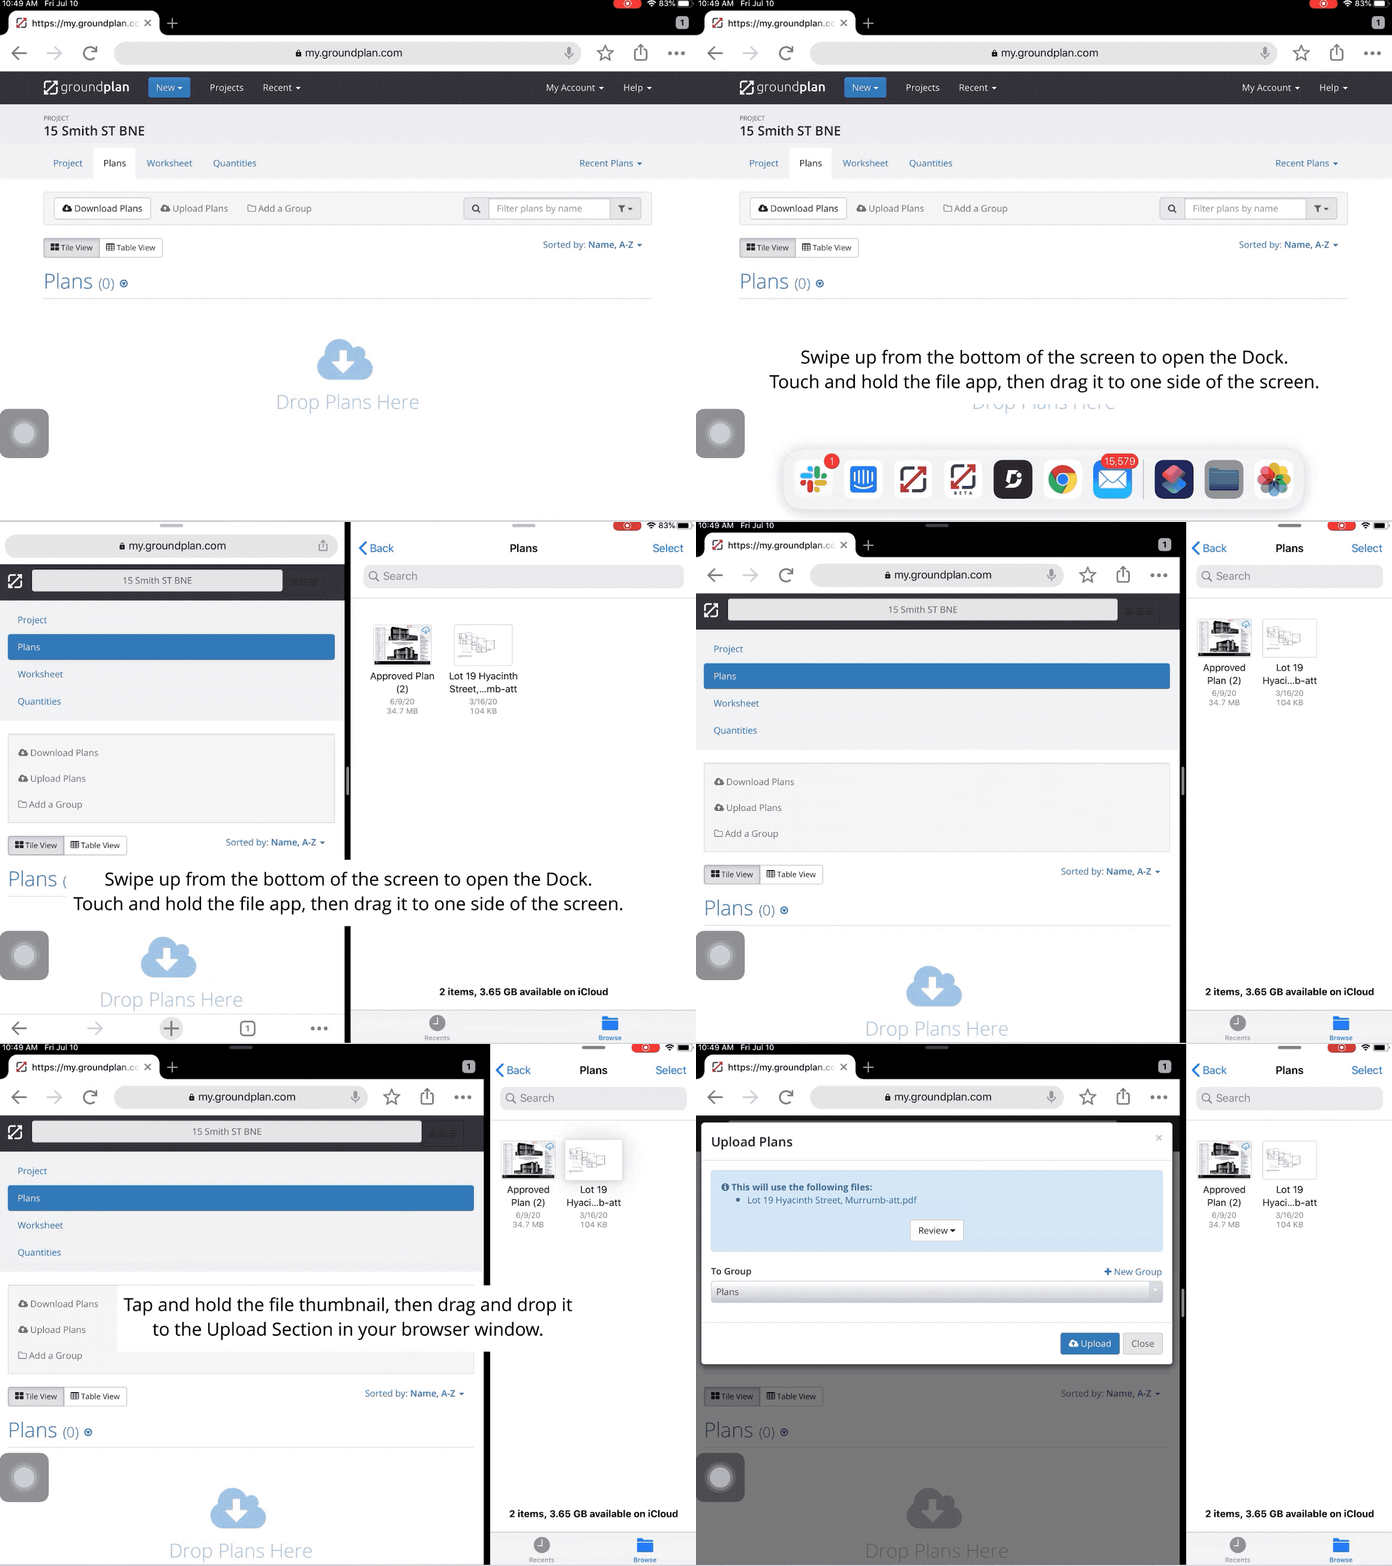
Drag and drop the files from your file app to the browser's upload section; or

Tap the Upload Plans button;
Your device will prompt you if you want to take a photo, select from your gallery or photo library or browse your files. Select from these options and tap on the file to select it.

Reviewing Plan files
After selecting the plans for upload, you will be prompted with a "confirmation" screen which lists the files you just selected.
If you uploaded a zipped file, Groundplan will now list the files inside the zip.
Option 1:
Tap the Review button to choose specific pages of the file you want to upload, delete any unnecessary files and send selected files to the attachments part of the project.
Option 2:
Tap the Upload button to upload all files and pages of the selected file.

Upload Queue window
After the plan upload starts, the "Upload Queue" window will appear at the bottom right of the screen.
Upload Progress: This is demonstrated in percentile on each plan in the uploading queue, as well as a green progress bar.
Processing Progress: After the plan gets received by our servers it needs to be processed. This shouldn't take more than 2 minutes.
Plans finished processing: Once a plan is processed the "Upload Queue" will read "Finished", and the plans' thumbnails will start to show on the plan list.
You can cancel the upload if it is still in progress.
When uploading a multi-page PDF file, the caption will read "Completed X of Y", being X the number of pages processed and Y the total number of pages in the PDF.
Once the plans are processed they are ready for take-off / design.
To start editing, tap on the plan's filename or thumbnail.
Rename plans by tapping the Rename button and entering the new name for easier recognition of plans under the plans tab.
In case of failure, the Upload Queue will notify you with a "Failed" status and an error message describing the issue (in red).
This usually means you're experiencing connection issues or you're trying to upload a large (256mb+) or long (100 pages) or unsupported file types (dwg). You will most likely be notified of the error during the upload review if it's the latter case.
For any other issues, please contact us on [email protected] and we will fix the issue promptly.

