Legend
  • 30 Mar 2021
  • 5 Minutes to read
  • Dark
    Light
  • PDF

Legend

  • Dark
    Light
  • PDF

Article Summary

There are two ways of getting a Measurement legend on your Plan.

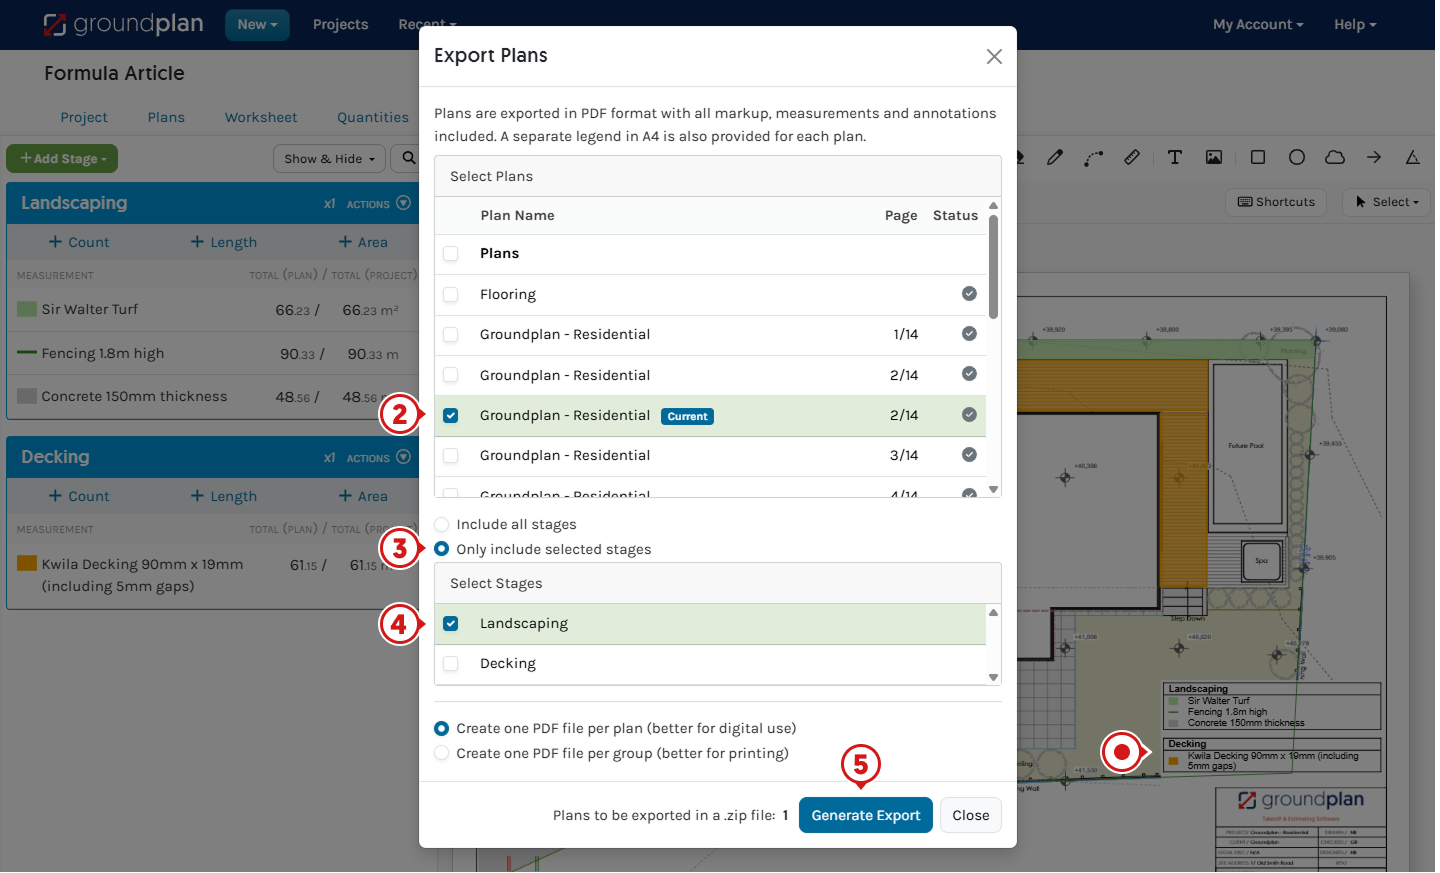
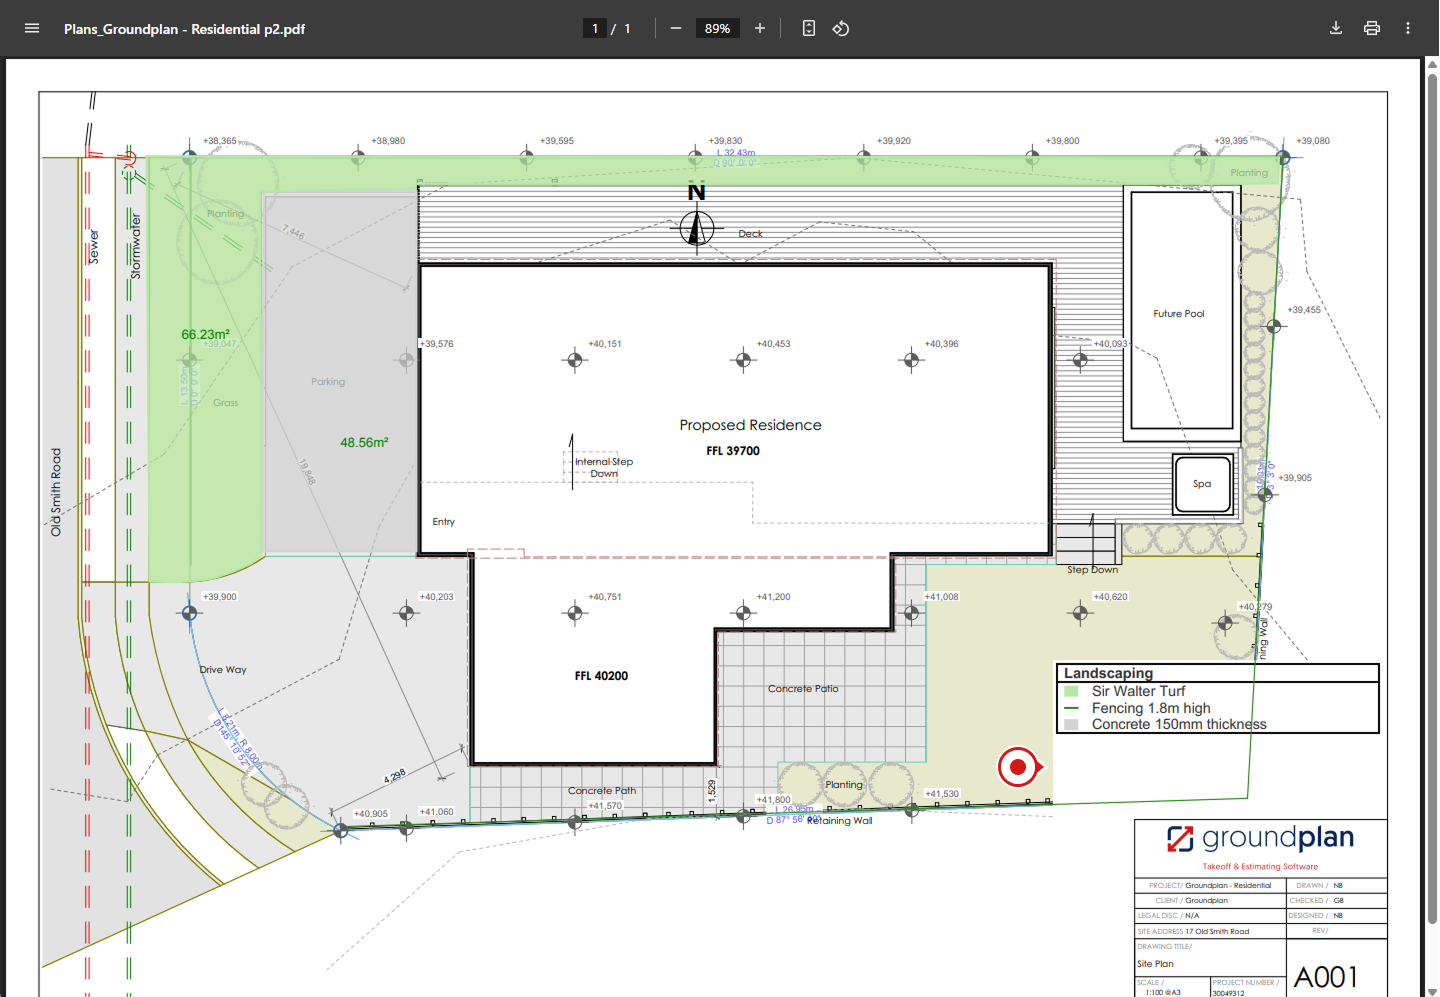
  1. When you export your plans, a second page will always be exported with your Stage legend on it.
  2. You can place a legend on each plan.

Adding a Legend to your plan

The legend tool can be found when you are inside a plan on the right-hand side toolbar.

image.png

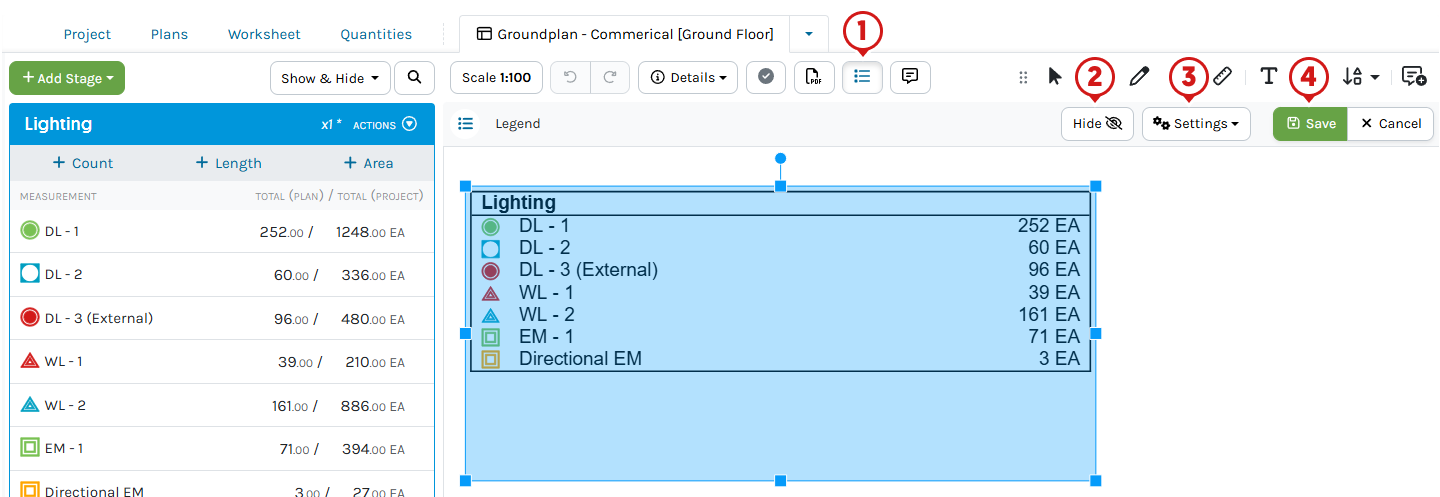
  1. Click the Legend Tool;
๐Ÿ’ก Can't find this button?

If your browser width is less than 702px (at 100% zoom level), the Legend button will be hidden from the Drawing tools in your right-side toolbar.

If you can't find this button, click the Toolbox button on the top of the editor, as it is listed as one of the options there.

GP V8.39 - Plan Navigation - Toolbox

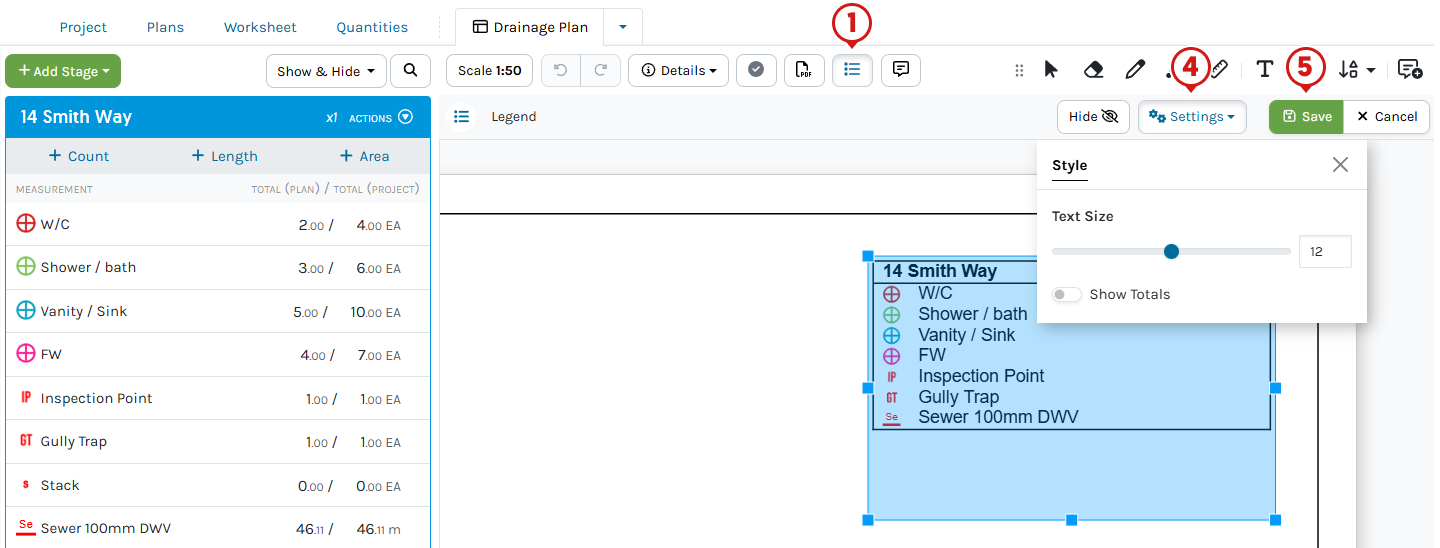
  1. Click, hold and drag the legend to the correct position;
  2. Drag the Rotation dot handle to adjust the orientation;
  3. Drag the corner boxes to adjust the legend size;
  4. Click the Settings button to adjust the text size;
  5. (Optional) Click the Settings button to hide totals;
  6. Click the Save button.
๐Ÿ“Note:
  • The legend quantities are updated every 3 seconds.
  • Only the parts with quantities greater than zero (0) will be listed in your legends.

GP V8.39 - LEGEND - Adding

Editing your Legend

To edit your Legend, click the Legends button again on the right toolbar.

On the top toolbar, click the Settings button. You can then show or hide the items' total quantities or measurements, and change the font size of your legend.

image.png

๐Ÿ“ Please Note: The symbols' sizes on the legend depends on the font size.

Removing the legend from your plan

  1. Click the Legend Tool on the toolbar on the right;
  2. Click the Hide button on the top toolbar.

GP V8.39 - LEGEND - Removing the Legend

To restore the legend again, simply click the Legend tool and the legend will appear on the plan in its previous position, then click the Save button.

Video Tutorial

You can also watch this video tutorial on how to add the legend on your plan.

FAQs

Q: The legend is not fitting on the plan / cannot make the legend smaller using the box.

A: Change the font size to decrease the size of the contents

Q: Some of my symbols do not show in the legend.

A: The stroke of the symbols could be too thin. This usually happens when you use custom symbols which have very thin strokes. In addition to that, Groundplan cannot add or change the symbol's stroke colour.
GP Legends v7.25-LightSymbols

To resolve this, you'll have to use another symbol with a thicker stroke, or use a darker fill colour.
GP Legends v7.25-LightSymbols2

Q: Can you print or export plans without specific measurements / symbols showing on the Legend?

A1: There is no direct way to do this as all measured parts will show in the legend, but there is a workaround:

  1. Add Stage/s to your plan, count and measure as normal;
  2. Copy the plan;
  3. In this copy, delete the symbols, measurements that you don't want to include in the export;
  4. Download/Export the plan;
  5. Delete the copy - to ensure that you're plans and quantities back to normal;

A2: You can use the Worksheet to create your own legend and add this to your plan as an image.

  1. Add Stage/s to your plan, then count and measure as normal;
  2. Click on the Worksheet tab;
  3. Using the drag handles, rearrange the measurements so the ones not to be seen are at the bottom;
  4. Take a screenshot of the stage and measurements you want to show (many people use the Snipping tool to do this) ;
  5. Save this image;
  6. Back on the plan, use the image tool to add the screenshot as the legend on the plan;

We are continuously looking to improve our product, and take all feature requests into consideration when making product improvements.

Q: Is there a way to view / print the legend for the whole project rather than per plan?

A: You can print the Worksheet page to PDF, this has the project totals broken down by stage, with symbols and measurement names showing.

For Project Total:

  1. Add Stage/s to your plan/s, count and measure as normal;
  2. Click on the Worksheet tab;
  3. Press Ctrl + P on your keyboard (โŒ˜ + P on a Mac);
  4. Select printer/destination as Save to PDF;
  5. Click the Print or Save button;

For Project Total and Quantities per plan:

  1. Add Stage/s to your plan/s, count and measure as normal;
  2. Click on the Worksheet tab;
  3. Click Options;
  4. Tick Show totals by plan ;
  5. Press Ctrl + P on your keyboard (โŒ˜ + P on a Mac);
  6. Select printer/destination as Save to PDF;
  7. Click the Print or Save button;
๐Ÿ“ Only the stages showing in your page will be printed.

Select the number of stages that you want to show, by clicking the dropdown box on the upper-right corner of the first stage in your worksheet. The maximum number of stages that you can show per page is 20.

Legend FAQ 2

Q: Can you rearrange the order of the stages on the Legend?

A: Yes
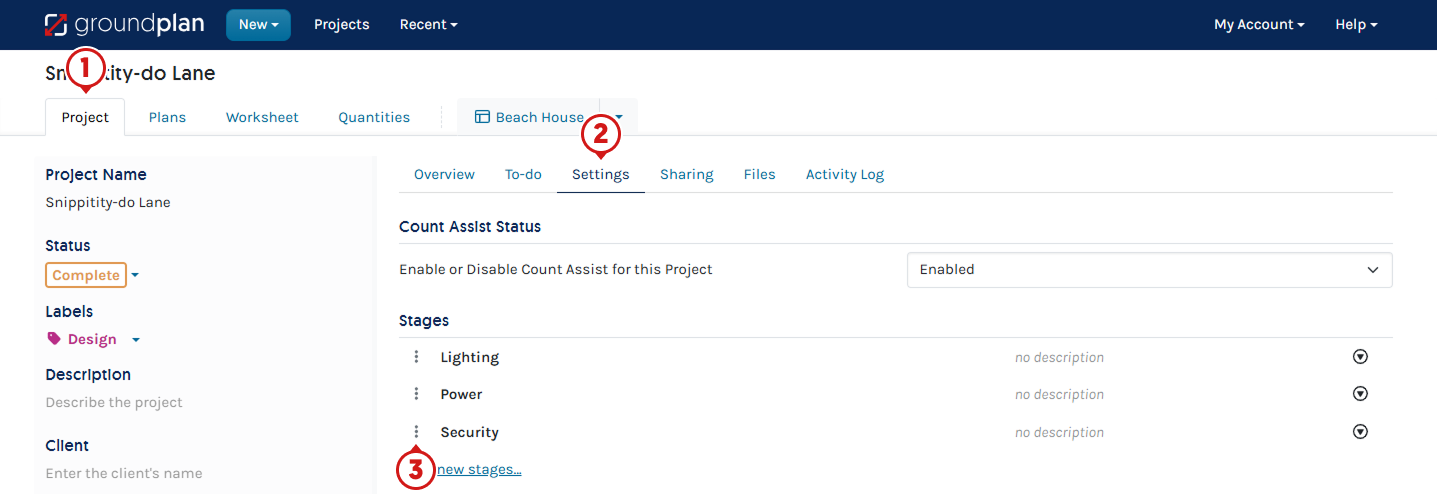
To do this:
2. Click on the โ€œProjectโ€ Tab
3. Click on โ€œStagesโ€
4. Drag and drop the stages into the new order
5. Back in the plan, the legend will now reflect the new order

๐Ÿ“ Please note:

This will change the order on โ€œallโ€™โ€™ plans not just the most recent plan.

GP V8.39 - LEGEND - Rearrange stages

Q: Can you change the size of the symbols on the Legend?

A: Not currently. You can only change the font size on the Legend but not the symbol size.

Q: If you add formula into a measurement, can you have the calculated measurement appear on the legend?

A: Not directly from the formula, however, you can update the plan total to reflect the formulas total which would show on the legend:

  1. Count and measure as normal;
  2. Click on the Quantities tab;
  3. Find the measurement and the total from the formula;
  4. Go back into the plan;
  5. Click on the Plan total for the measurement to adjust the value;
  6. Type in the new value from the quantities tab;
  7. Click the Adjust button;
โš ๏ธ When using this method you will need to take the follow steps after adjusting the plan total to ensure your Bill of Quantities is also correct:
  1. Click on the Worksheet tab;
  2. Click to open the measurement;
  3. Click on the formula to open the measurement;
  4. Remove the additional formula leaving Count/Len/Area;
  5. Click the Save button;

Was this article helpful?