Use Project Labels to categorise and store Projects and assist with future retrieval. Some options used are type of building, project type, builder/architect name, location, and works undertaken, all dependent on the work carried out by the Account.
Creating / Editing Labels
Only Administrators can create and edit Labels, but all Users can use them.
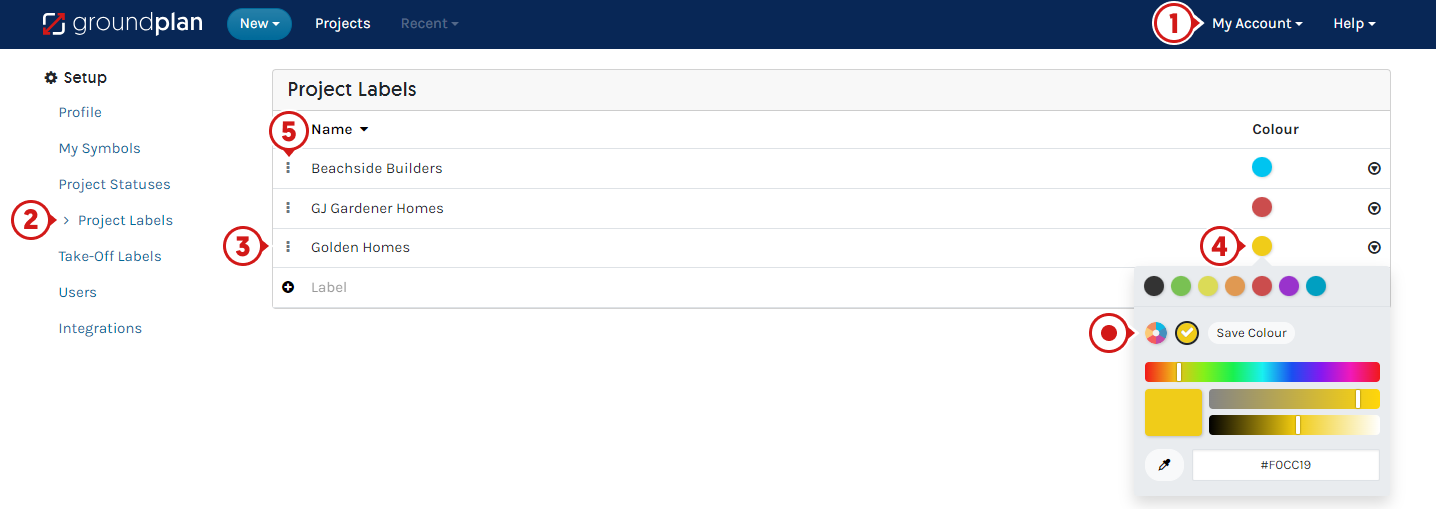
- Click My Account then click Setup
- Click Project Labels
- Click and type in the new Label or Edit an existing
- Select a preset colour or choose new from the colour wheel (optional save colour)
- (optional) Drag and drop to reorder

Assigning Labels
Labels can be assigned when creating a New Project or from the My Projects page.
When creating a New Project:
- Click Show more details
- Click Labels and select (optional to select Project Statuses)
- Click Save
From My Projects page, Labels can be assigned for individual or bulk Projects:
- Click check box for Project/s
- Click Change/Update Labels
- Select the Label

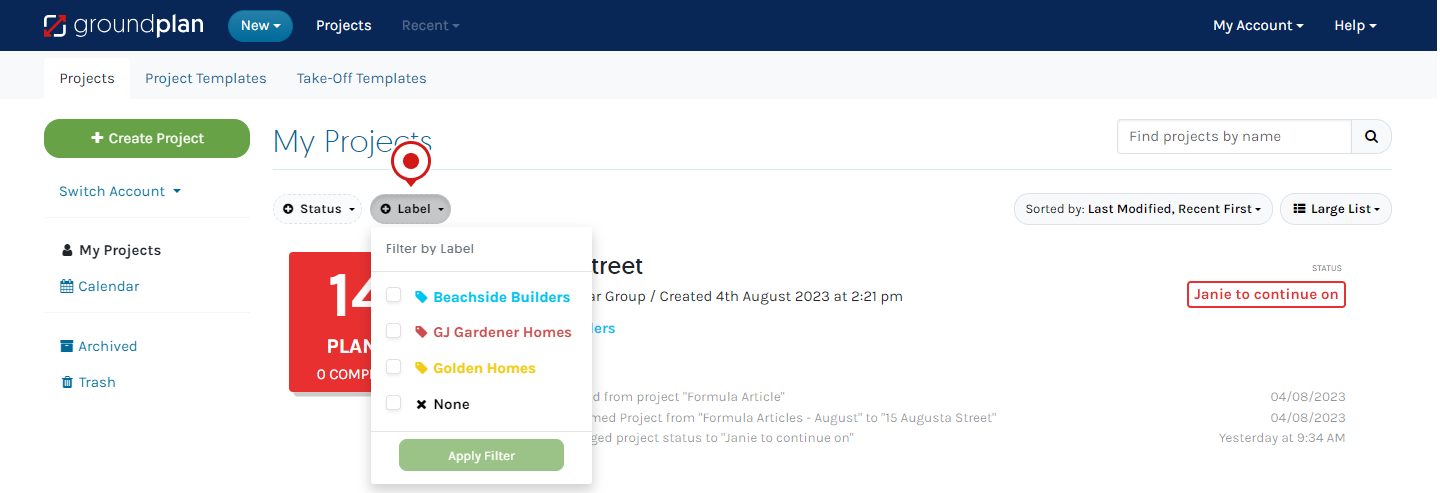
Filter Labels and Statuses
Projects Labels can be Filtered, allowing Users to locate Projects with ease.
