Use the Snip Tool to "cut out" an area of an existing Plan to produce a new Plan. It can also be used to resize a Plan.
Related Article: Measuring the Scale
Using the Snip Tool
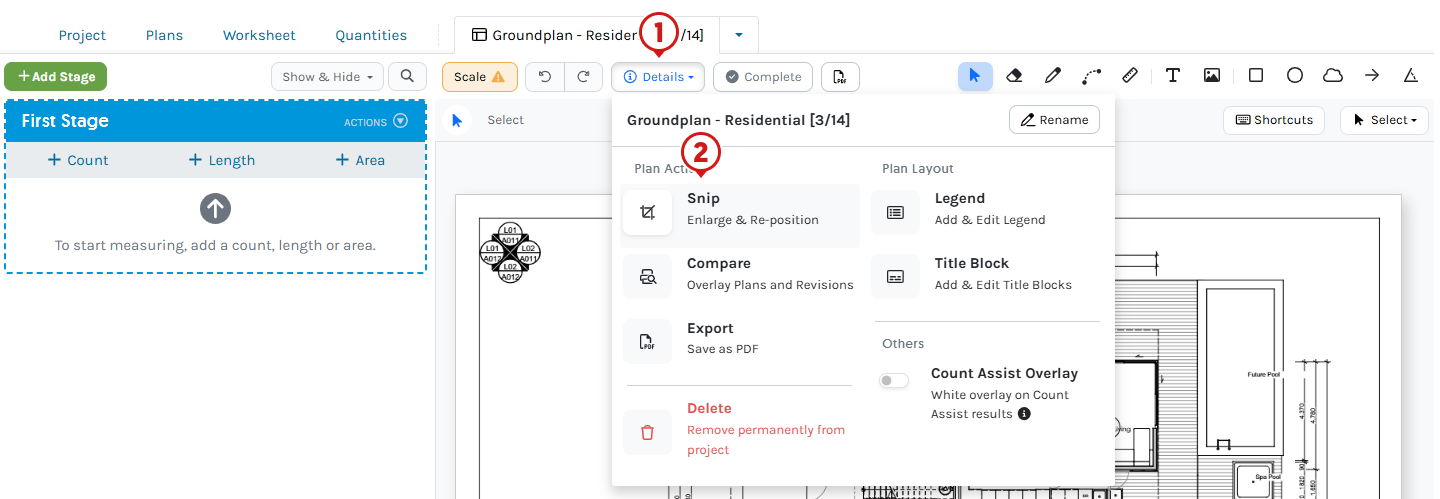
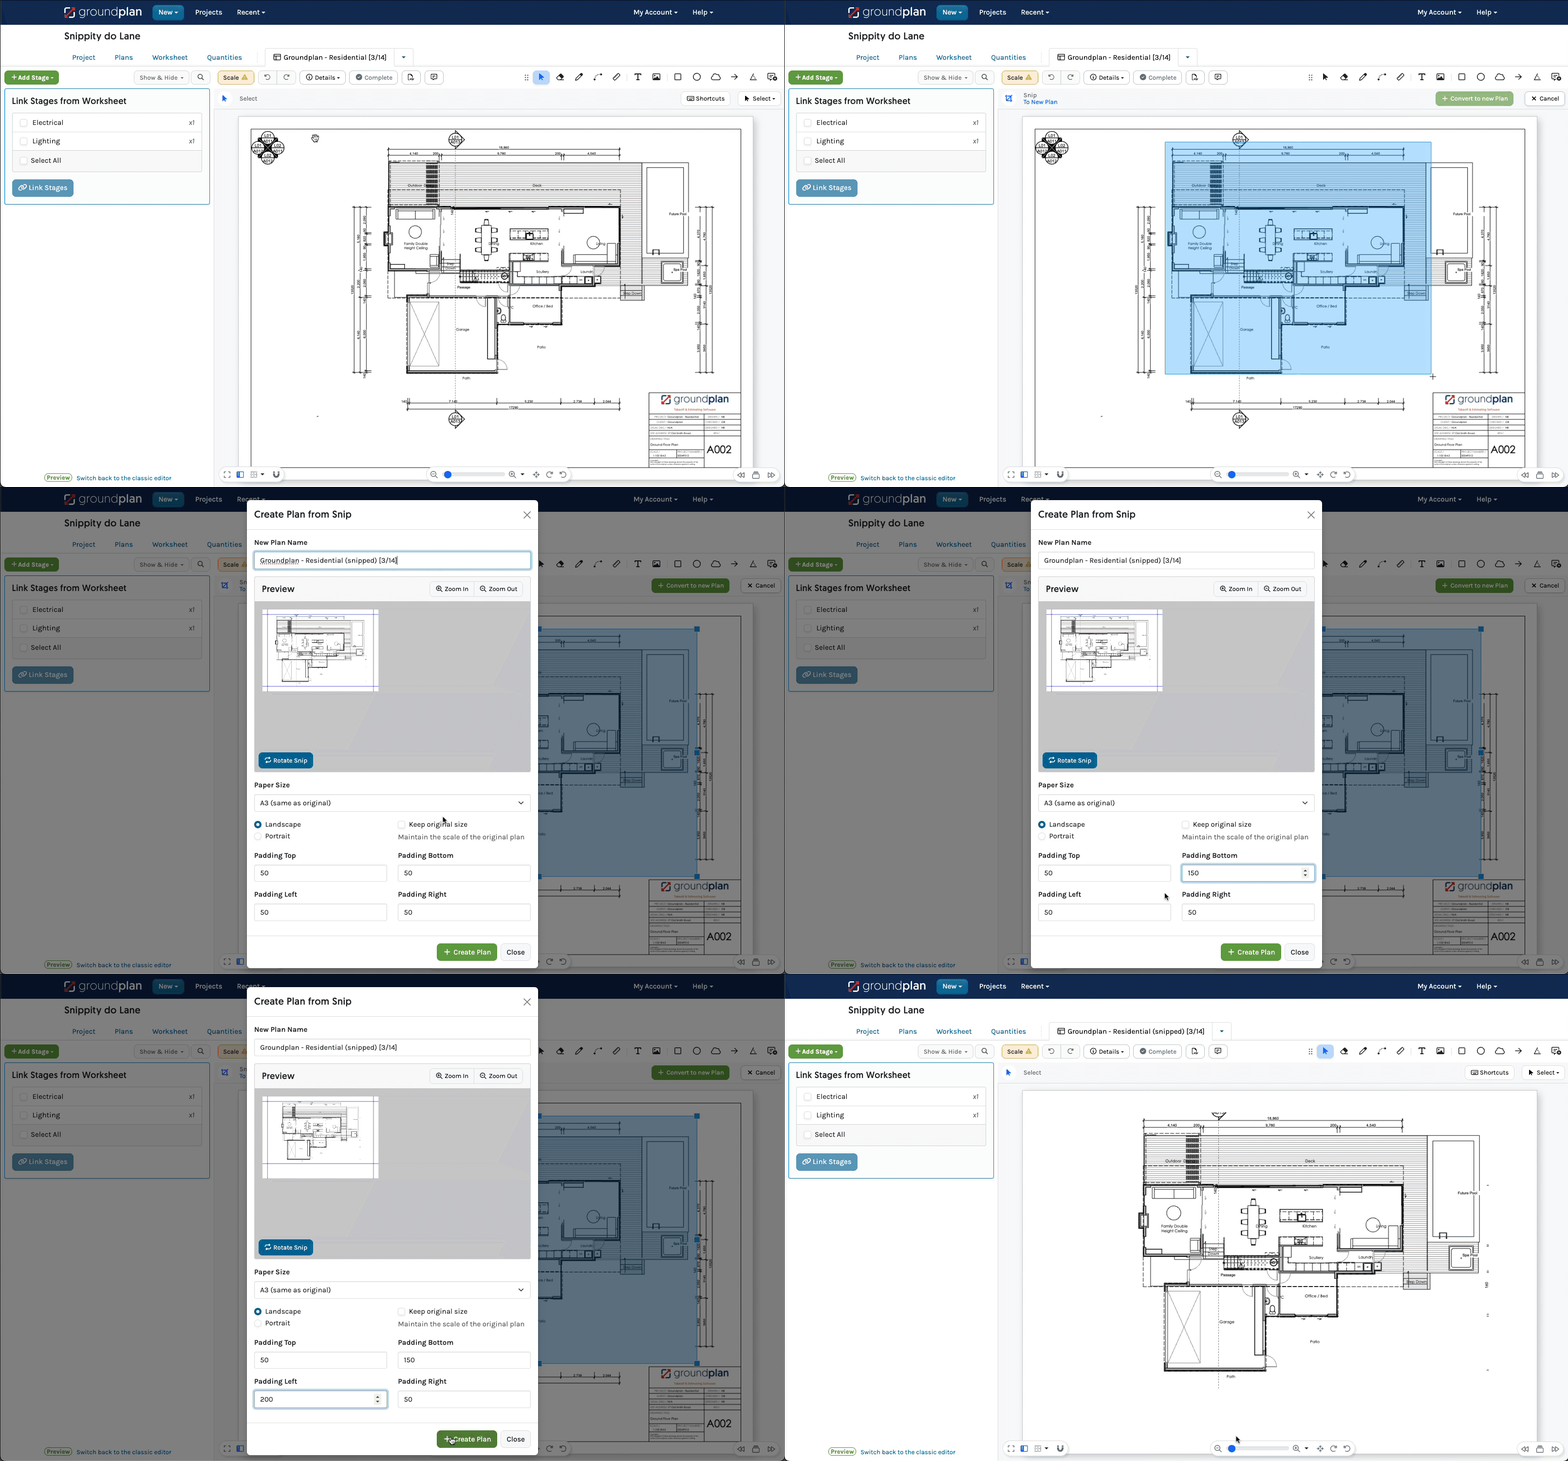
- From the Editor, click Details
- Click Snip
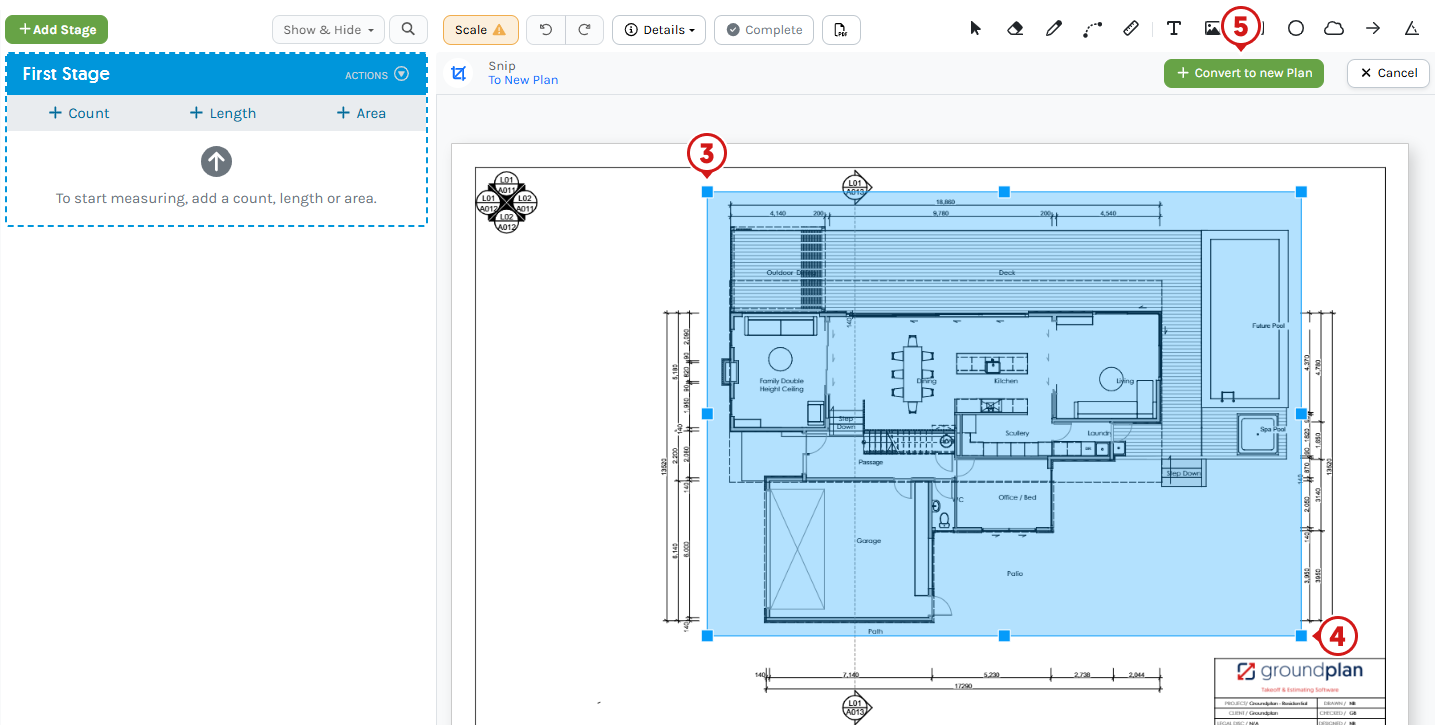
- Click and release to start the Snip selection
Move the mouse to select the area to Snip - Click and release on the opposite corner
- Click + Convert to new Plan
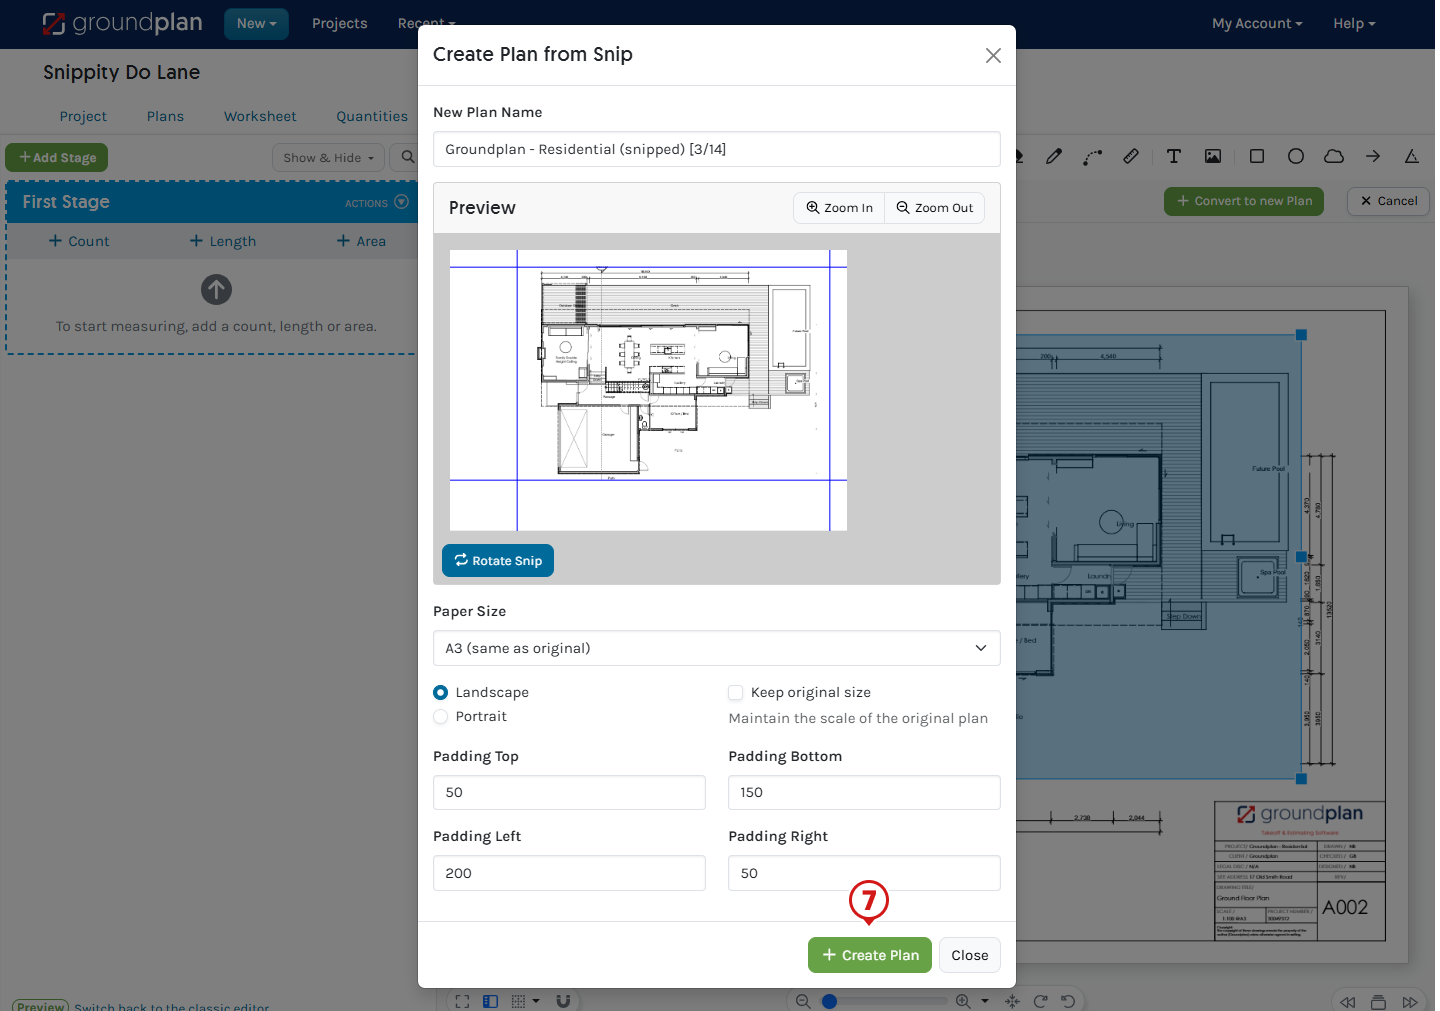
- Define the properties of the new Snipped Plan
- New Plan name
- Rotate Snip
- Paper size (choose same as original or select new)
- Landscape or Portrait orientation
- Keep the original size, which maintains the Scale of the original Plan
- Edit Padding boxes to allow for a Title Block and/or Legend (click onto the white section to see updates to the Plan)
- Click Create Plan
⚠️ Cannot undo Snip
Press ENTER only when all required changes have been made. Once created, the Snip Properties cannot be edited.
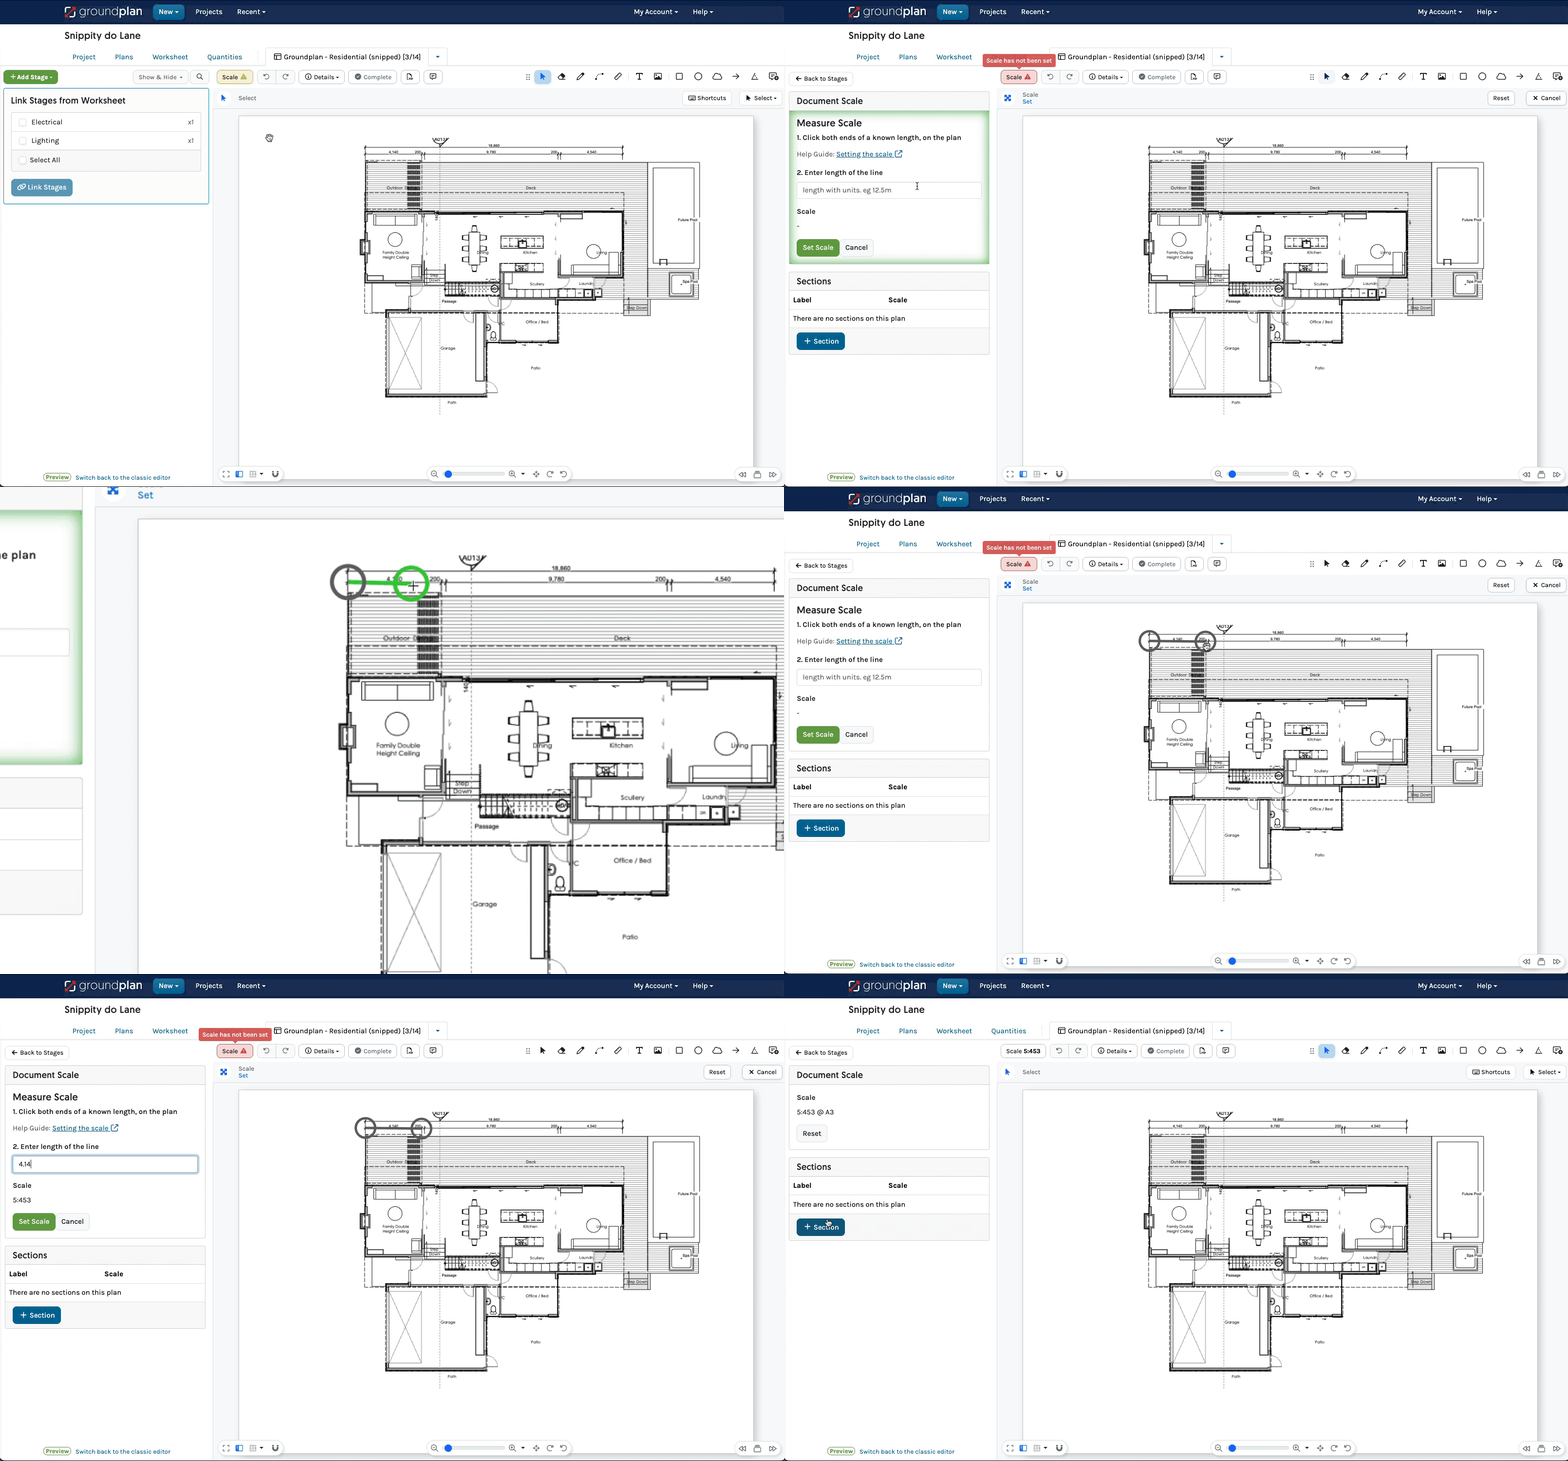
⚠️ Re-Scale Plan
The Scale on the new Snipped Plan will now be incorrect. Use Measure Scale of a known dimension to accurately set the Scale.
Using an iPad or Tablet?
Click for alternate terminology.
Things to note when following the above steps:
- Tap instead of click
- Unless there is a keyboard attached to the device, there are no shortcut keys on an iPad or Tablet
- Tap Done instead of pressing ESC
Navigation hints:
- Pinch zoom
- Tap hold and drag to pan around a Plan
Images within this article are taken from a desktop computer. Interface appearance on an iPad / Tablet devices may vary based on screen size, potentially hiding or shortening buttons to icons. For accuracy, consider using a stylus, Apple pencil or mouse.
Frequently Asked Questions
Why are my Measurement and markings not included in the new Snipped Plan?
Existing mark-ups are not transferred onto the new Snipped Plan. It is optimal to use the Snip Tool before marking up the Plan.
Why have my Erased areas not been taken with my snipped Plan?
Any existing changes to the Plan, including using the Eraser Tool are not transferred onto the new Snipped Plan. It is optimal to use the Snip Tool before cleaning up the Plan.
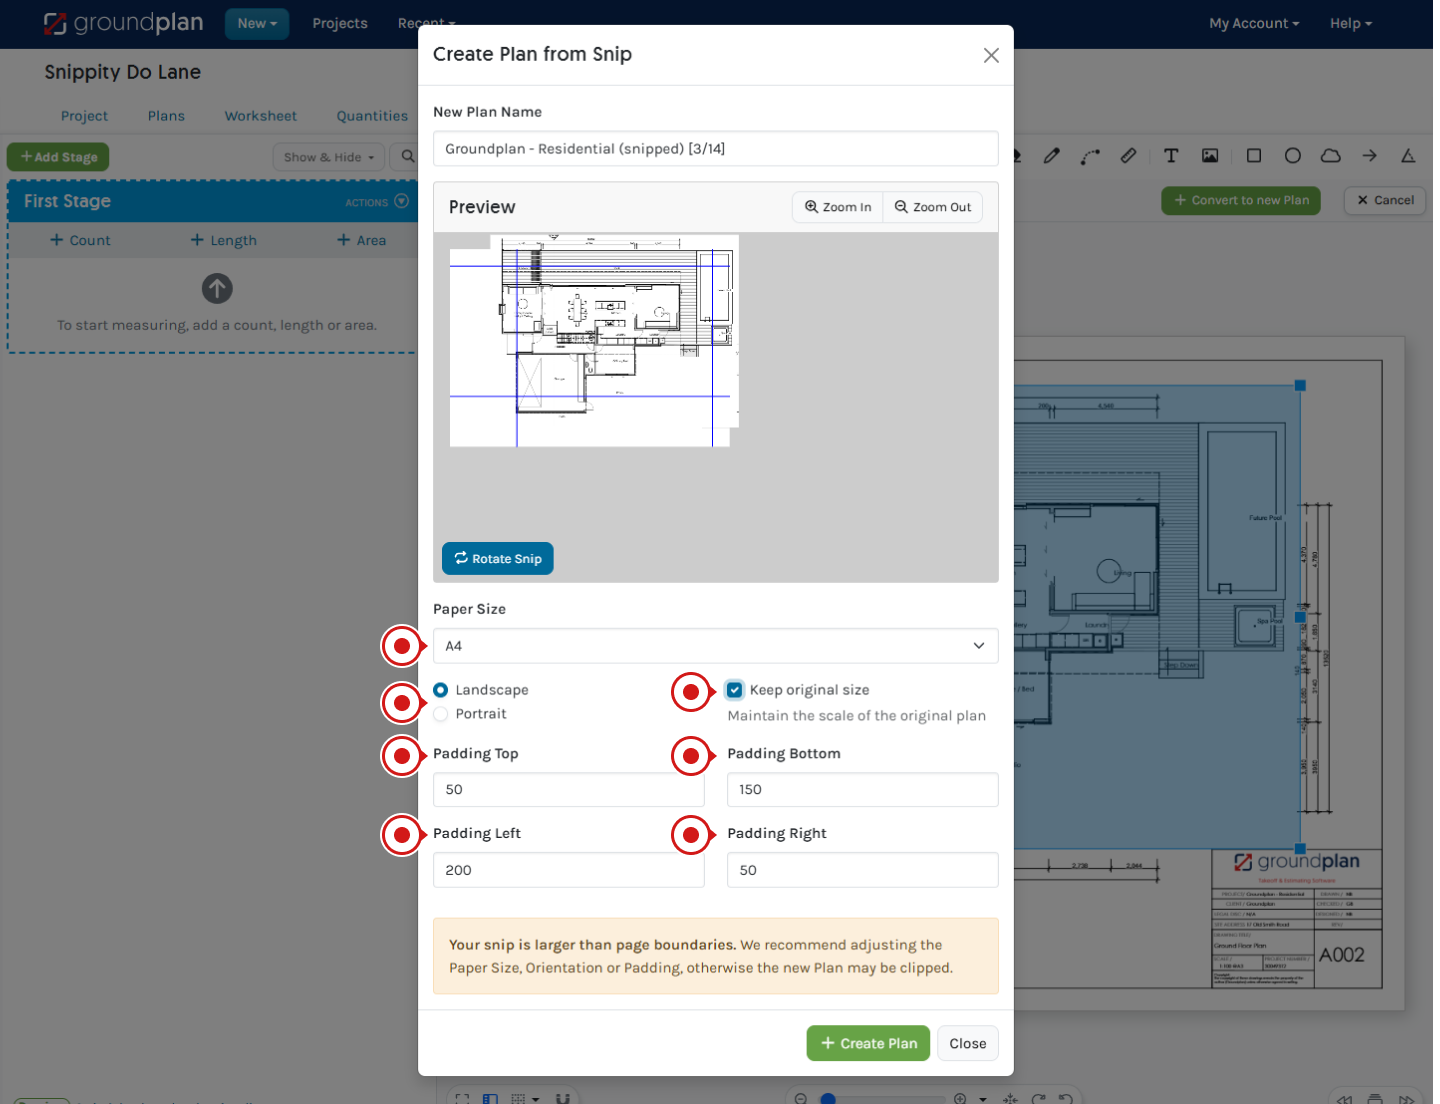
I have Snipped a small section of the Plan and received an error message that "snip is larger than the page." How can I fix this?
The Snip is larger than the page boundaries. You will need to adjust the Snip settings to remove the warning. If left, it will cut off a section/s of your Snip when converted to a new Plan.
To adjust, you can edit the:
- Paper Size
- Page Orientation (Portrait / Landscape)
- Padding at the Top, Bottom, Left or Right
