Take-Off Templates when Integrated with Sparky
- 11 Jan 2024
- 3 Minutes to read
- Print
- DarkLight
- PDF
Take-Off Templates when Integrated with Sparky
- Updated on 11 Jan 2024
- 3 Minutes to read
- Print
- DarkLight
- PDF
Article Summary
Share feedback
Thanks for sharing your feedback!
Creating Take-Off Templates is a time-saving option to populate Projects with frequently used Measurements. When integrated with Sparky, measurements can be manually linked to your Sparky Products or Pre-Builds.
Creating Take-Off Templates
The two most common approaches to creating Take-off Templates linked to Sparky products are: Copying from an existing Stage or Building a new Take-off Template.
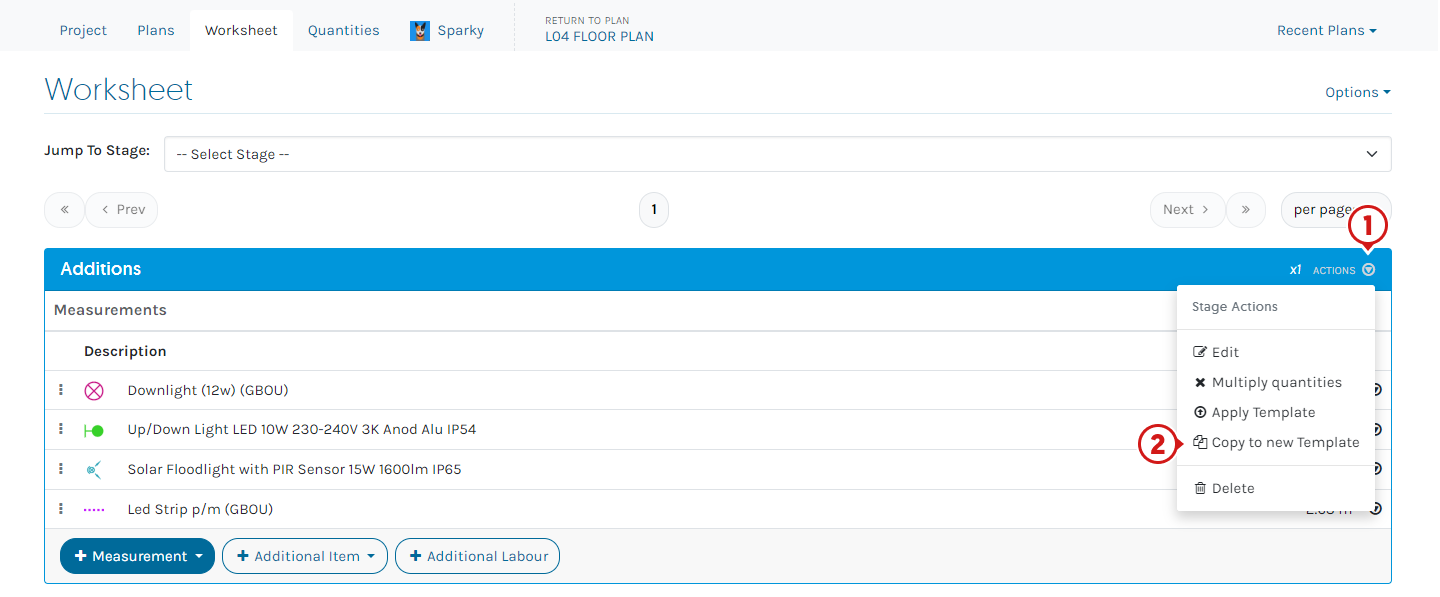
1. Copying an Existing Stage to a Take-Off Template
If Measurement Parts are already linked to Sparky Products or Pre-builds, Take-Off Templates are created by Copying an existing Stage in a Project.
- From the Worksheet tab, click Stage Actions
- Click Copy to new Template
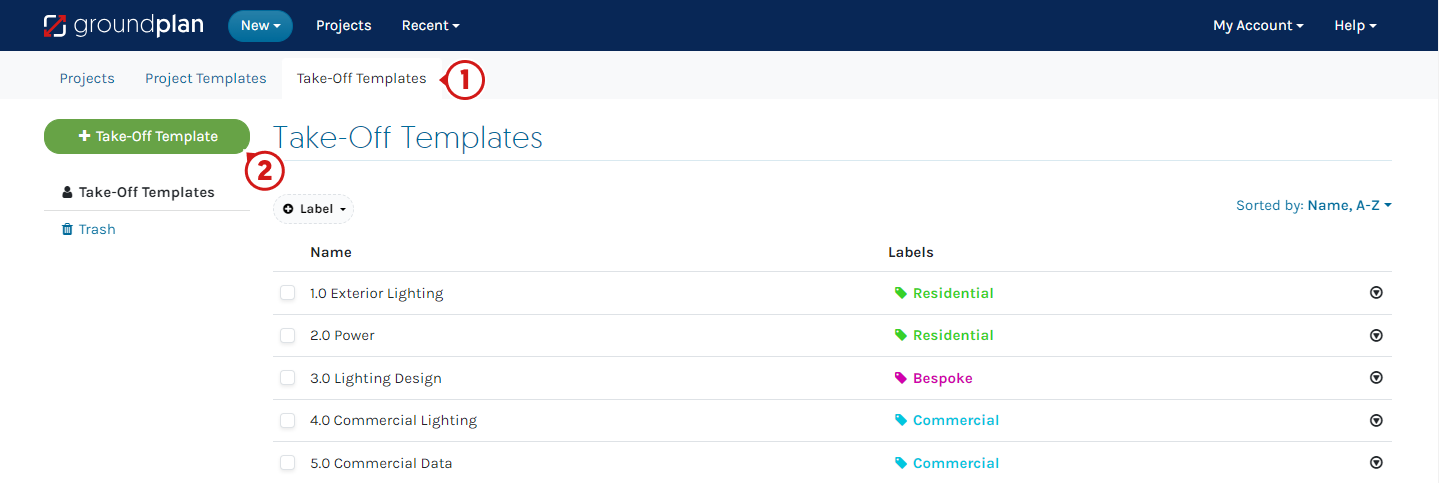
2. Building a new Take-Off Template
- From the Groundplan home page, navigate to the Take-Off Templates tab
- Click +Take-Off Template
- Enter the Template Name and click Create
- Click +Measurement and click to add Count, Length or Areas
- Select Measurement Part Type and complete remaining fields
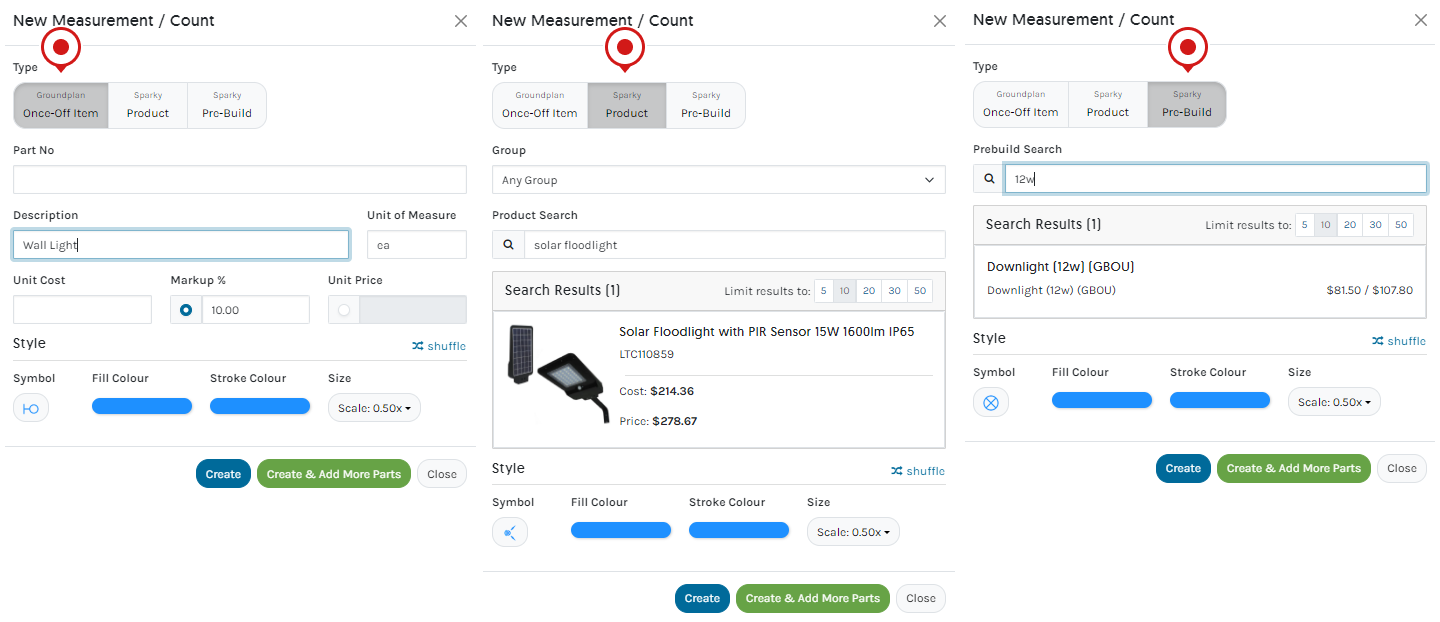
- Click Create
If additional Parts and Labour are required, click Create & Add More Parts
Applying a Take-off Template to a New Stage
- From within a Plan, click +Add Stage
- Enter Stage Name and click Apply Take-off Template
- Click Take-off Template name, review and de-select Measurements not required
- Click Create
Add additional Count, Length and Area Measurements if required

Applying a Take-off Template to an Existing Stage
- From within a Plan, click Stage Actions and click Apply Template

- Click Take-off Template name
- Review and/or de-select Measurements not required
- Click Apply Template

Linking Take-Off Measurements to Sparky Inventory
Take the following steps to link Sparky Products within Take-Off Templates:
- From the Groundplan home page, click Take-Off Templates and click Take-off Template name to amend
- Click Measurement name
- Click Part Actions and click Delete
- Click +Part
- Select Sparky Product or Sparky Pre-Build
- Type a full word
- Click to select the item
- Click Save

Frequently Asked Questions
If I import all my Measurements using the CSV upload option with the same part numbers and descriptions, will they automatically link to my Sparky Items?
No. Measurements will need to be manually linked to Sparky Items. Follow the GIF above for the steps.
If I update my pricing in Sparky, will this update my Projects?
No, not automatically.
You will need to de-configure and reconfigure the integration again. The updated pricing will show when pushed to a Quote in Sparky.
I want to include items in my Templates, but I don't want them to appear on the Plan. Is there a way to add them?
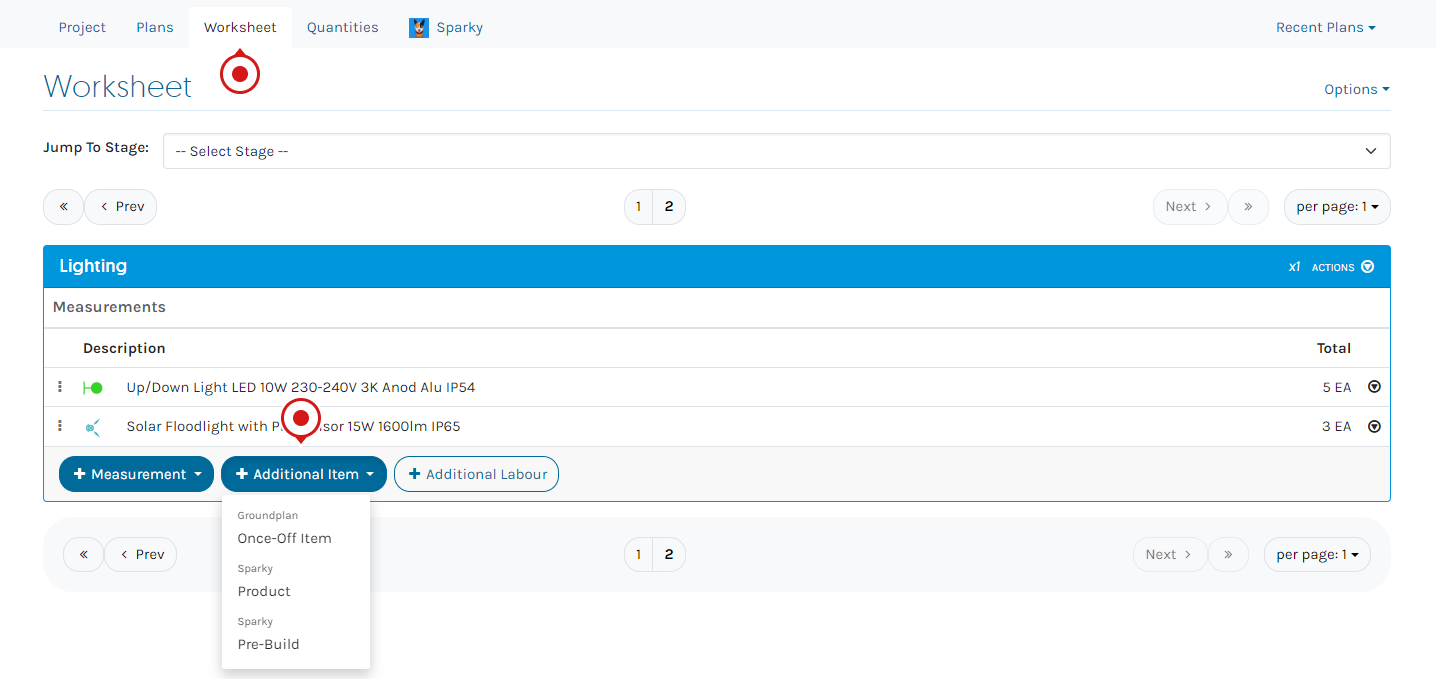
Yes. After you have applied the Template to a Project, add them as Additional Items from the Worksheet tab.
Choose from Groundplan Once-off Items (appears in "Other Items"), Sparky Products (appears in "Products") or Pre-Builds (occurs in both the Pre-Builds and Products if there are separate Products within the Pre-Build).
When I add my Pre-Build, why does it display the Sparky description instead of the Sparky name on the Stage?
The Pre-Build name appears as the Part number, and the Pre-Build description appears as the Measurement and Part Name.

The Pre-Build name shows correctly once inside the Sparky Quote.

Please note: When a Pre-Build does not have a description, the Pre-Build name shows as the Part Name in Grounplan.
Can I create Sparky Prebuilds within Groundplan?
No.
Having multiple Sparky Products as Parts will not create a Prebuild within Sparky. Any additional Parts and Labour added to a Measurement are sent to Sparky as individual lines.
Prebuilds must be built in Sparky.
If I rename a Sparky product with, say, D1 - then the type of downlight, will that appear in my Sparky Quote?
No.
Renaming measurements on Groundplan will not send the updated name to Sparky.
These names will only appear in Groundplan on the Stage, Worksheet, Quantities, Take-off Templates and on the Legend.
💡Accessed your Company's free 1 hour Training Session?
Organise your session today! Click Help > Send us a Message and ask to book in for free training.
Trainers can assist with:
- Workflow solutions
- Time-saving tips
- Making sure you're getting the most out of your subscription
If you've accessed your free training and need further support, reach out to book a 1 or 2 hour paid session.
Was this article helpful?