Title Blocks are used to add logos, business details and other information specific to a Project. They are fully customisable and often used in combination with the Eraser and Legend Tools. Live updates to Text and Style are displayed on-screen.
Related Articles: Eraser Tool | Legend | Exporting Plans
Block Types
Block Types allow the User to control the appearance of Images, Text and Table settings within a Title Block.

| Block Type | Benefit | |
|---|---|---|
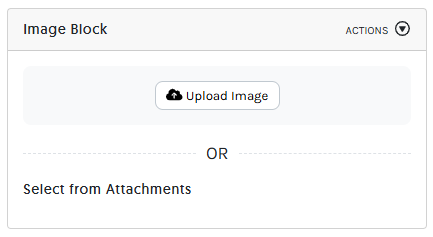 |
Image | For adding images. Accepted file types are jpeg, bitmap, png or gif. Resizing will occur automatically. e.g. Company logo and/or organisation logos like NECA, Master Builder, Master Plumbers, Master Electricians, images of business |
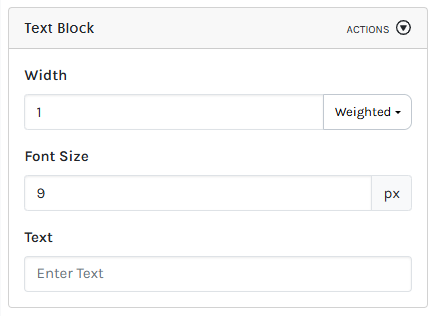 |
Text Box | For free text e.g. Business contact details, terms & conditions, design specifications |
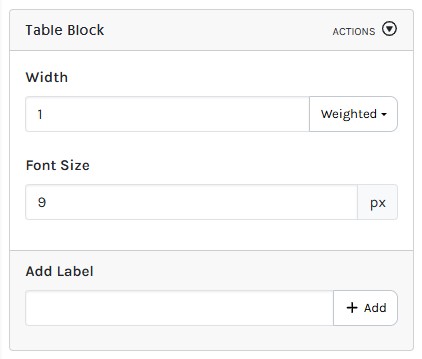 |
Table | Add labels that pre-populate into a table to complete for the Project. Reorder labels with click hold and drag. e.g. Customer names, address, builder/architect, designed by, revision number and date |
Create a New Title Block
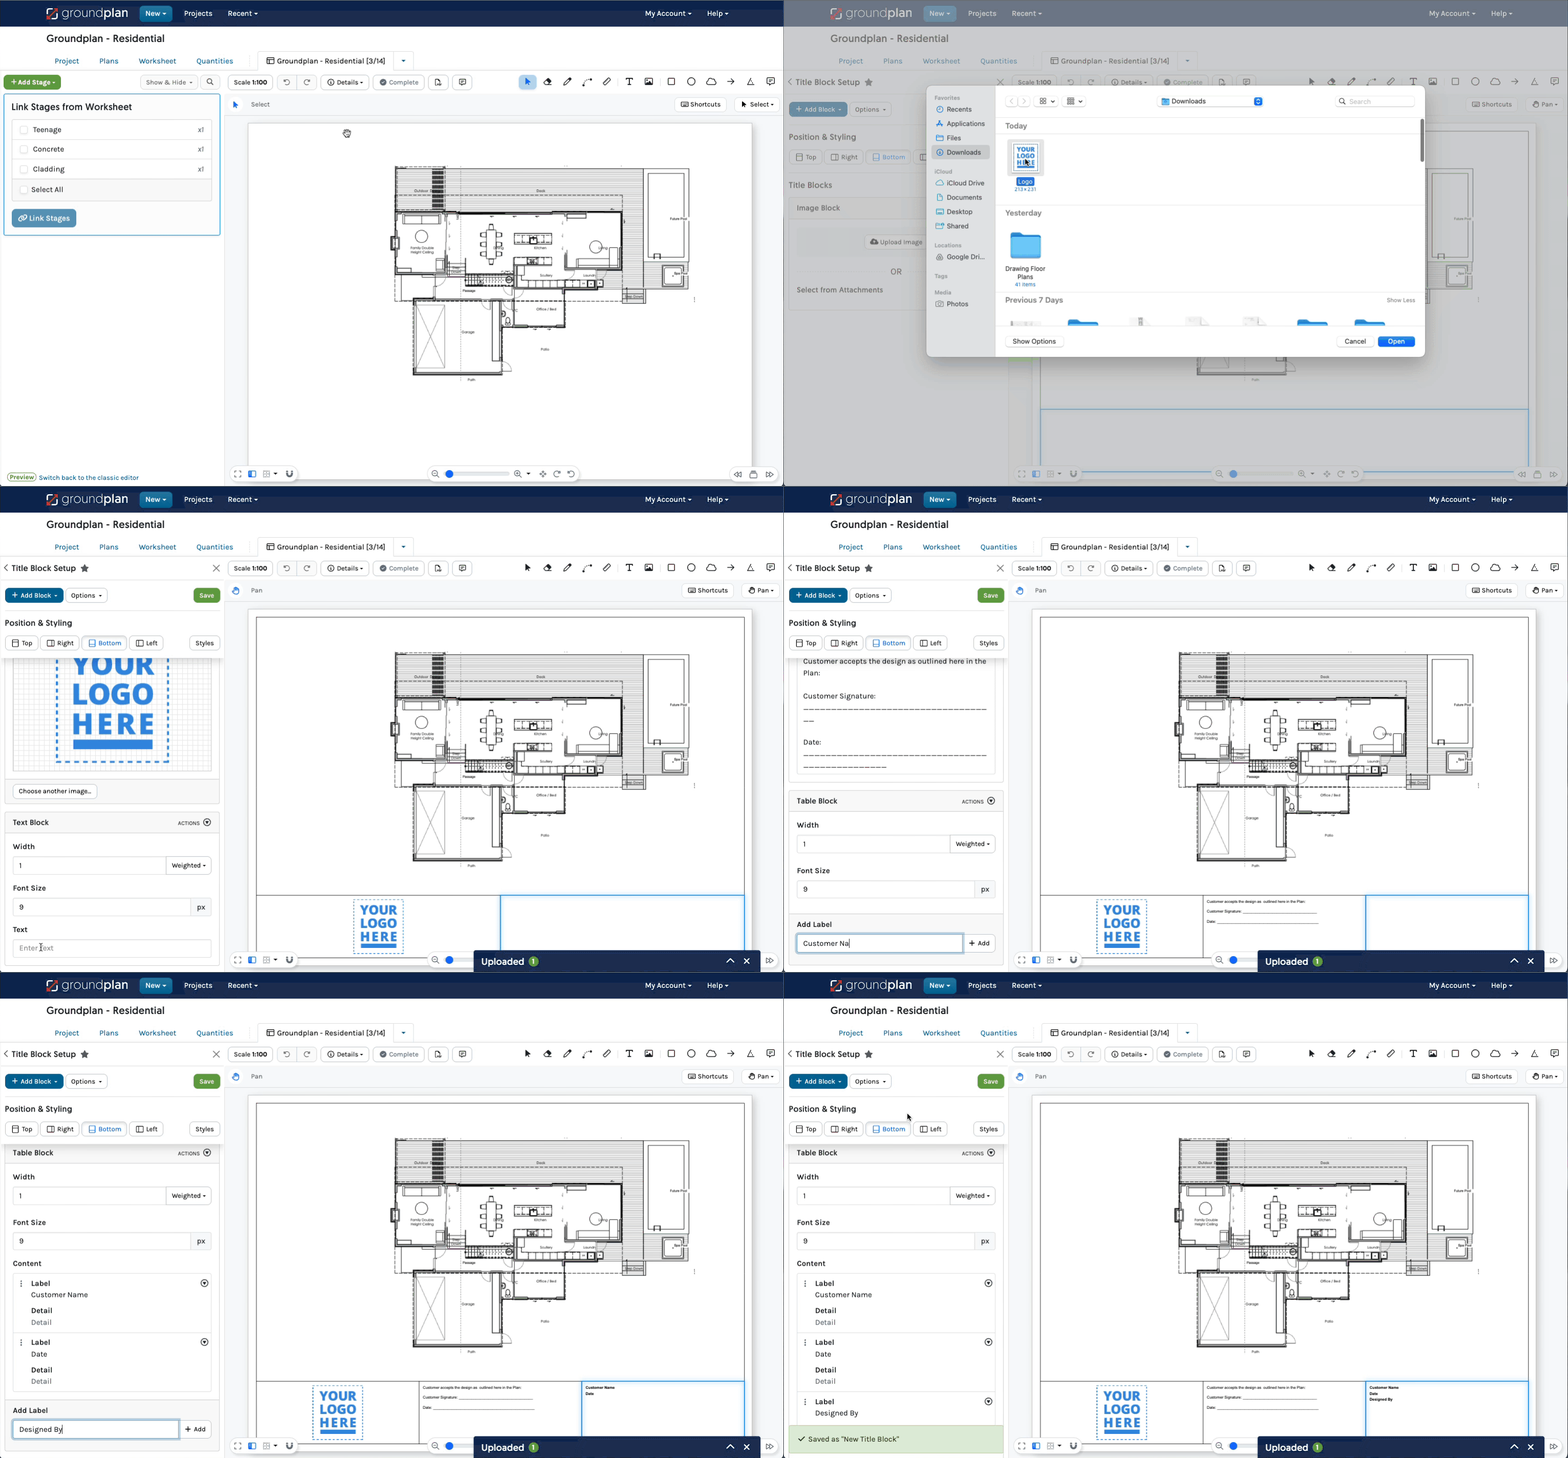
- Click the Details Tab then click Title Block
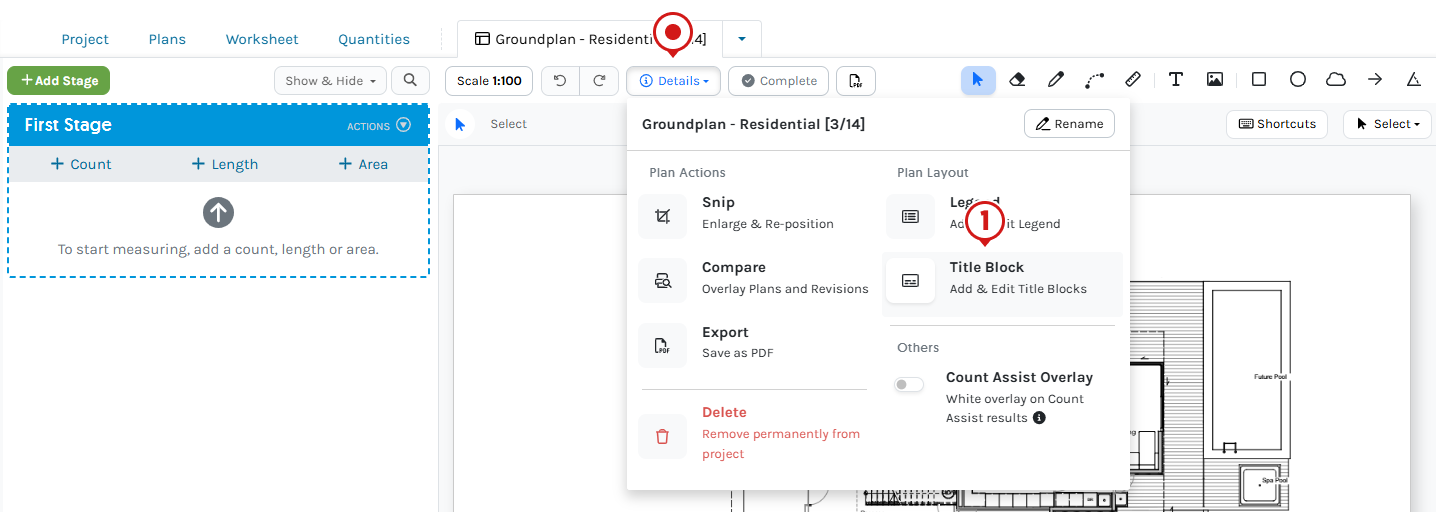
- Click New Title Block

- Click to select the first Block Type and complete the required details and/or upload
- Click +Add Block until all required information is entered into the Title Block

- If required, change Title Block orientation or click Styles to adjust Formatting Options, then click Back
Changes are in real-time - (Recommended) To Save as a Template, click the Star, enter a Nickname, then click Save
- Click Save
To add the Title Block to the Plan

Add/Edit an Existing Title Block
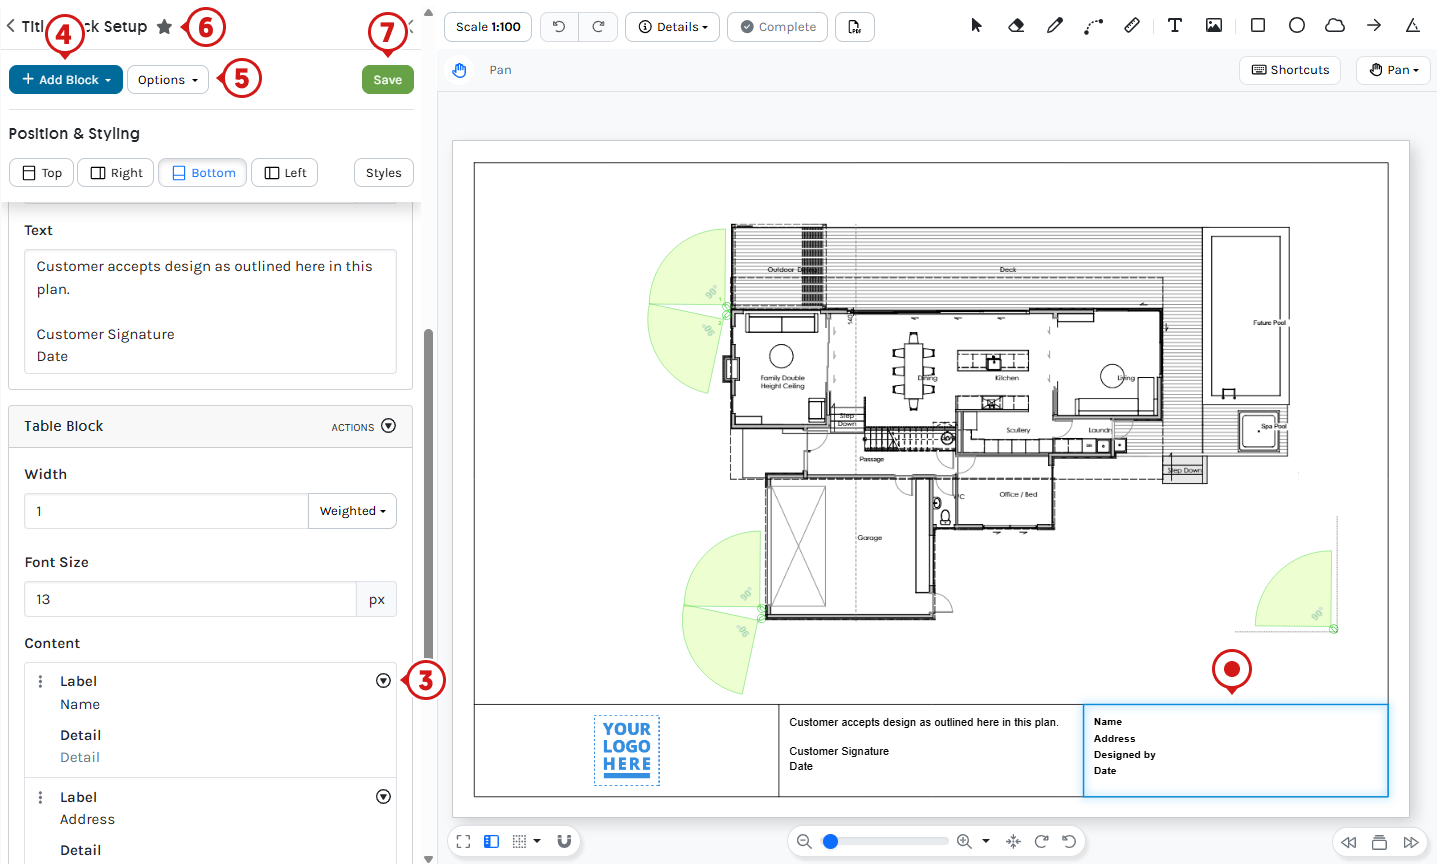
- Click the Details Tab then click Title Block
- Click Title Block name to add/edit

- Identify the section/s and Edit / Remove
Live updates are provided in Sections highlighted blue - (Optional) Click +Add Block and complete the required details and/or upload
- (If required) Click Options to change Style Options, Reorder or Remove the Title Block and then click Back
- (Optional) If the Template is to be Saved as a new Template, click the Star, enter a Nickname, then click Save
Delete any old Templates - Click Save
To add the Title Block to the Plan
Using a Title Block on multiple Plans in a Project
If a Title Block is already applied to a Plan in the Project, use the same Title Block across multiple Plans, including any pre-populated information.
- Navigate to the correct Plan
- Click the Details Tab then click Title Block
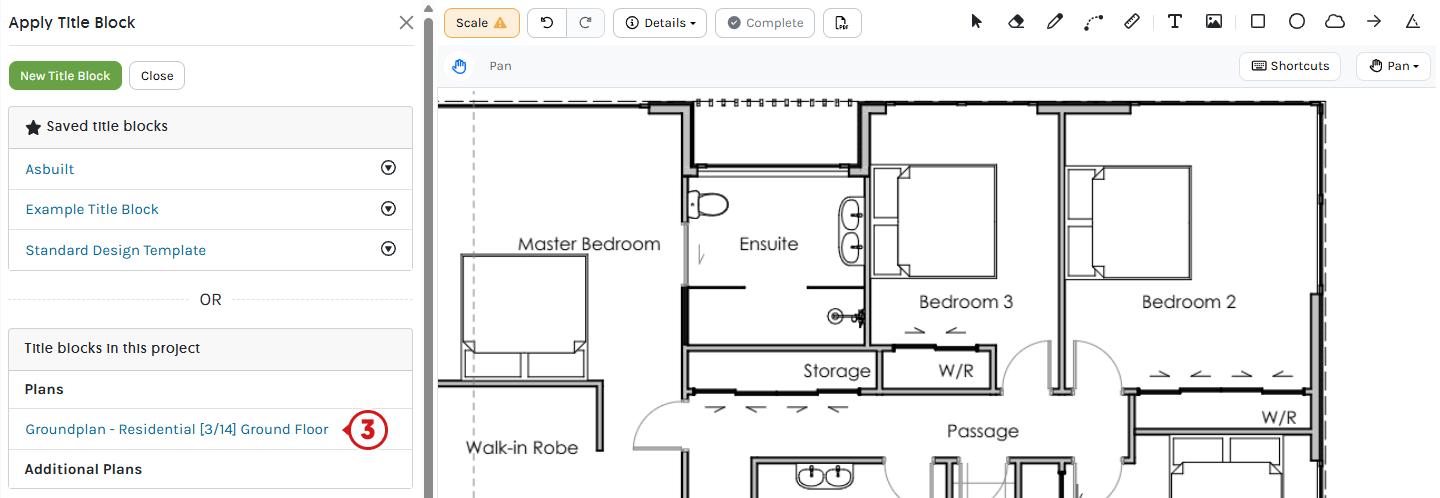
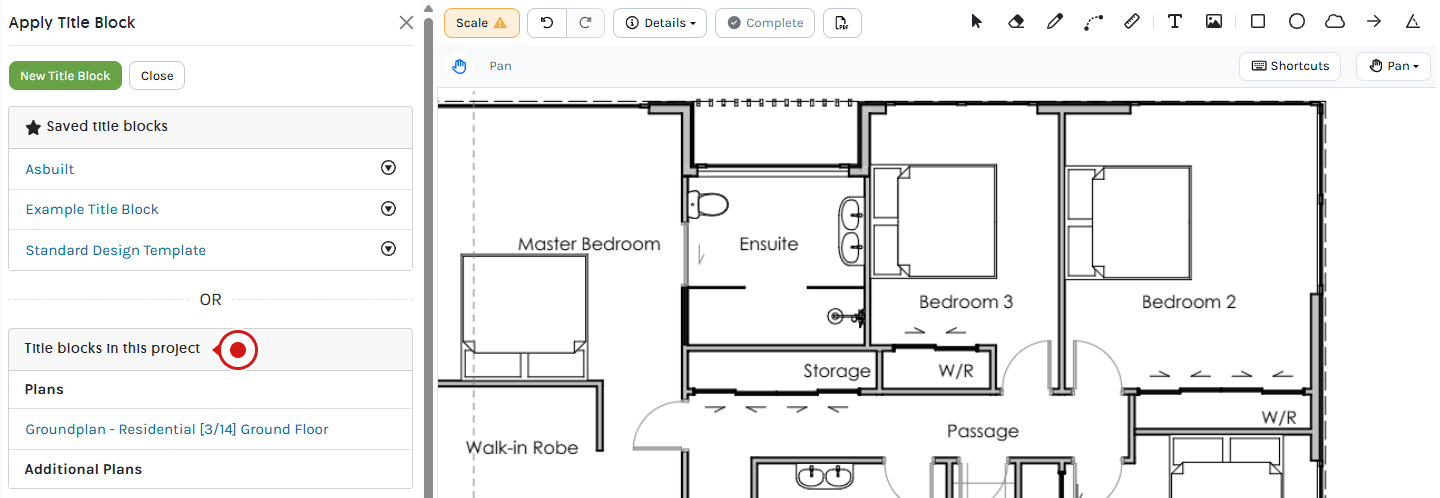
- Under Title Blocks in this Project, click the Plan name to copy the Title block
A blue Plan name denotes there is a Title Block present
- Make any changes required
- If required, click Options to change Style Options, Reorder or Remove the Title Block and click Back
- Click Save
To add the Title Block to the Plan
Formatting Options
Adjust the Formatting Options and click Save to retain the changes.

| Setting | Explanation |
|---|---|
| Edge | Orientation and selecting the Edge of the Plan to display the Title Block |
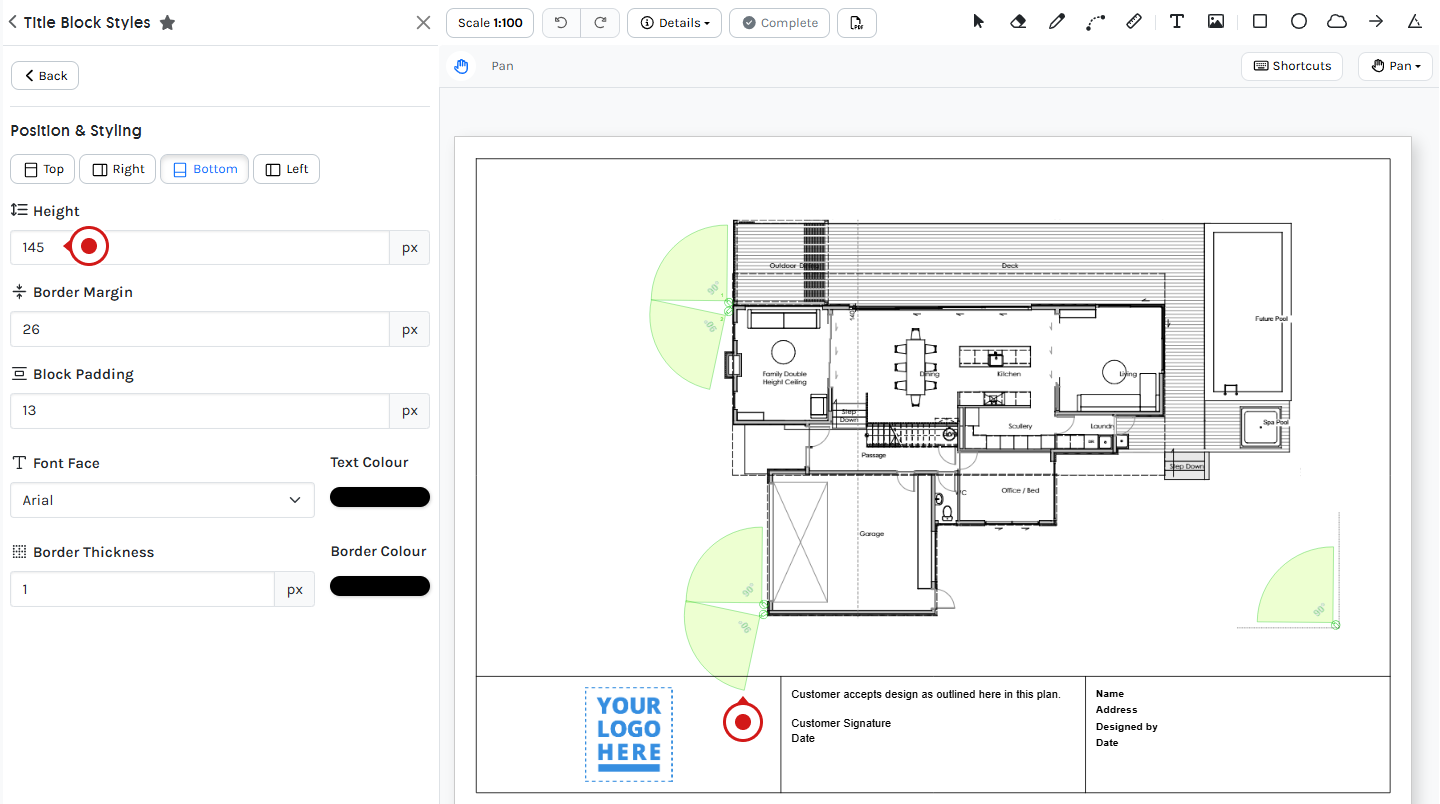
| Height | Adjust the Height of the Title Block |
| Border Margin | Choose the margin of the border around the Plan |
| Block Padding | Control the amount of space around Images and Text |
Explanation: Adjust the Height of the Title Block so there is no overlap.
Errors
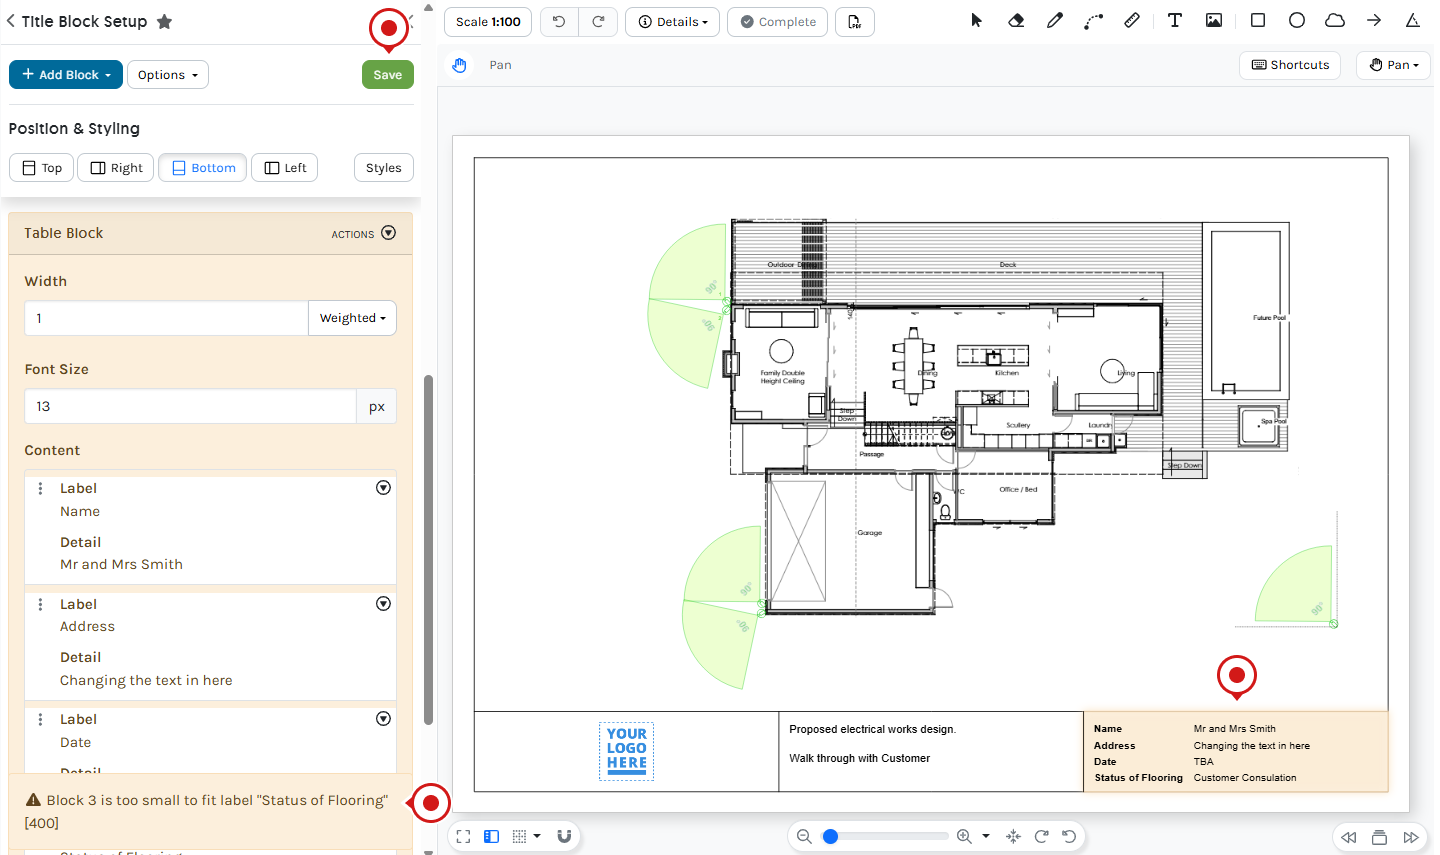
If an Error message is received, return to the Block Element number and adjust to suit (Text size must be modified in the example below). Click Save to update.
For further assistance with Errors or setting up Title Blocks, please contact the Support team at Help > Send us a Message.
Video Tutorial
Frequently Asked Questions
I have edited the Text Block on the Plan, why won't the update carry across all of the other Plans?
Any updates must be made on the left-hand side panel.
If updates are made directly on the Plan, these will not transfer to other Plans when choosing Title Blocks in this Project option.
Arrange your free training by clicking Help > Send us a Message. Our trainers are ready to help with:
- Streamlining workflows
- Time-saving strategies
- Maximising your subscription
Alternatively, visit the Groundplan Academy here for self directed courses.