The Quantities Tab displays your bill of materials for a Project after a Formula has been applied. Export Options to extract all Project Quantities from Groundplan are discussed in this article.
The Options shown in the drop down menu is for on-screen display only. Unchecking Quantity Options will not reflect in the columns Exported on the CSV. They will all be produced within the Export. See our FAQ's about removing columns.
Zero Quantity items can be removed from the Export.
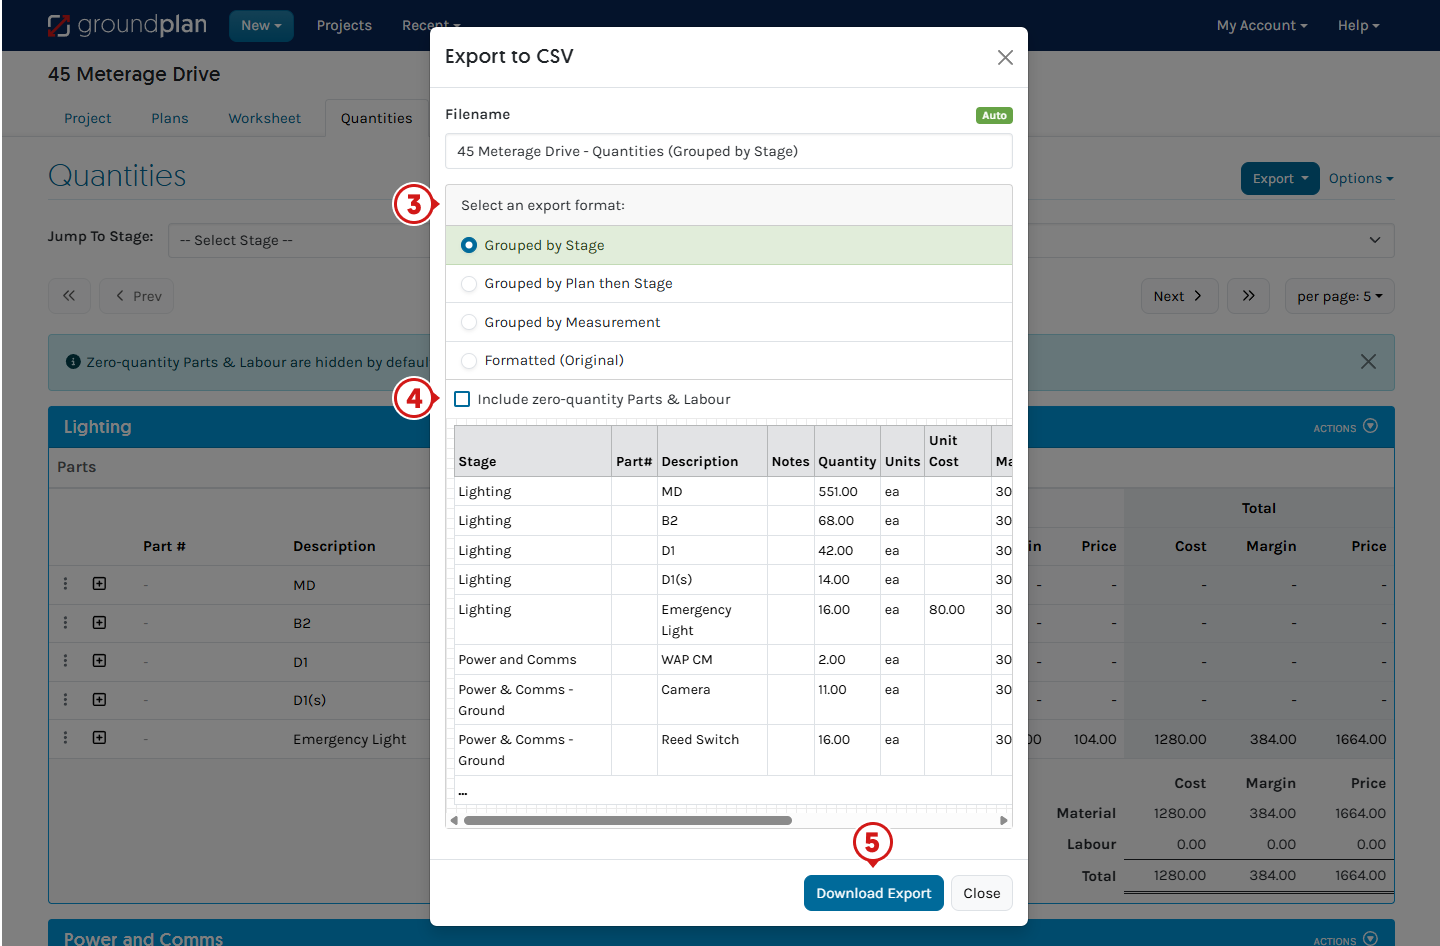
Options for Exporting Quantities to CSV
- Click Export
- Click Export as CSV

- Select an Export format
Unit Cost, Unit Markup, Unit Price, Total Cost, Total Margin and Total Price values are shown on all Export options
| Grouped by | Column Length & Area Breakdowns are shown in | Column Stage Multipliers are shown in | |
|---|---|---|---|
| Grouped by Stage | Stage > Part / Labour | Notes | Notes on Length & Area Breakdowns |
| Grouped by Plan then Stage | Plan > Stage > Part / Labour | Notes and Adjusted Values if present | Multiplier |
| Grouped by Measurement | Stage > Measurement > Part / Labour | Description | Description on Length & Area Breakdowns |
| Formatted (original) | Visually similar to Quantites Tab | Notes | Notes on Length & Area Breakdowns |
- (Default is unchecked) If required, click Include zero-quantity Parts & Labour
To include0Quantity Parts and Labour - Click Download Export
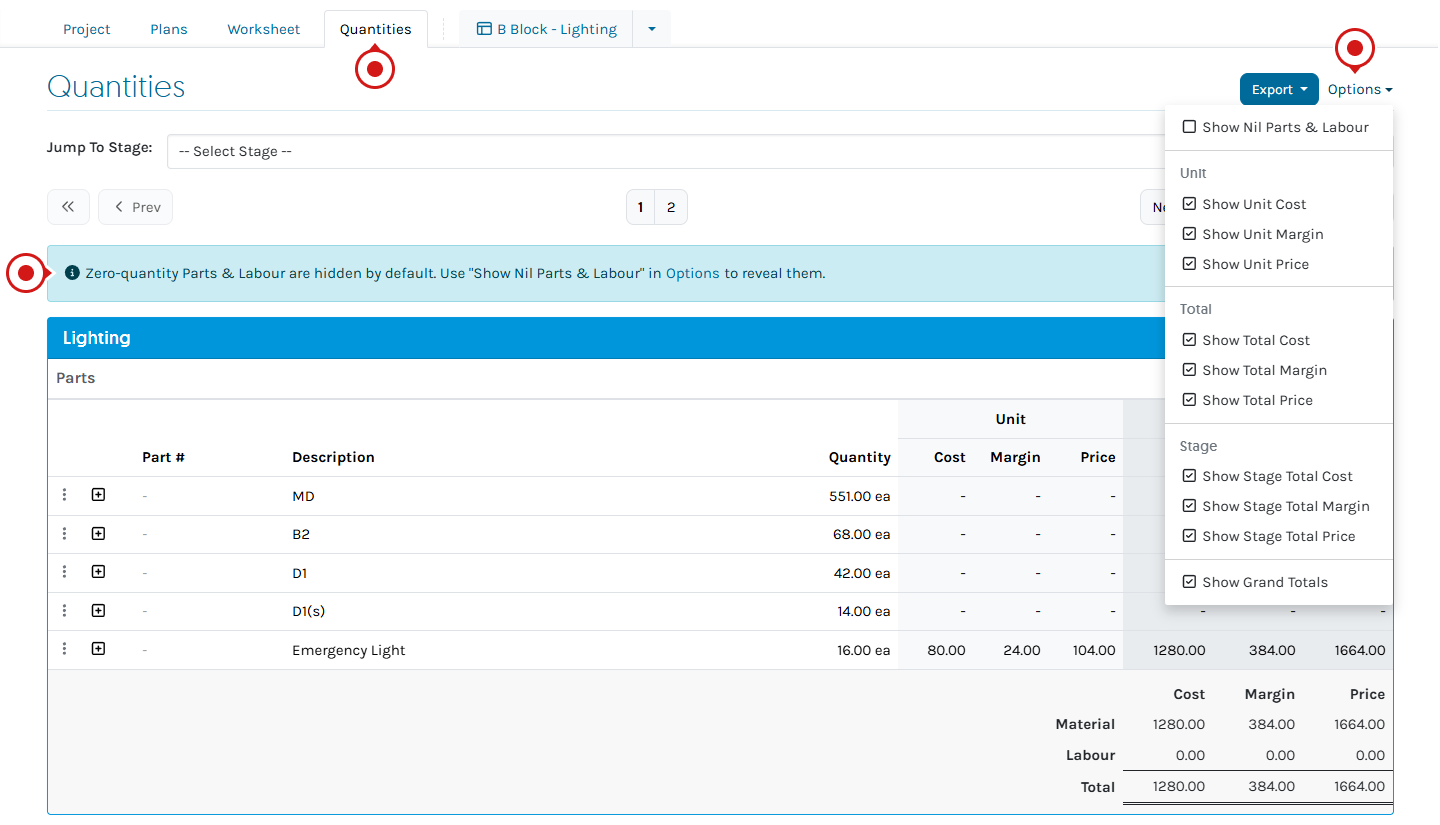
Viewing Parts / Labour and Length / Area Breakdowns
Parts and Labour Totals are grouped by Stage/s. Formulas are included in these figures.
To show individual Length and/or Areas and Grouped Parts / Labour breakdowns, lock the breakdown to display on Export.
- Click + on the Part / Labour line with the breakdown
- Click + next to Measurement name and click the Padlock

- Click Export and select Export as CSV
- Choose the Export format
View the breakdown in the Notes Column or for Group by Measurement, the breakdown will appear in the Description Column - Click Download Export then open

Video
Access the Groundplan Academy here for self-paced courses to use Groundplan more efficiently.
Frequently Asked Questions
When I Export, I don't want the Margin or Unit Price columns to show. How can I change this?
Unit Cost, Unit Markup, Unit Price, Total Cost, Total Margin and Total Price values are shown on all Export options. To combat this, remove columns from your Export in the program of your choice.
Open the document in the program it downloads into e.g Excel or Numbers (for some Macs):
- Highlight the columns to remove
- Tap DELETE on your keyboard
Can you select certain Stages to be exported to CSV rather than the whole project?
No. You would need to edit the CSV file once exported from Groundplan.
Why are the numbers different on the Quantities and Worksheet tabs?
The Worksheet shows all Measurement and the measured Totals from Plans.
The Quantities tab shows all Parts and Labour Totals after any Formula has been applied.
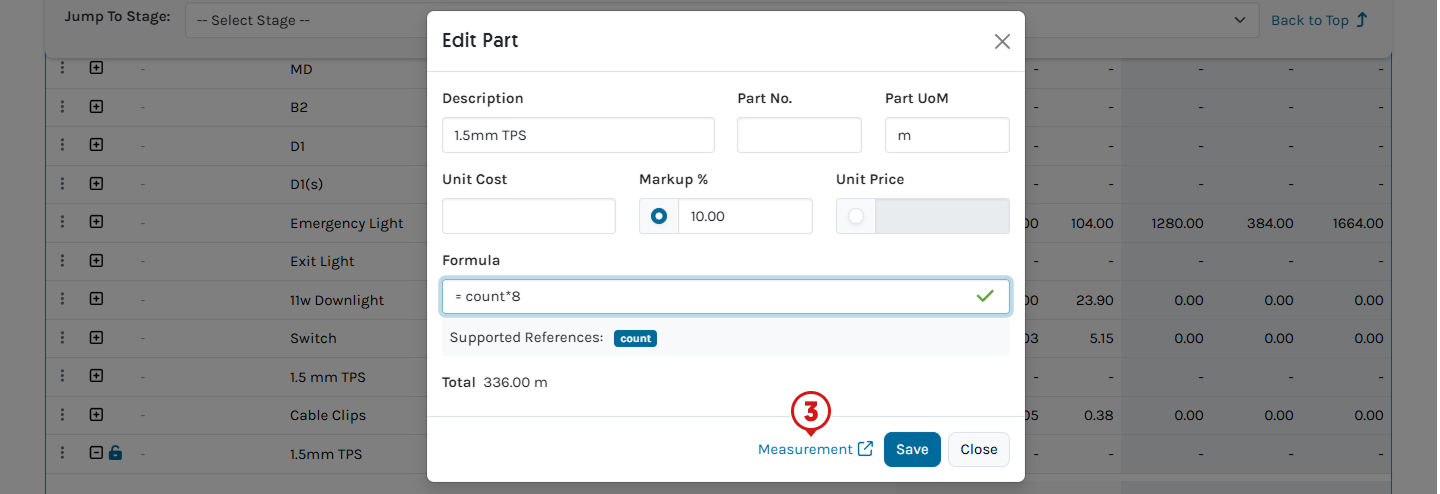
I have added additional Parts into Measurements, but they are not Grouped together on the Quantities tab. How can I fix this?
When a Part is created, they must have identical Part Numbers, Descriptions, Unit of Measure, including capitals, spelling, spacing and blank boxes to the Part you want it Grouped with. Look for the blue Grouped / Linked sign before clicking Save.
The example below shows a space between the 5mm in one image and not in the other. This causes the items to not Group on the Quantities tab. When creating a new Part, the fields must be identical, or the items won't Group.
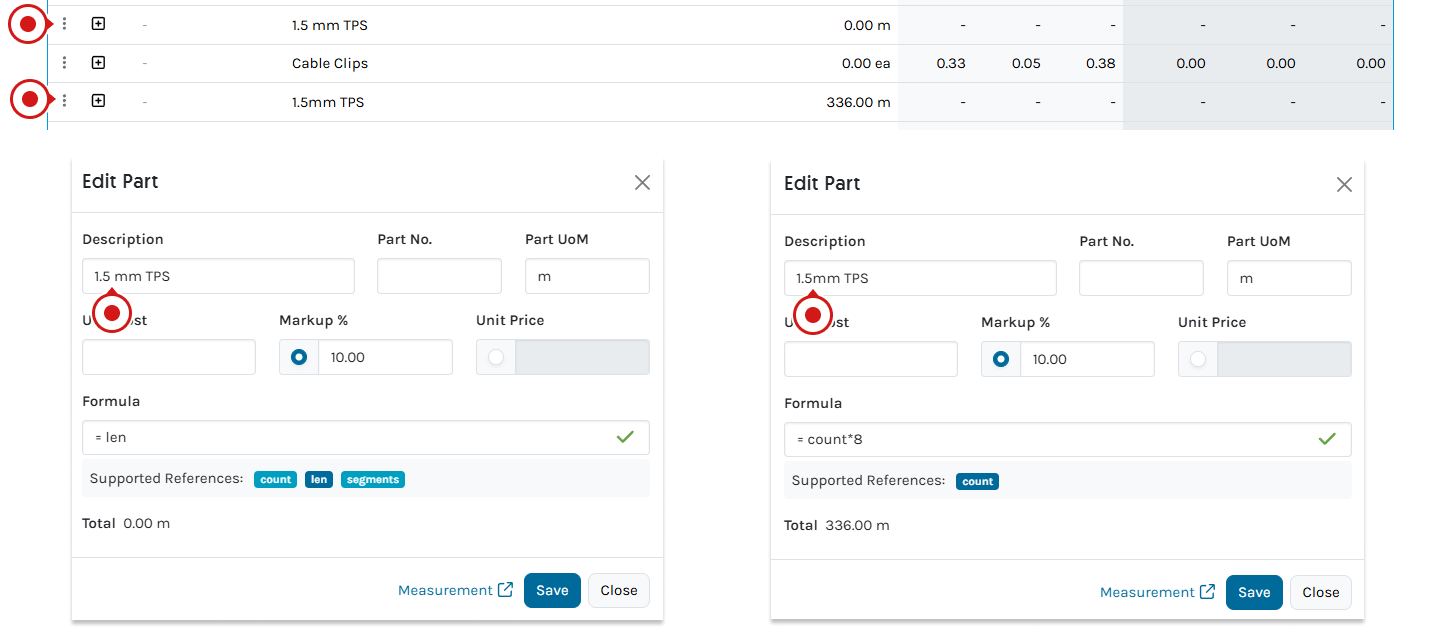
To fix a non-Grouped item:
- Click on the incorrect Part
- Click the Measurement name

- Click Measurement
Editing on this window will not Group the Part
- Click Actions then Delete on the original Part
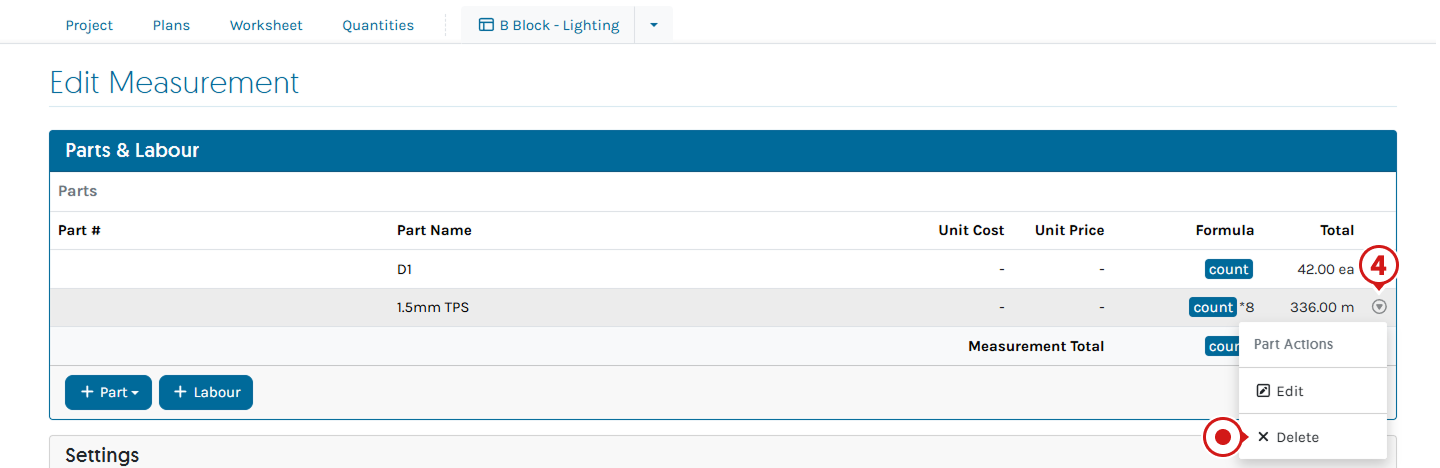
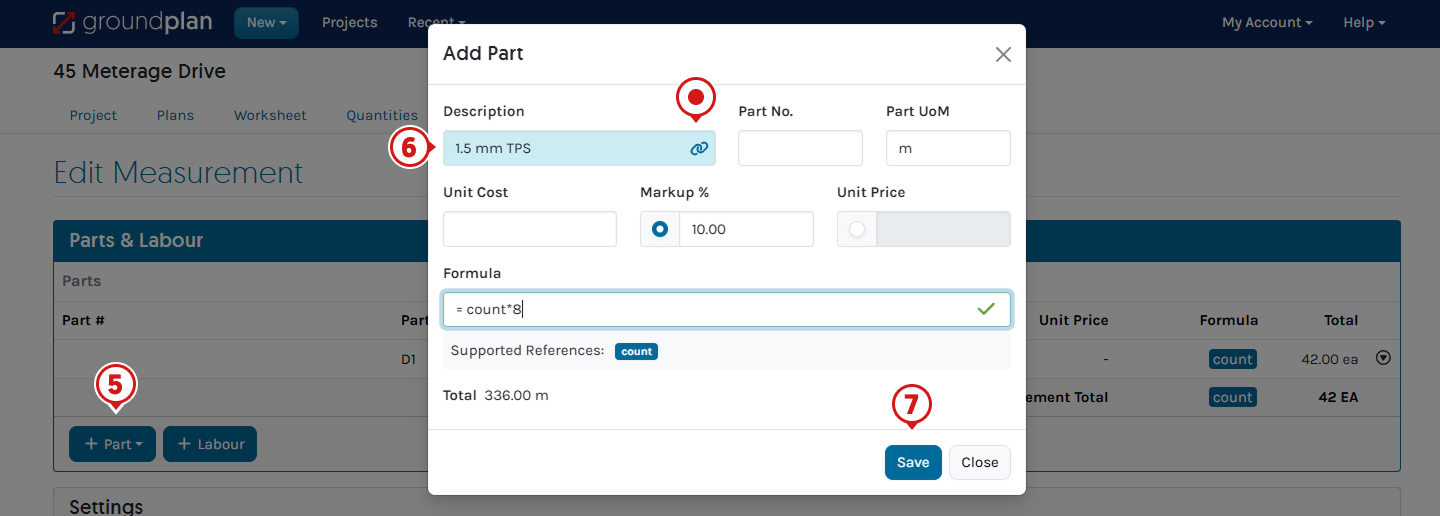
- Click +Part and select Groundplan Part
- Create a new Part
All sections mentioned must be identical and matching with the other Part
Ensure the linked sign appears before Saving, the Part UoM may need to be changed to see this - Click Save

For further information, please refer to our specific section on How to fix Parts/Labour Groupings.
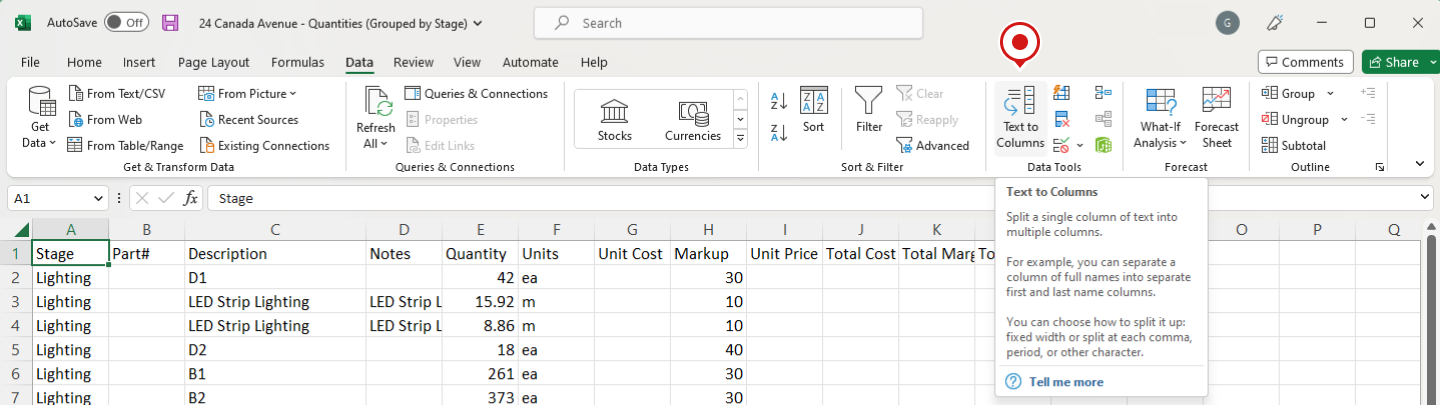
I downloaded the .CSV file; however, all the data is in one column rather than being formatted as in the preview.
This is due to settings within Excel.
To make the document appear correctly, please follow these steps:
- In Excel, go to the Data tab
- Click Text to Columns once the file is open in Excel