The Circle Tool adds circles and ellipses to Plans. Circles drawn will not add quantities to Measurements. If quantities are required, please use the Length in Curve Mode and / or Area in Curve Mode. Relocate the annotation bar by click, holding and dragging.
Depending on the screen size, the location of buttons and functionality may be different from that in this article.
Drawing Circles
- Click the Shapes Tools
- Click the Circle Tool
- Click and release on one corner to start
Move the cursor to the diagonal corner
Hold SHIFT to draw a perfect Circle - Click and release to complete the Circle
- Repeat for additional Circles
- Click Done

Editing Circles
The Settings modal remains open during editing and requires a click to close once editing is complete.
- Press ESC
Zoom in on the Circle to select - Select the Circle on the Plan
- To move: Click, hold and drag
To move several items at once, use the Select Tool - To resize Circles: Click, hold and drag the blue square boxes
Hold SHIFT to draw a perfect Circle - To rotate: Click, hold and drag the blue dot rotation handle
Hold SHIFT to lock the rotation to 45º angles
- To move: Click, hold and drag
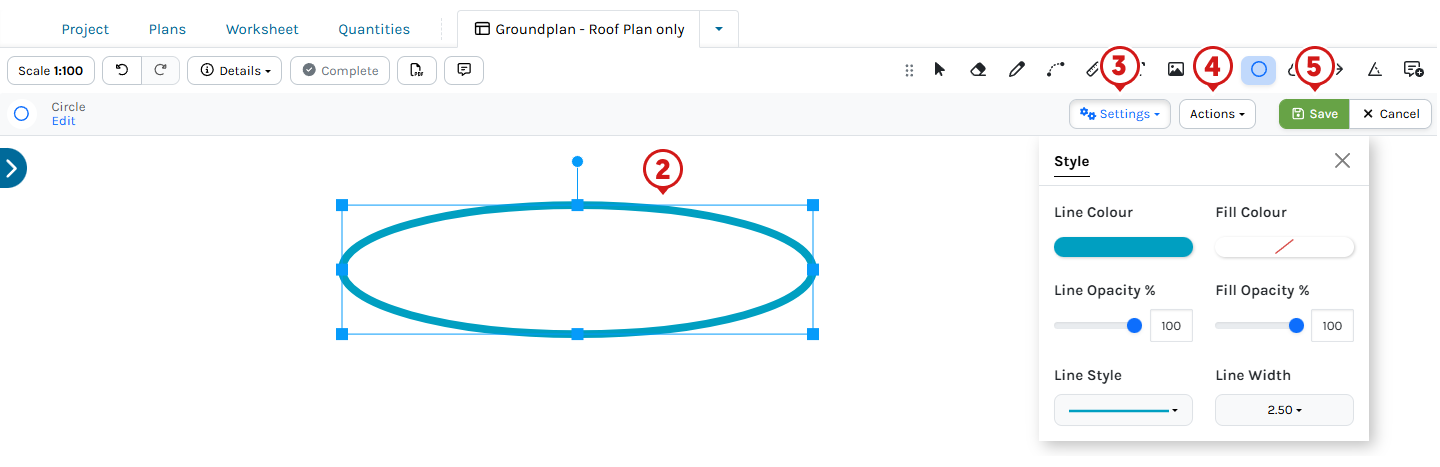
- Click Settings to:
- Change the Line Colour, Line Opacity %, Line Style, Fill Colour, Fill Opacity %, Line Width
- Click Actions to:
- Click Save
To Cancel the changes click Cancel
- Hold CTRL/Command ⌘ and press Z or
- Click Undo before leaving the Plan
Using an iPad or Tablet?
Click for alternate terminology.
Things to note when following the above steps:
- Tap instead of click
- Unless there is a keyboard attached to the device, there are no shortcut keys on an iPad or Tablet
- Tap Done instead of pressing ESC
Navigation hints:
- Pinch zoom
- Tap hold and drag to pan around a Plan
Images within this article are taken from a desktop computer. Interface appearance on an iPad / Tablet devices may vary based on screen size, potentially hiding or shortening buttons to icons. For accuracy, consider using a stylus, Apple pencil or mouse.