Negative Areas is a feature of the Area Tool used to generate a list of Negative Areas in a Measurement, commonly used for windows or island bench removals.
Related Articles: Area Tool | Area Cut-Out Tool
Creating a Negative Area
- Within a Stage click the Area Measurement
- Select a Drawing Mode
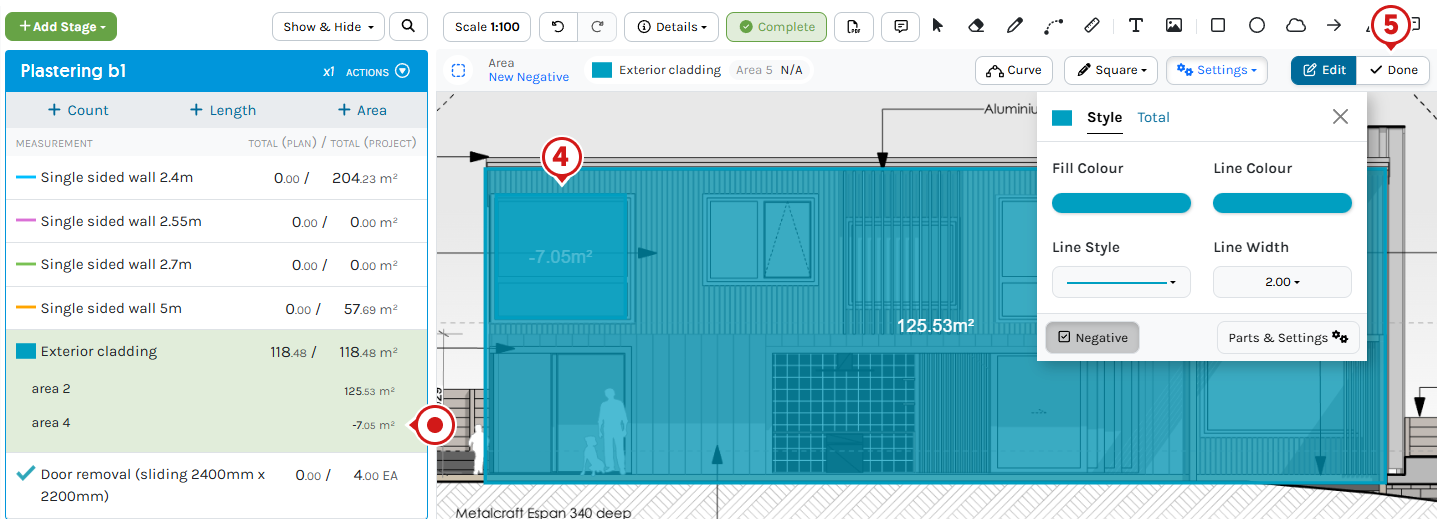
Freeform, Square or Curved Modes - Click Settings then click Negative
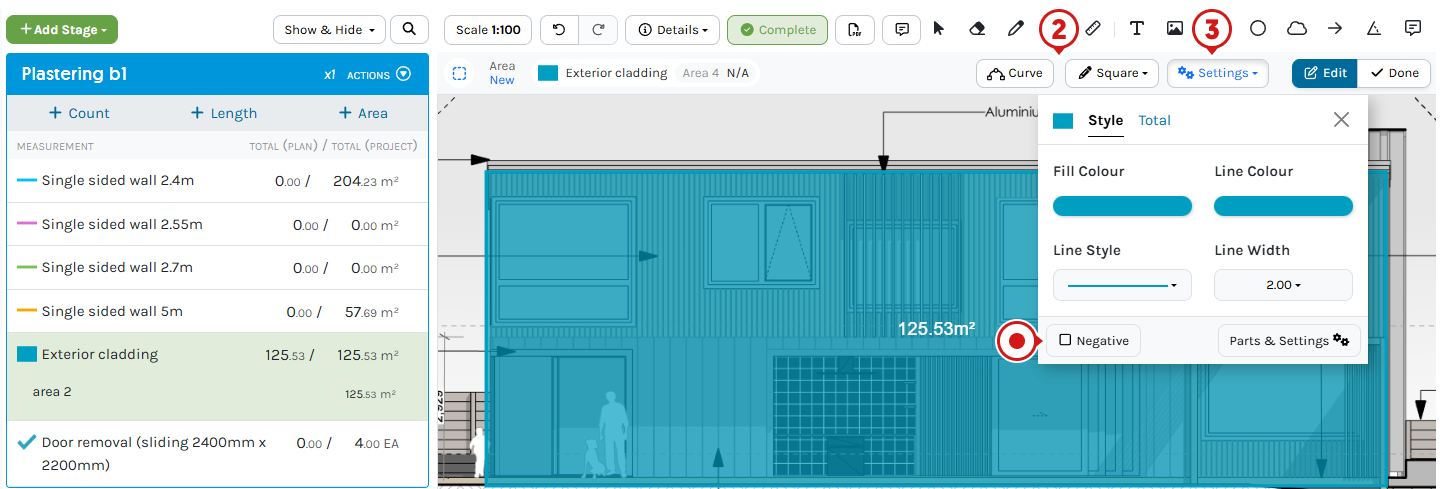
- Create the Negative Area
- Click Done
Negative Area Total will show the Measurement list
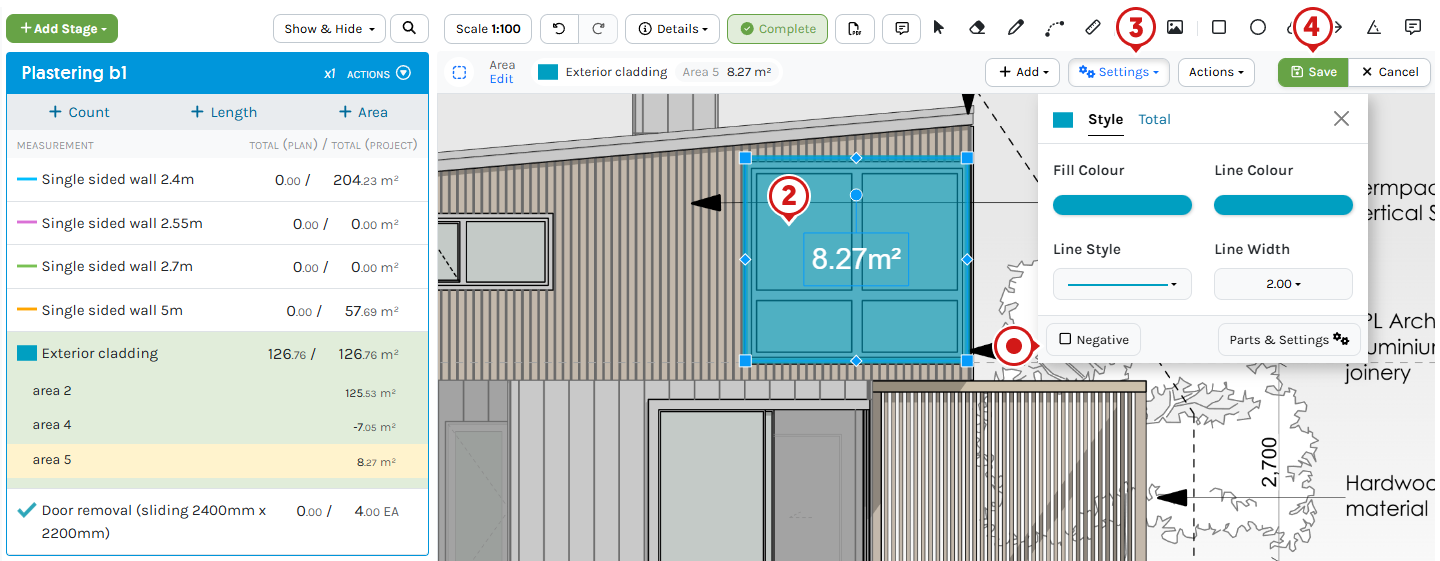
Convert an existing Area Measurement to a Negative Area
Turn an already created Area into a Negative, subtracting from the Area Measurement Total.
- Press ESC
Zoom in on the Area to select - Select an Area on the Plan
- Click Settings then click Negative
- Click Save
The Area will update to a Negative
Negative Area vs Area Cut-out
The Negative Area method will not remove the section of Area being subtracted from the Plan. It places another Area onto the Plan with a Negative Area Total.
The Negative Area Tool is the optimal choice to generate a list of Negative Areas in a Measurement.
If the requirement is to remove the Area drawn from the Plan and also from the Area Total, please refer to the Area Cut-out Tool Article.
Using an iPad or Tablet?
Click for alternate terminology.
Things to note when following the above steps:
- Tap instead of click
- Unless there is a keyboard attached to the device, there are no shortcut keys on an iPad or Tablet
- Tap Done instead of pressing ESC
Navigation hints:
- Pinch zoom
- Tap hold and drag to pan around a Plan
Images within this article are taken from a desktop computer. Interface appearance on an iPad / Tablet devices may vary based on screen size, potentially hiding or shortening buttons to icons. For accuracy, consider using a stylus, Apple pencil or mouse.
Frequently Asked Questions
Can I create a Curve?
Yes.
To create Curves and straight lines in the same Area
- In Freeform Mode, click at the beginning of the Curve
- Press Q
- Click once along the Curve
Close to the apex / highest point for best results - Continue on or click the last point to complete
When the Curve is complete, Freeform Mode will automatically engage.
Is there a way to Edit a Curve?
Yes. Click onto the Area with the curve to Edit. Slide the blue circles to adjust the Curve.
