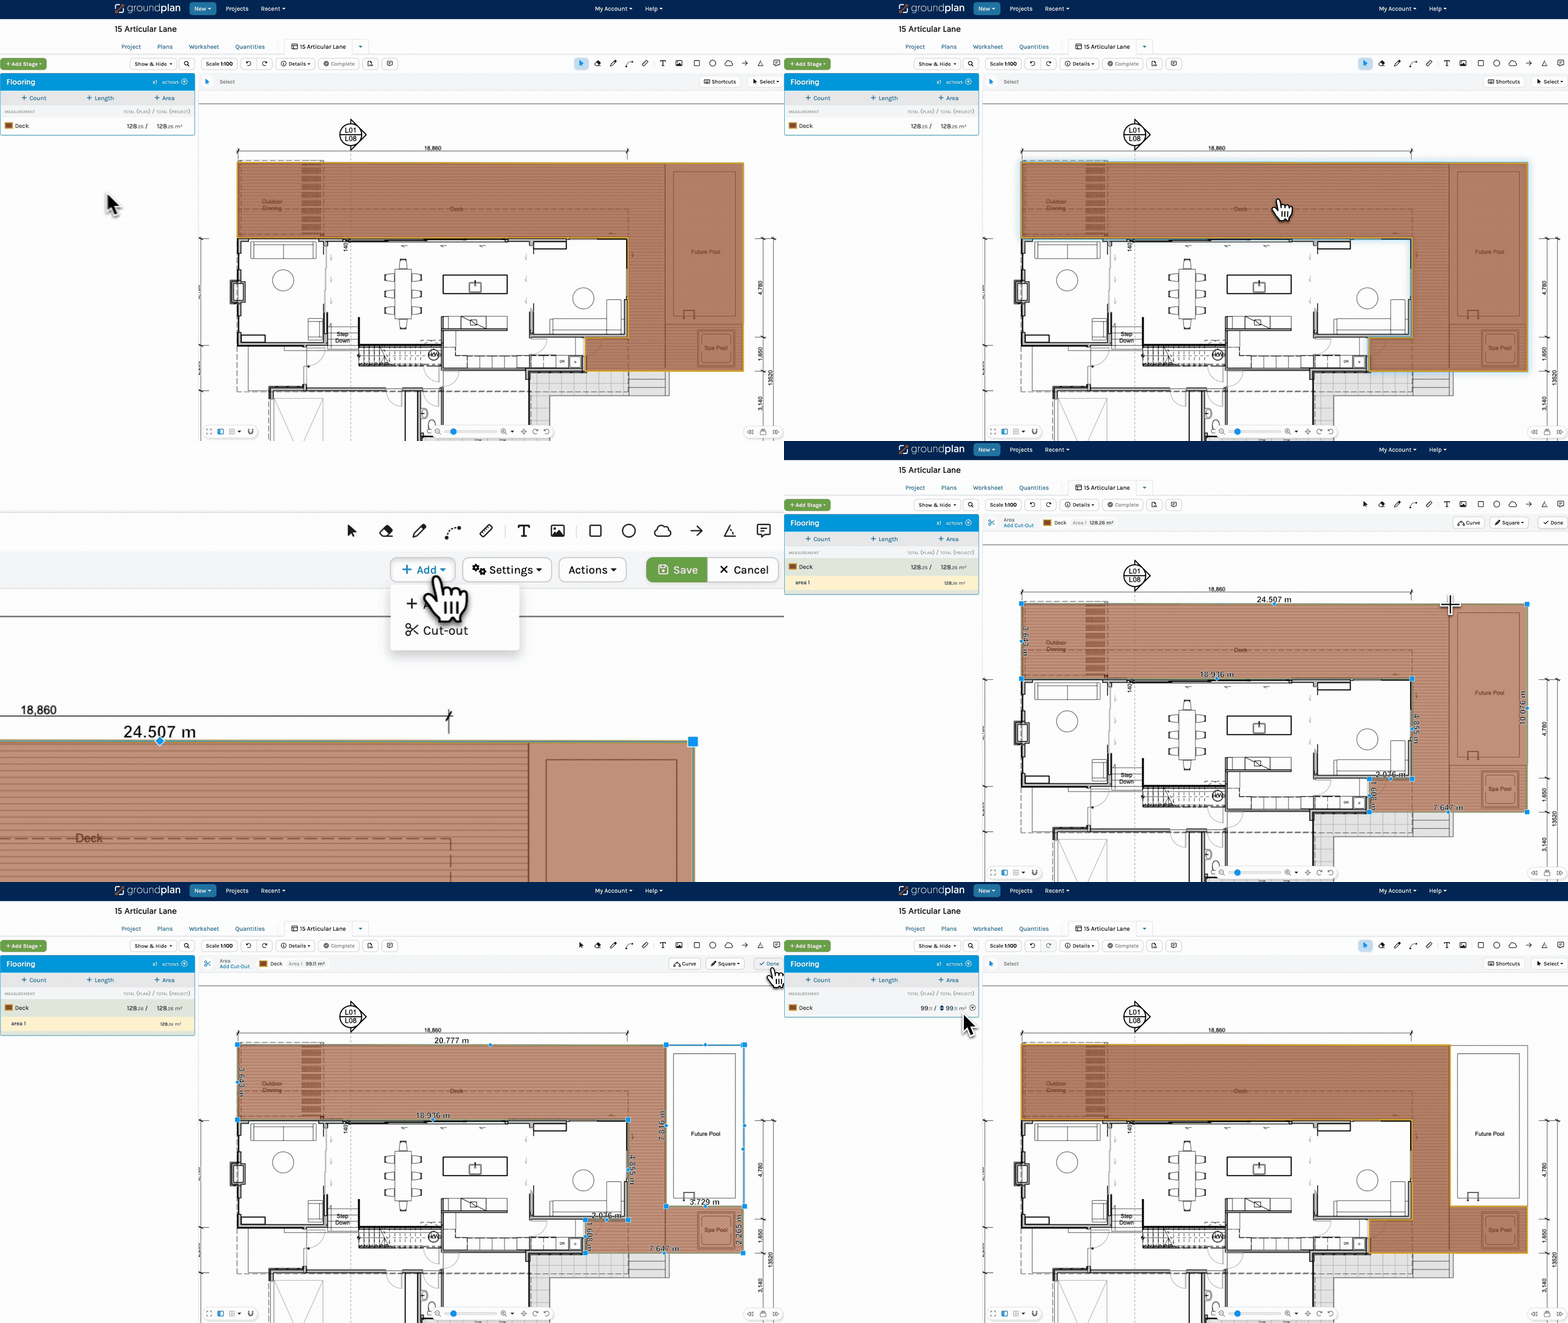
The Area Cut-out Tool is used to remove an Area from an Area Measurement e.g. an island bench from flooring or windows from the external cladding.
Related Articles: Area Tool | Negative Areas
Using the Area Cut-out Tool
- After drawing an Area, click Edit; or press ESC and click the Area again.
- Click +Add and then click Cut-out
- Select a Drawing Mode
Freeform, Square or Curved Modes - Click to create the Cut-out moving around the Area
- Click Done
- Click Save
To Cancel the changes click Cancel
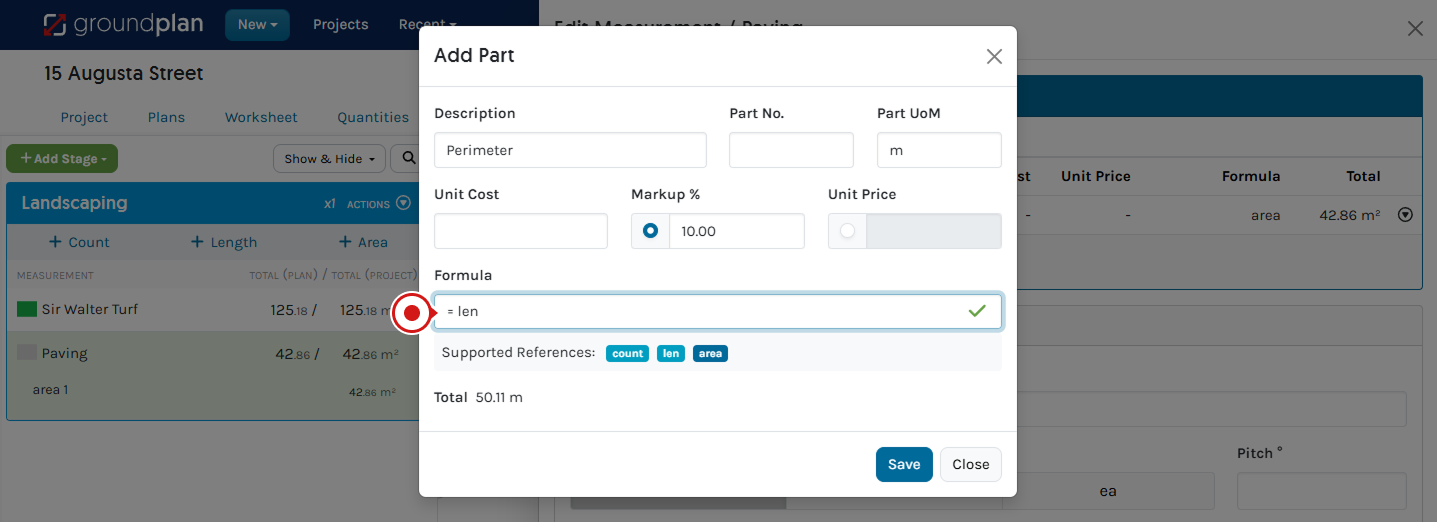
Within the Area Parts, using the len variable within the Formula will create a total perimeter for the Area, which also includes the perimeter of any Cut-outs in the Area
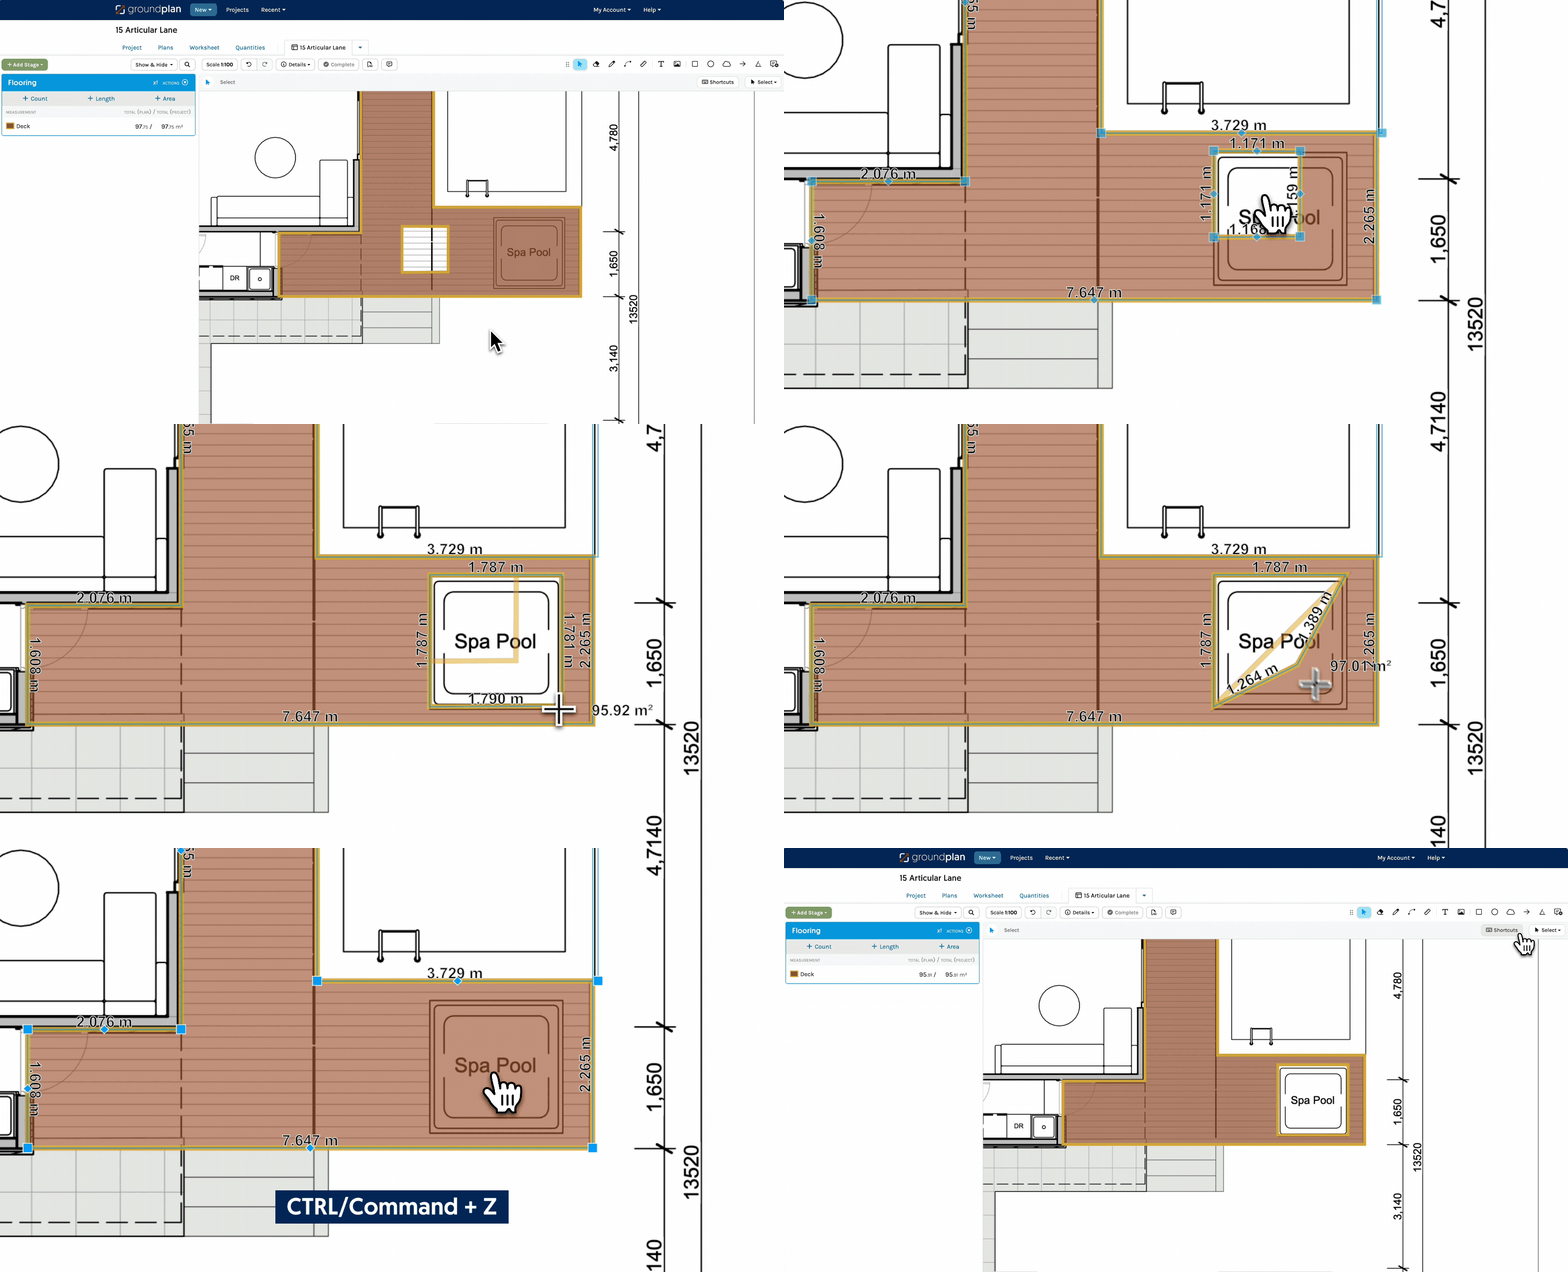
Editing an Area Cut-out
- Press ESC
- Select the Area
- To move: Click, hold and drag
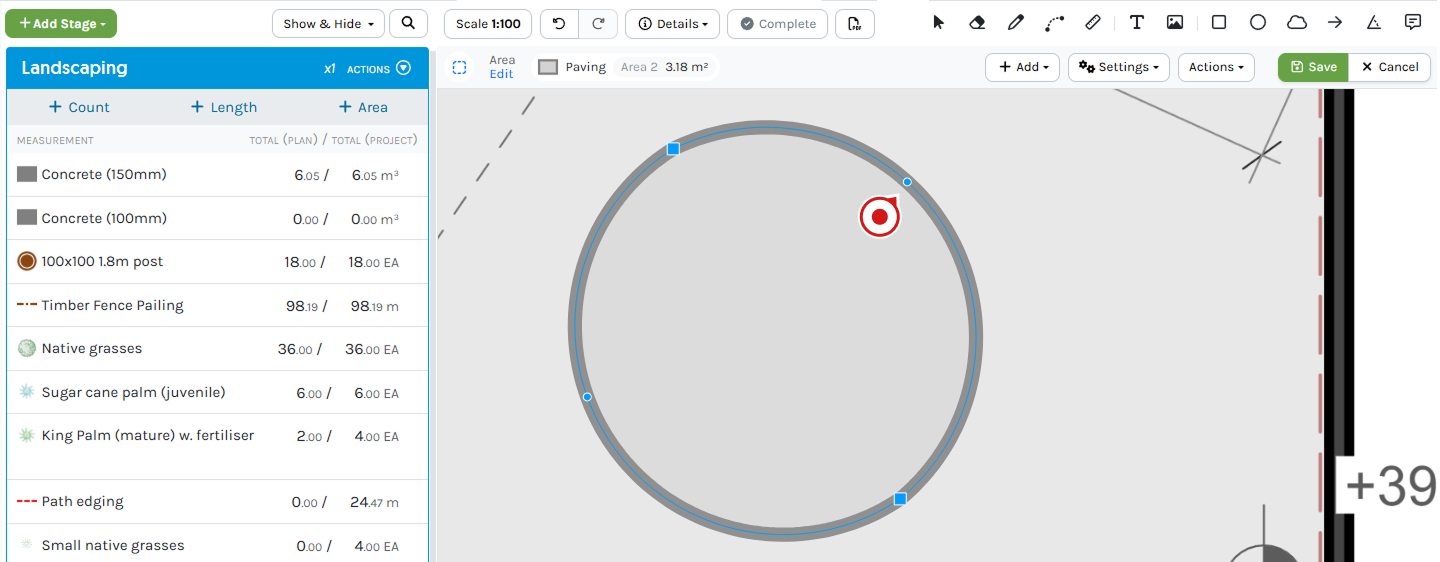
- To adjust the Area: Click, hold and drag the blue square boxes
- To edit a Curve: Click hold and drag the blue circle
- To create another Vertex: Click, hold and drag a blue diamond
- To Delete a square point: Hold CTRL/Command ⌘ and click the blue square
- To Delete an entire Area Cut out: Hold Ctrl / Command ⌘ and click the centre of the Cut-Out
- To add an additional Area Cut-out: Click +Add, then click Cut-out and create an Area Cut-out
- Click Done
- Click Save
To Cancel the changes click Cancel
Area Cut-out or Negative Area?
The Area Cut-out Tool will not create a Negative Area under the Measurement. The Area Cut-out subtracts the Cut-out from the selected Area Total and removes the Area from the Plan.
If Negative Areas need to be recorded in the Measurement breakdown, please refer to the Negative Areas article here.
Using an iPad or Tablet?
Click for alternate terminology.
Things to note when following the above steps:
- Tap instead of click
- Unless there is a keyboard attached to the device, there are no shortcut keys on an iPad or Tablet
- Tap Done instead of pressing ESC
Navigation hints:
- Pinch zoom
- Tap hold and drag to pan around a Plan
Images within this article are taken from a desktop computer. Interface appearance on an iPad / Tablet devices may vary based on screen size, potentially hiding or shortening buttons to icons. For accuracy, consider using a stylus, Apple pencil or mouse.
Frequently Asked Questions
Can I create a Cut-out curve?
Yes.
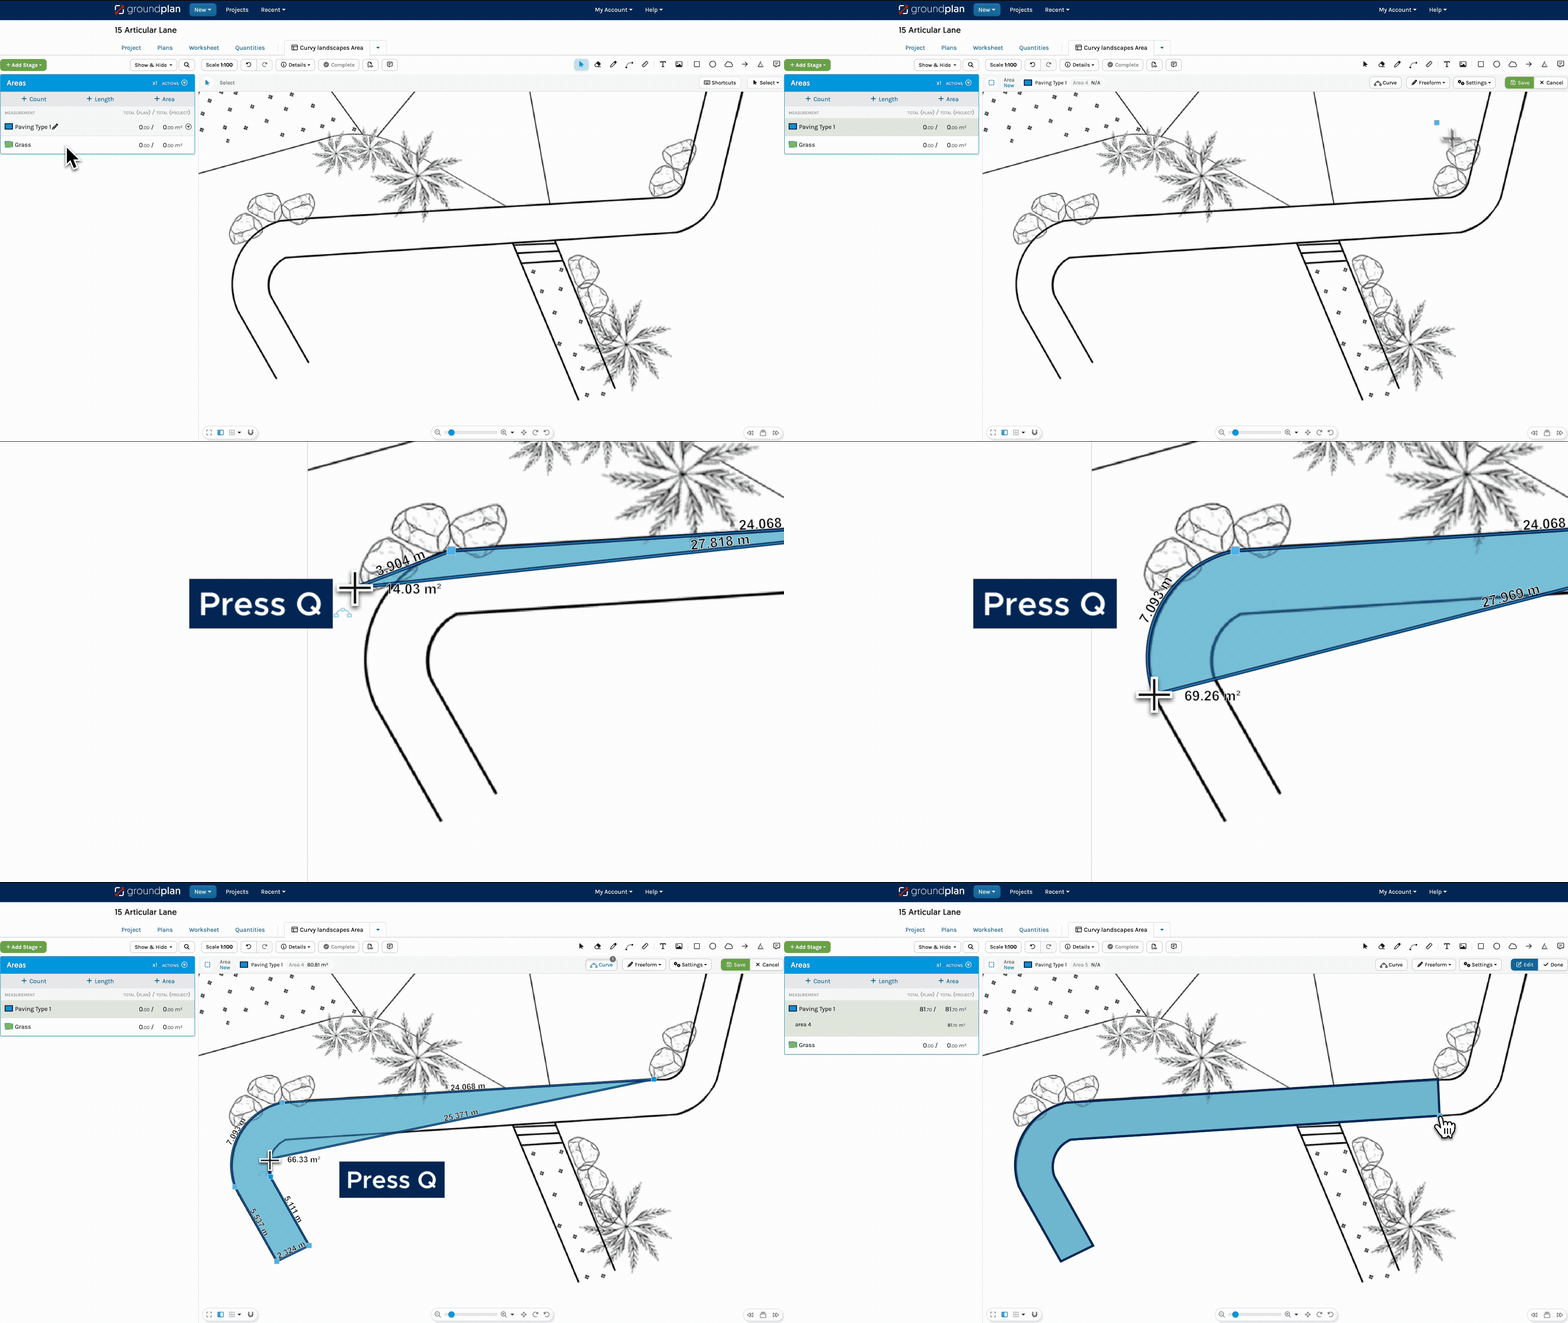
To create Curves and straight lines in the same Area
- In Freeform Mode, click at the beginning of the Curve
- Press Q
- Click once along the Curve
Close to the apex / highest point for best results - Continue on or click the last point to complete
When the Curve is complete, Freeform Mode will automatically engage.
Is there a way to Edit a Curve?
Yes. Click onto the Area with the curve to Edit. Slide the blue circles to adjust the Curve.
Is there a way to see the list of Cut-outs I made?
No, unfortunately there is not.