Groundplan offers a range of tools for drawing As-built Plans. This document showcases examples, with the understanding that the naming conventions of Counts / Lengths shown in the document may vary based on specific council requirements. However, the underlying principles and tools used remain consistent.
If further symbols are required, please send our friendly Support Team a message at Help > Send us a Message and they will be able to assist.
⚠️ Important to note: Groundplan is not designed to produce scaled engineering Plans.
Creating an Asbuilt within a New or Existing Project
- Set the Plan Scale
- Create a Stage called As-builts / property address
- Click +Count and create and populate the Plan
Requirements from council eg. WC, floor waste, shower, upstand, inspection point, valves, gully trap - Click +Length and create and populate on the Plan
- Click Settings then click Label to Label the Length
E.g. 100mm Sewer, Stormwater - Click Advanced to adjust the Text Size, Colour or Frequency of the Label
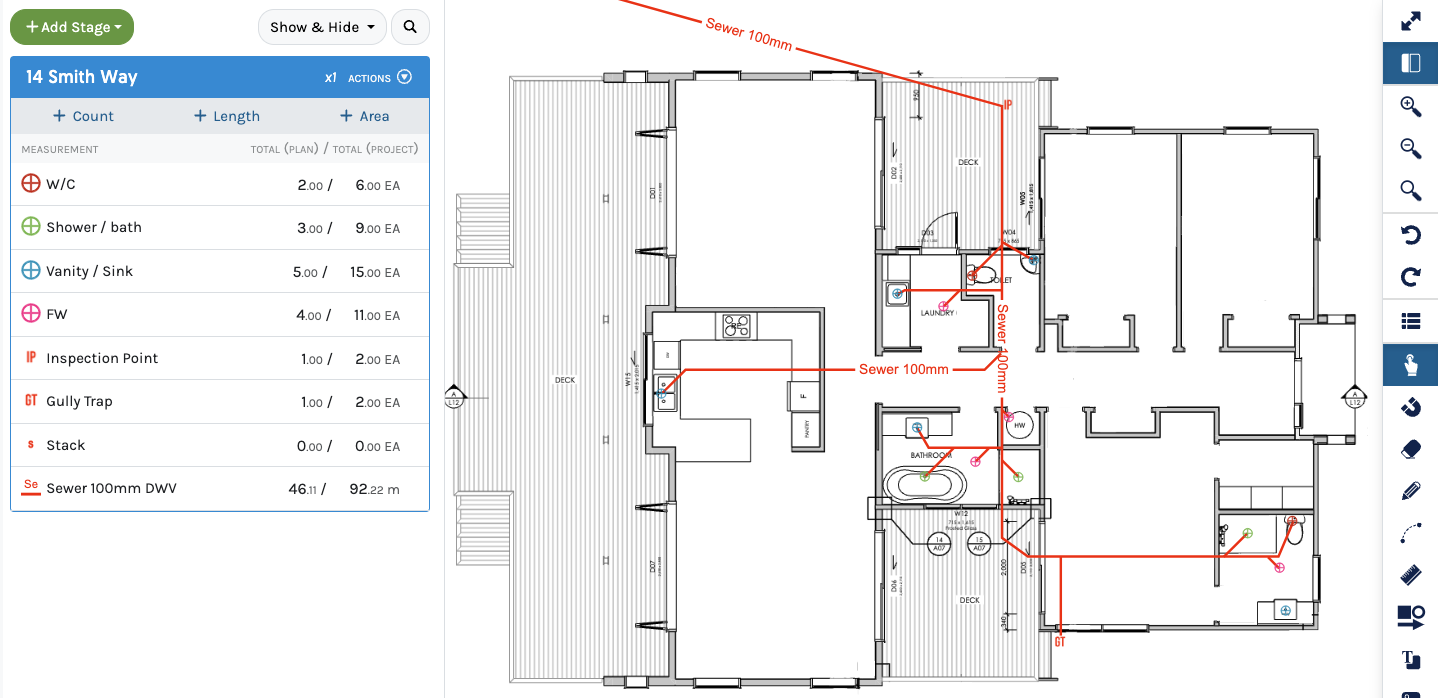
Additional Tools that are frequently used:
| Requirement | Usage examples | Best Tool to use |
|---|---|---|
| Text | - Notate wastepipes connections - Pipe details |
Text Tool - Edit Size and Style - Change location |
| Arrows | - Direction of flow (use only the head) - To notations |
Arrow Tool - Edit Line thickness and Styles - Change location |
| Dimensioning | - Add dimensions to a Plan | Ruler Tool - Edit Line Colour, Width, Text Size and Number Format (mm, cm, m) |
| Labelling | - Label W/C, Gully Trap etc | Count Labelling - Edit Size and Style - Change location around Symbol |
| Images | - Council coding or legend - Drains insitu - Site photo |
Image Tool - Edit Size and location |
| Draw attention to items | - Man hole positions | Cloud Tool - Edit Line thickness and Styles |
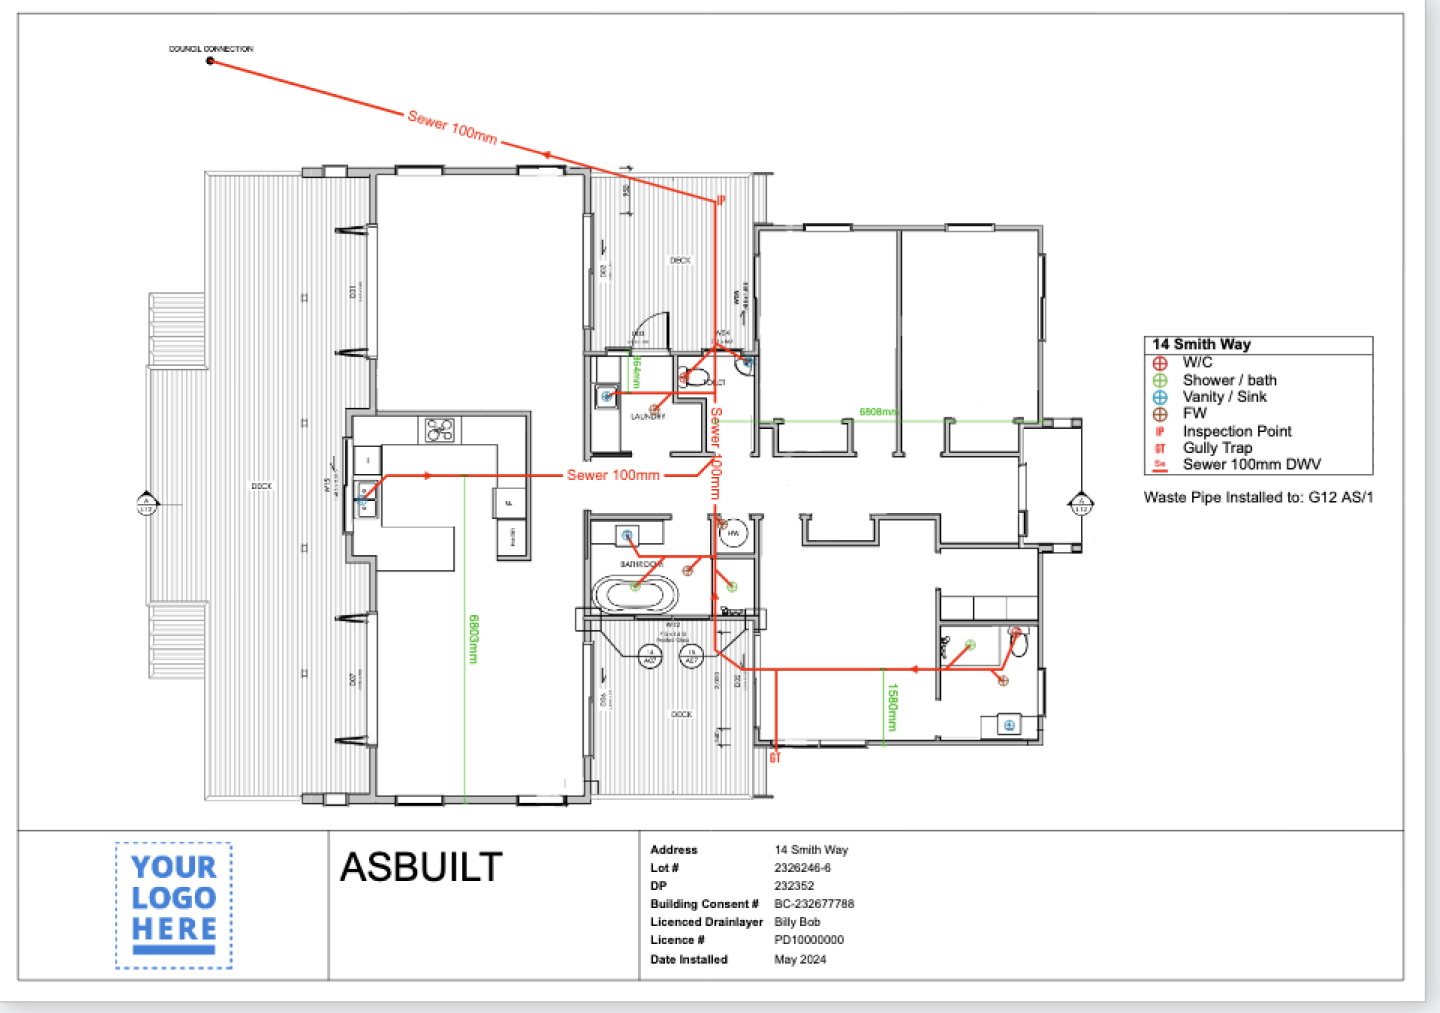
- Add a Legend
- Add a Title Block with all saved details
- (optional) click the Details Tab and Edit the Plan Name
- Export the Plan as a PDF
It is recommended to save your Stage as a Take-off Template to use for future Projects.
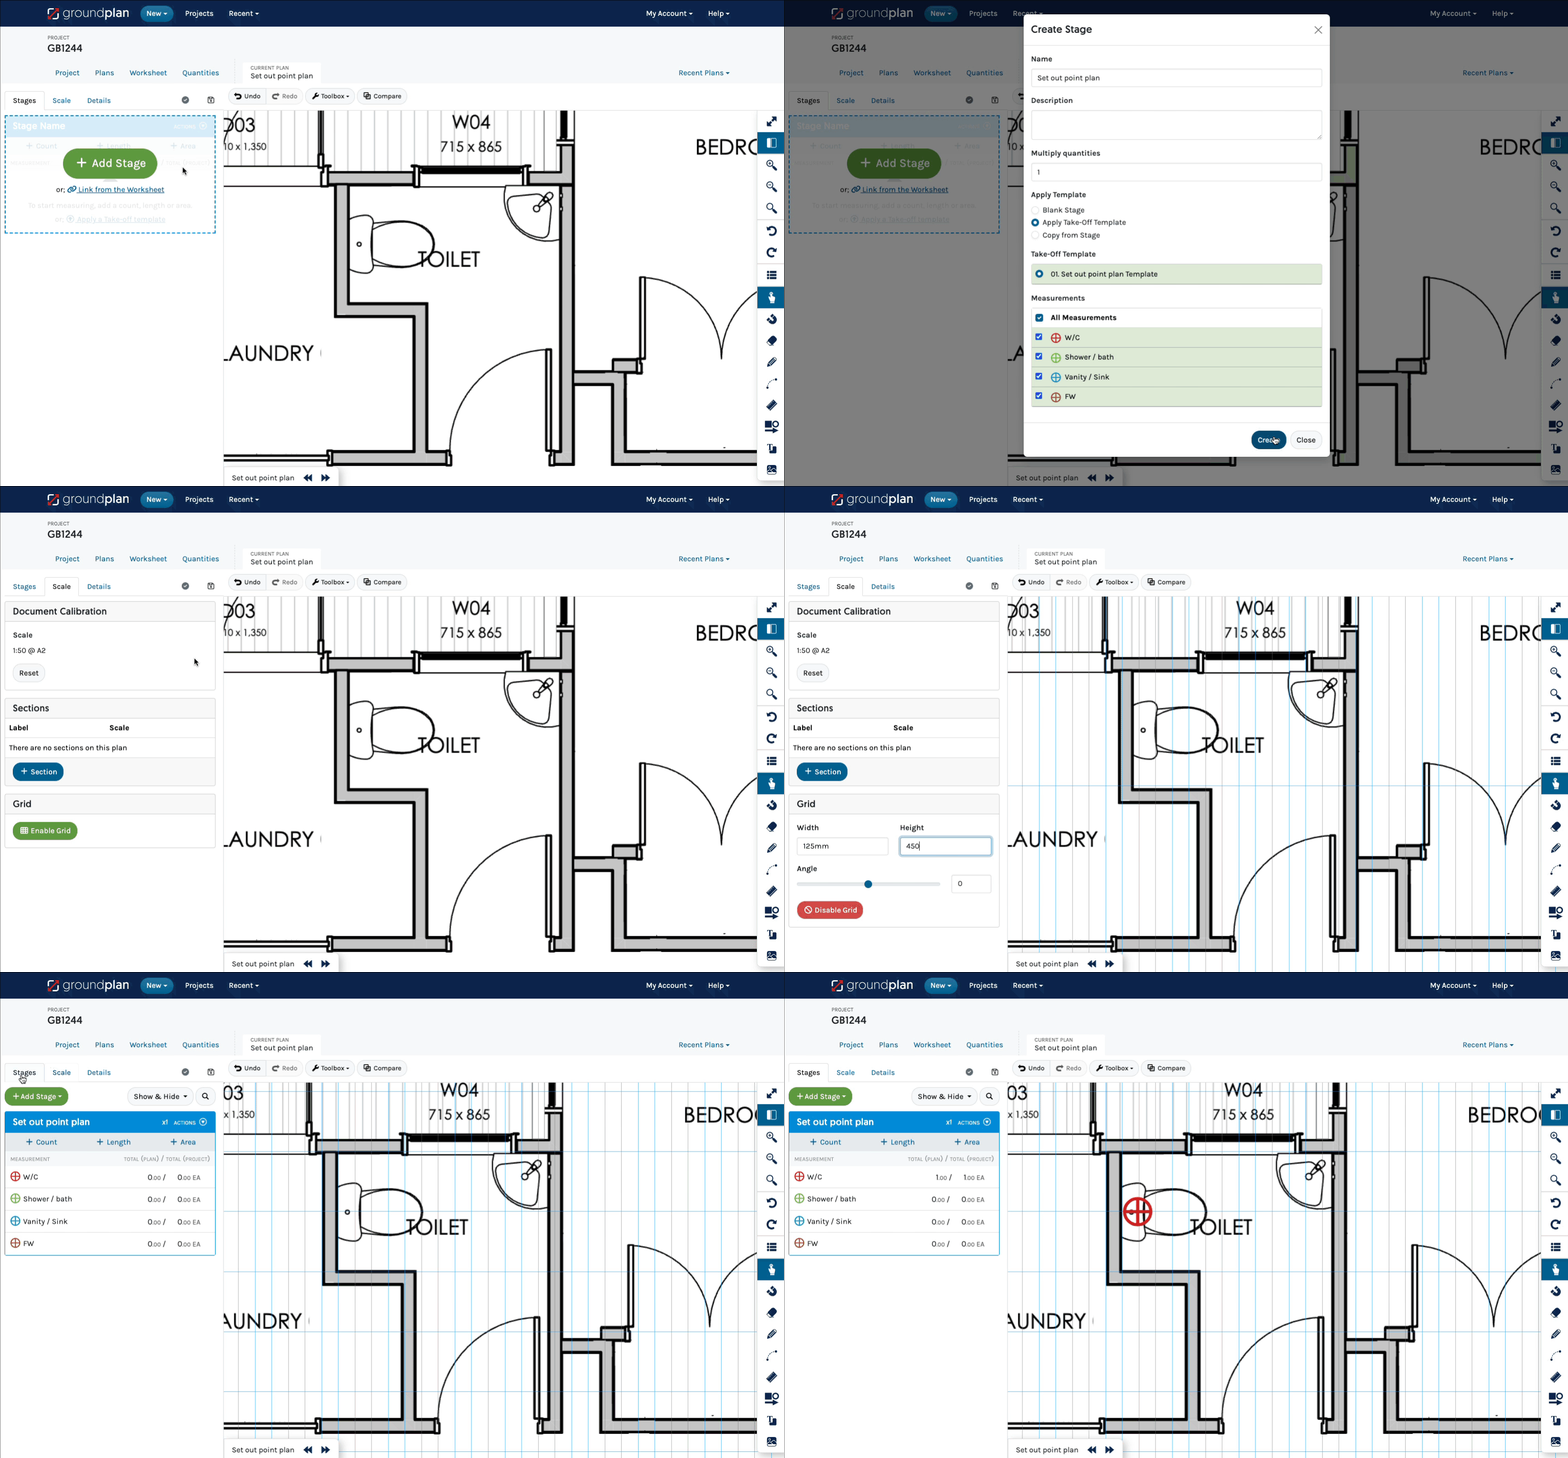
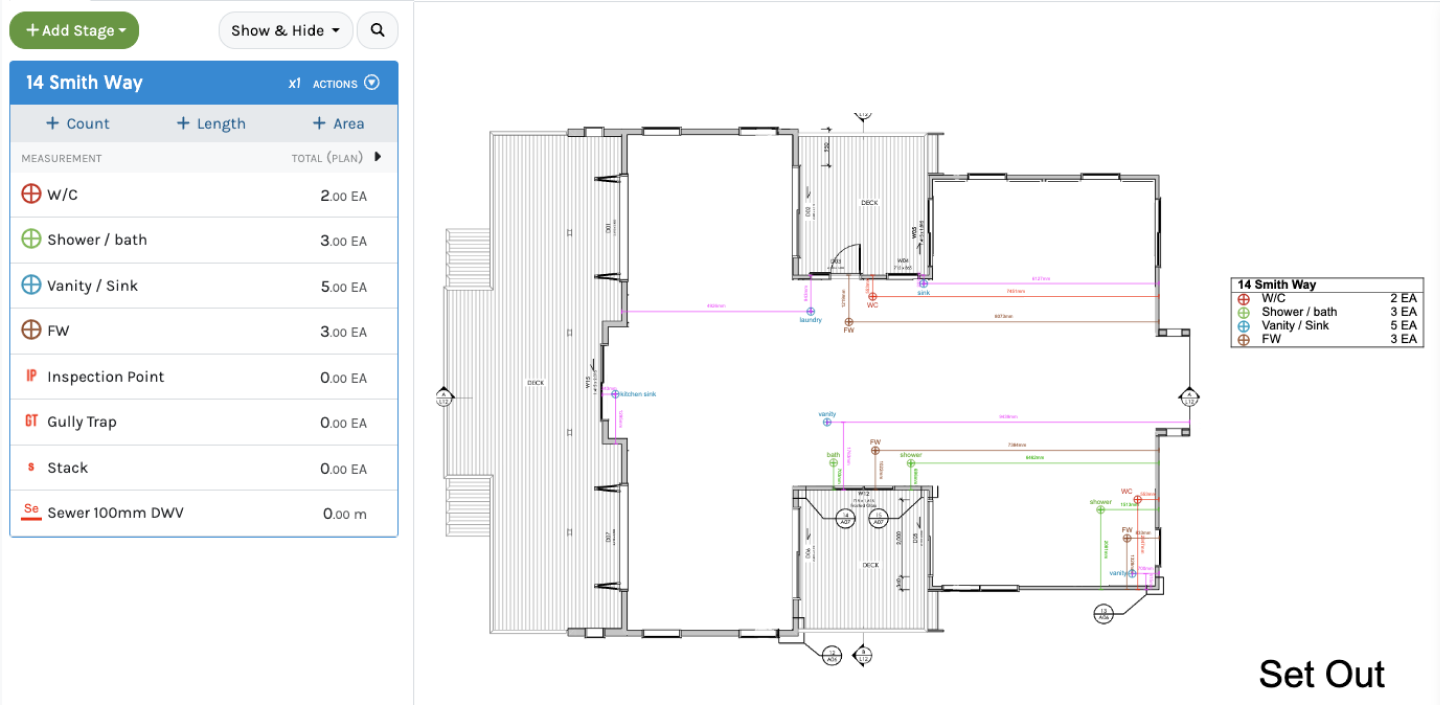
Create a Set Out Point Plan
- Create your Stage
- Populate with Counts or use a Take-off Template
e.g. W/C, shower, floor waste, vanity, sinks
Recommended to use symbols with a Cross in the centre and a separate colour for each Count - Set your Scale
- Enable the Grid Tool
Set the grid references to position off the wall, e.g. 125mm and 450mm - Line up the corner of the room with the corner of the Grid. The intersection point is where the Count is placed
6. Continue for all penetration points
7. Click the Ruler Tool and place dimensions on the plan from the centre of the point to the exterior string line
Colour code the Ruler for each point
8. Click a Count on the Plan and enable Count Labels
Type the Label then choose the Position around the Symbol
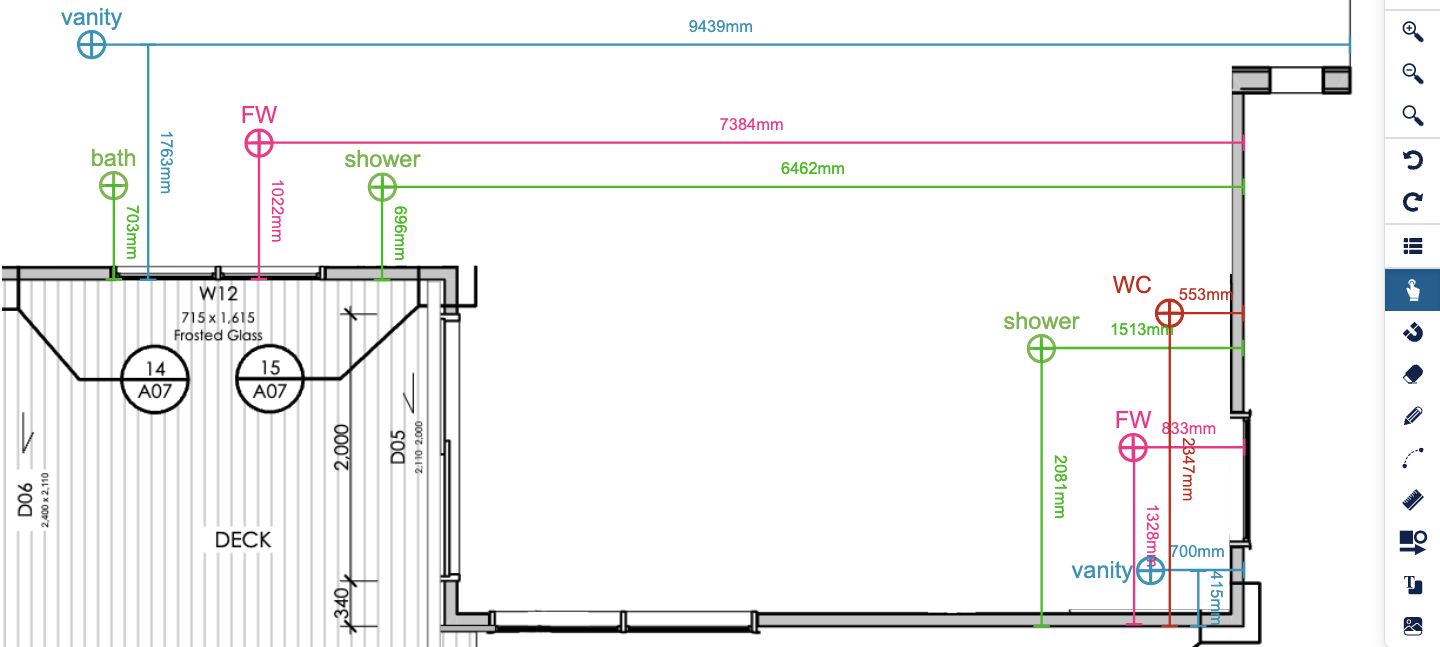
9. Add a Legend to the Plan
10. Complete any Text notes on the Plan
11. Export the Plan as a PDF
Copying a Plan with a Stage present
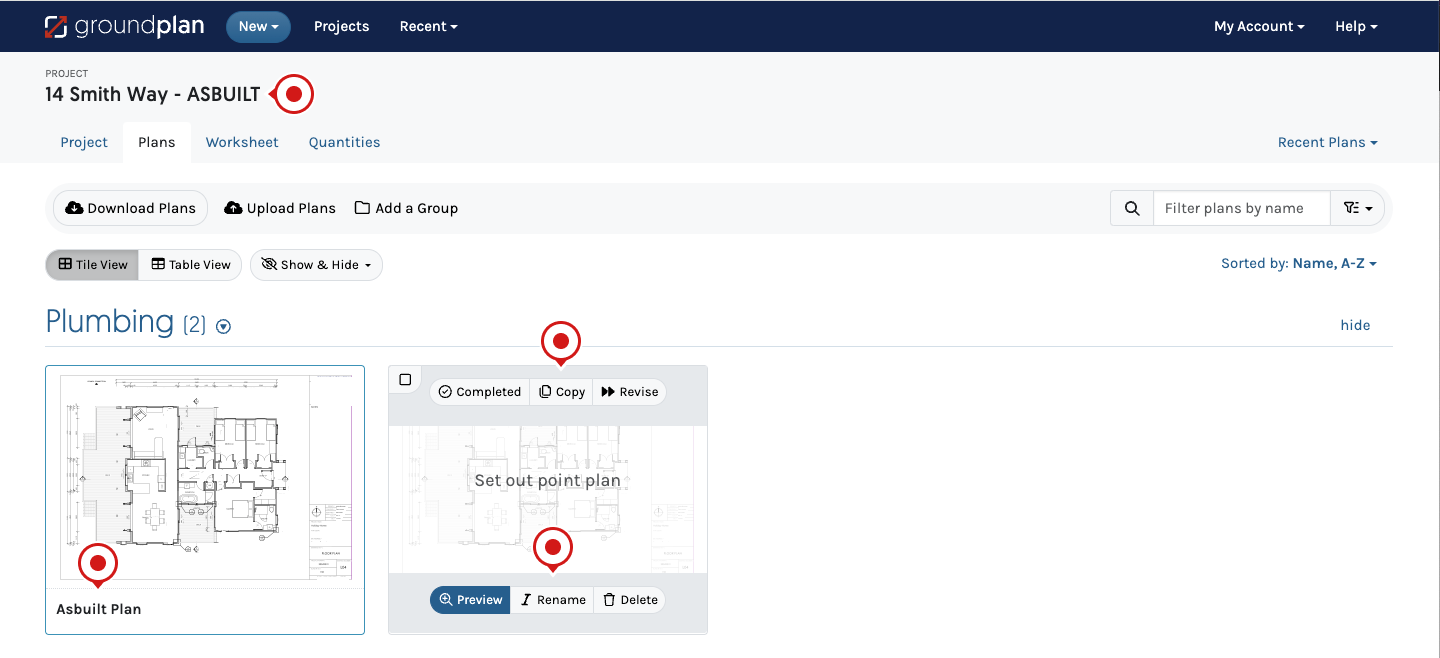
Easily copy an existing Plan from the Project to create an As-built on.
- While in Tile view, hover over the Plan then click Copy,
- Rename the Plan then click Copy Plan
Duplicating the Plan and any Stages on that Plan - Click into the Plan
- Click Actions then click Unlink from Plan
To remove the Stage from the Copy Plan but leave it on the orginal Plan
Caution: Ensure to use Unlink from Plan.
Delete from Project - will remove the Stage permanently from all Plans across the entire Project
Frequently Asked Questions
Can I use a Set Out point again for a Take-off?
Absolutely.
To use time wisely, you can duplicate a Plan to become your future Asbuilt Plan or a Take-off. After copying the Plan, hide the Stage and use the Select Tool to select all the Rulers and Delete them. If Project quanitites are irrelevant on both Plans, Copying the Plan within the same Project would be fine. The totals within a Legend are for the Plan only.
I need to create an Asbuilt on a sheet provided by my Council, can I do that?
Yes.
You can upload the Plan / sheet into Groundplan then draw over the top using our Tools mentioned above.
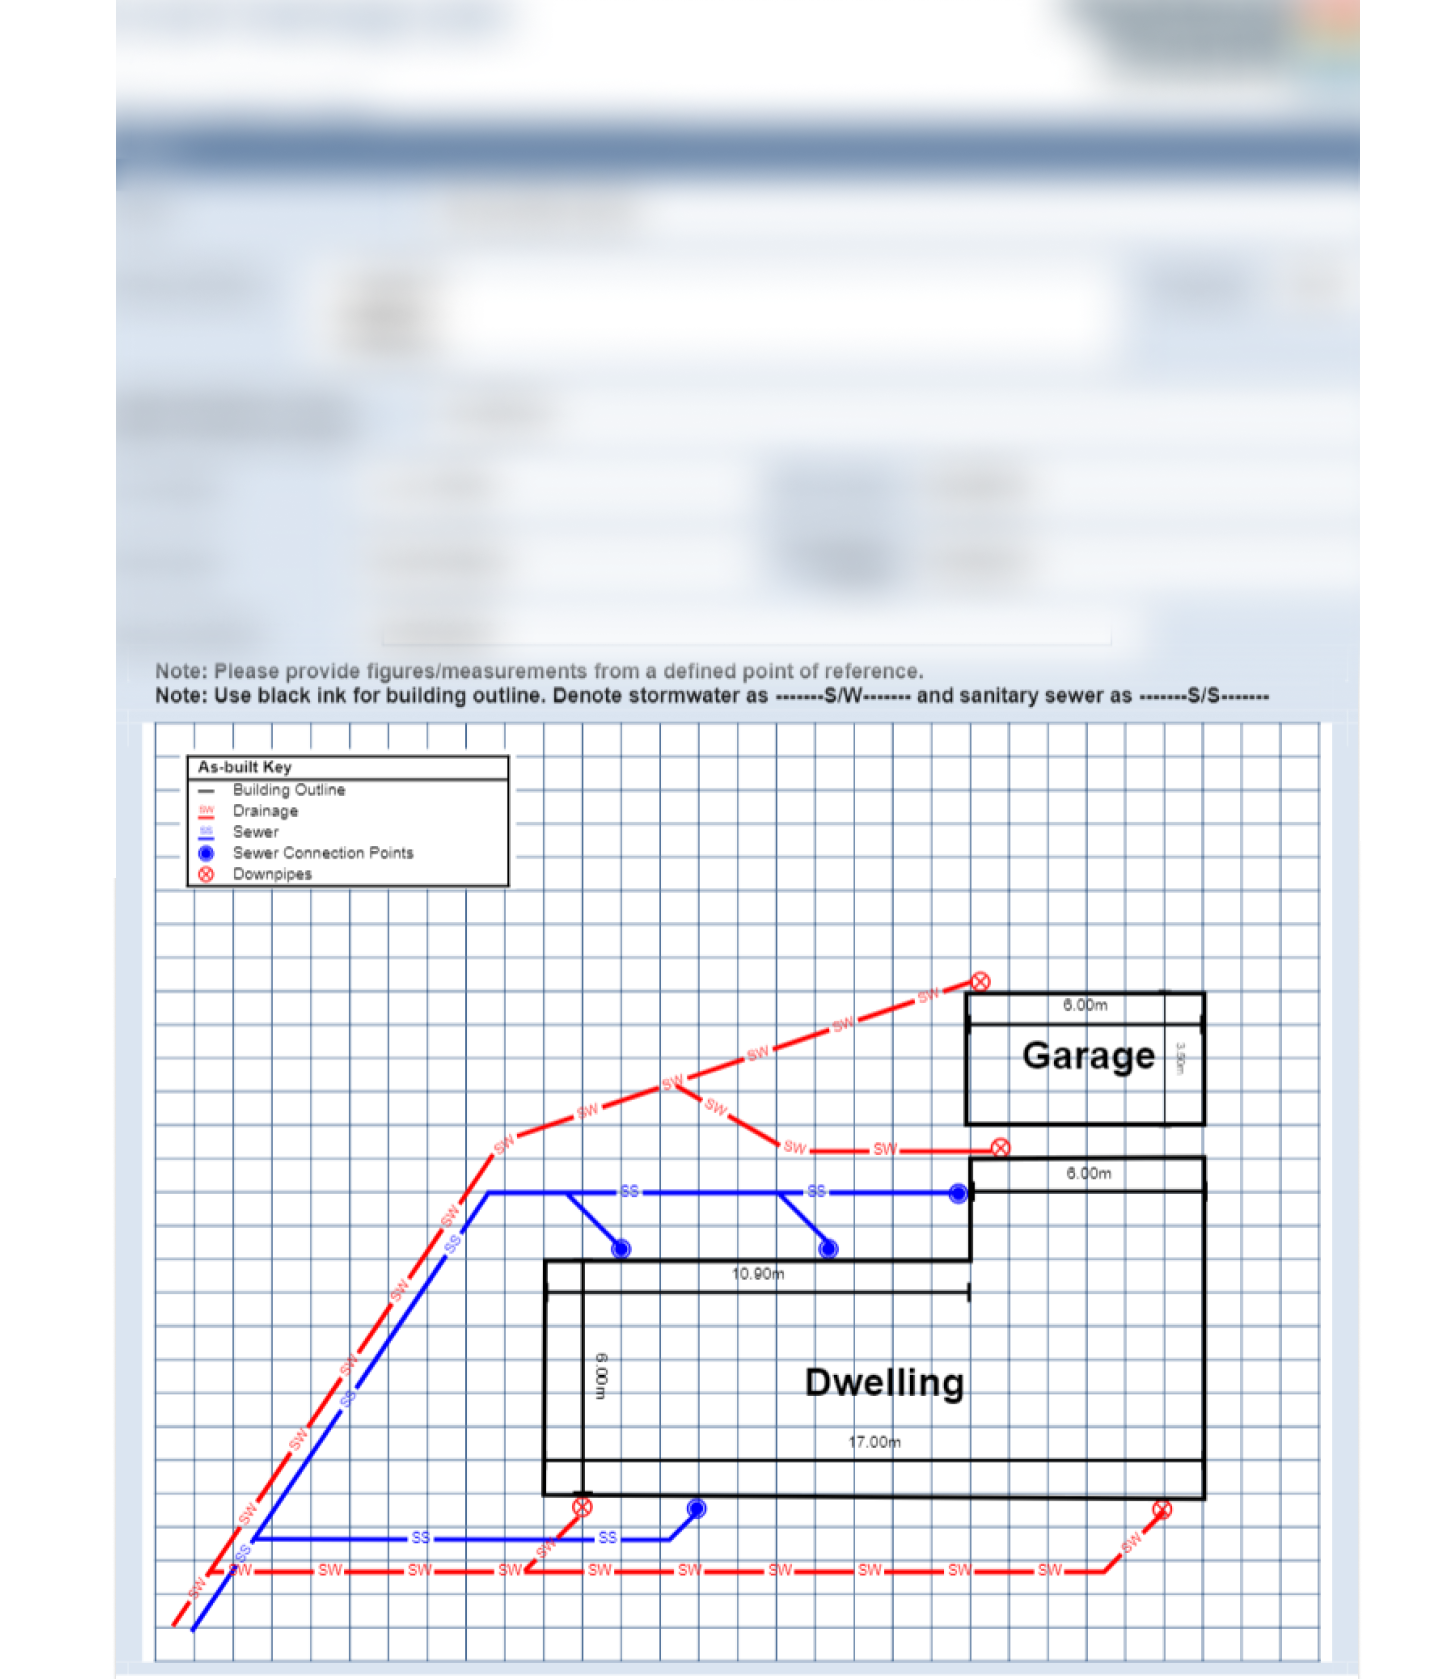
Non Scales:
There are two ways to do this, use our Shapes Annotations to create the property and the Text Tool to notate the dimensions. There may not be the requirement to have this scaled (only the property scaled).
Scaled:
- Use Measure Scale to scale from a Length on the Plan e.g. known dimension of a wall
- Create a Stage called Drawing and populate with Measurements e.g. walls
- Create a Stage for the Asbuilt requirements. Populate the Plan
- Adjust the order of the Stages so that the Drawing Stage is at the bottom and can be hidden from the Legend

Any issues, please contact Support at Help > Send us a Message